Every once in a while forensic examiners come across hard drives that get shorted. In most cases, a drive has become shorted after experiencing overvoltage either due to a power supply failure or as a result of a user error. Here is what happens to drive in these scenarios and how to fix this.
Most drives have two TVS diodes: one on the 5V rail and another one on the 12V rail.
In a situation when a drive experiences overvoltage, these diodes protect the drive’s circuit by converting the surplus electric power into heat energy and warming up. In
When the drive is subsequently powered, the diodes create
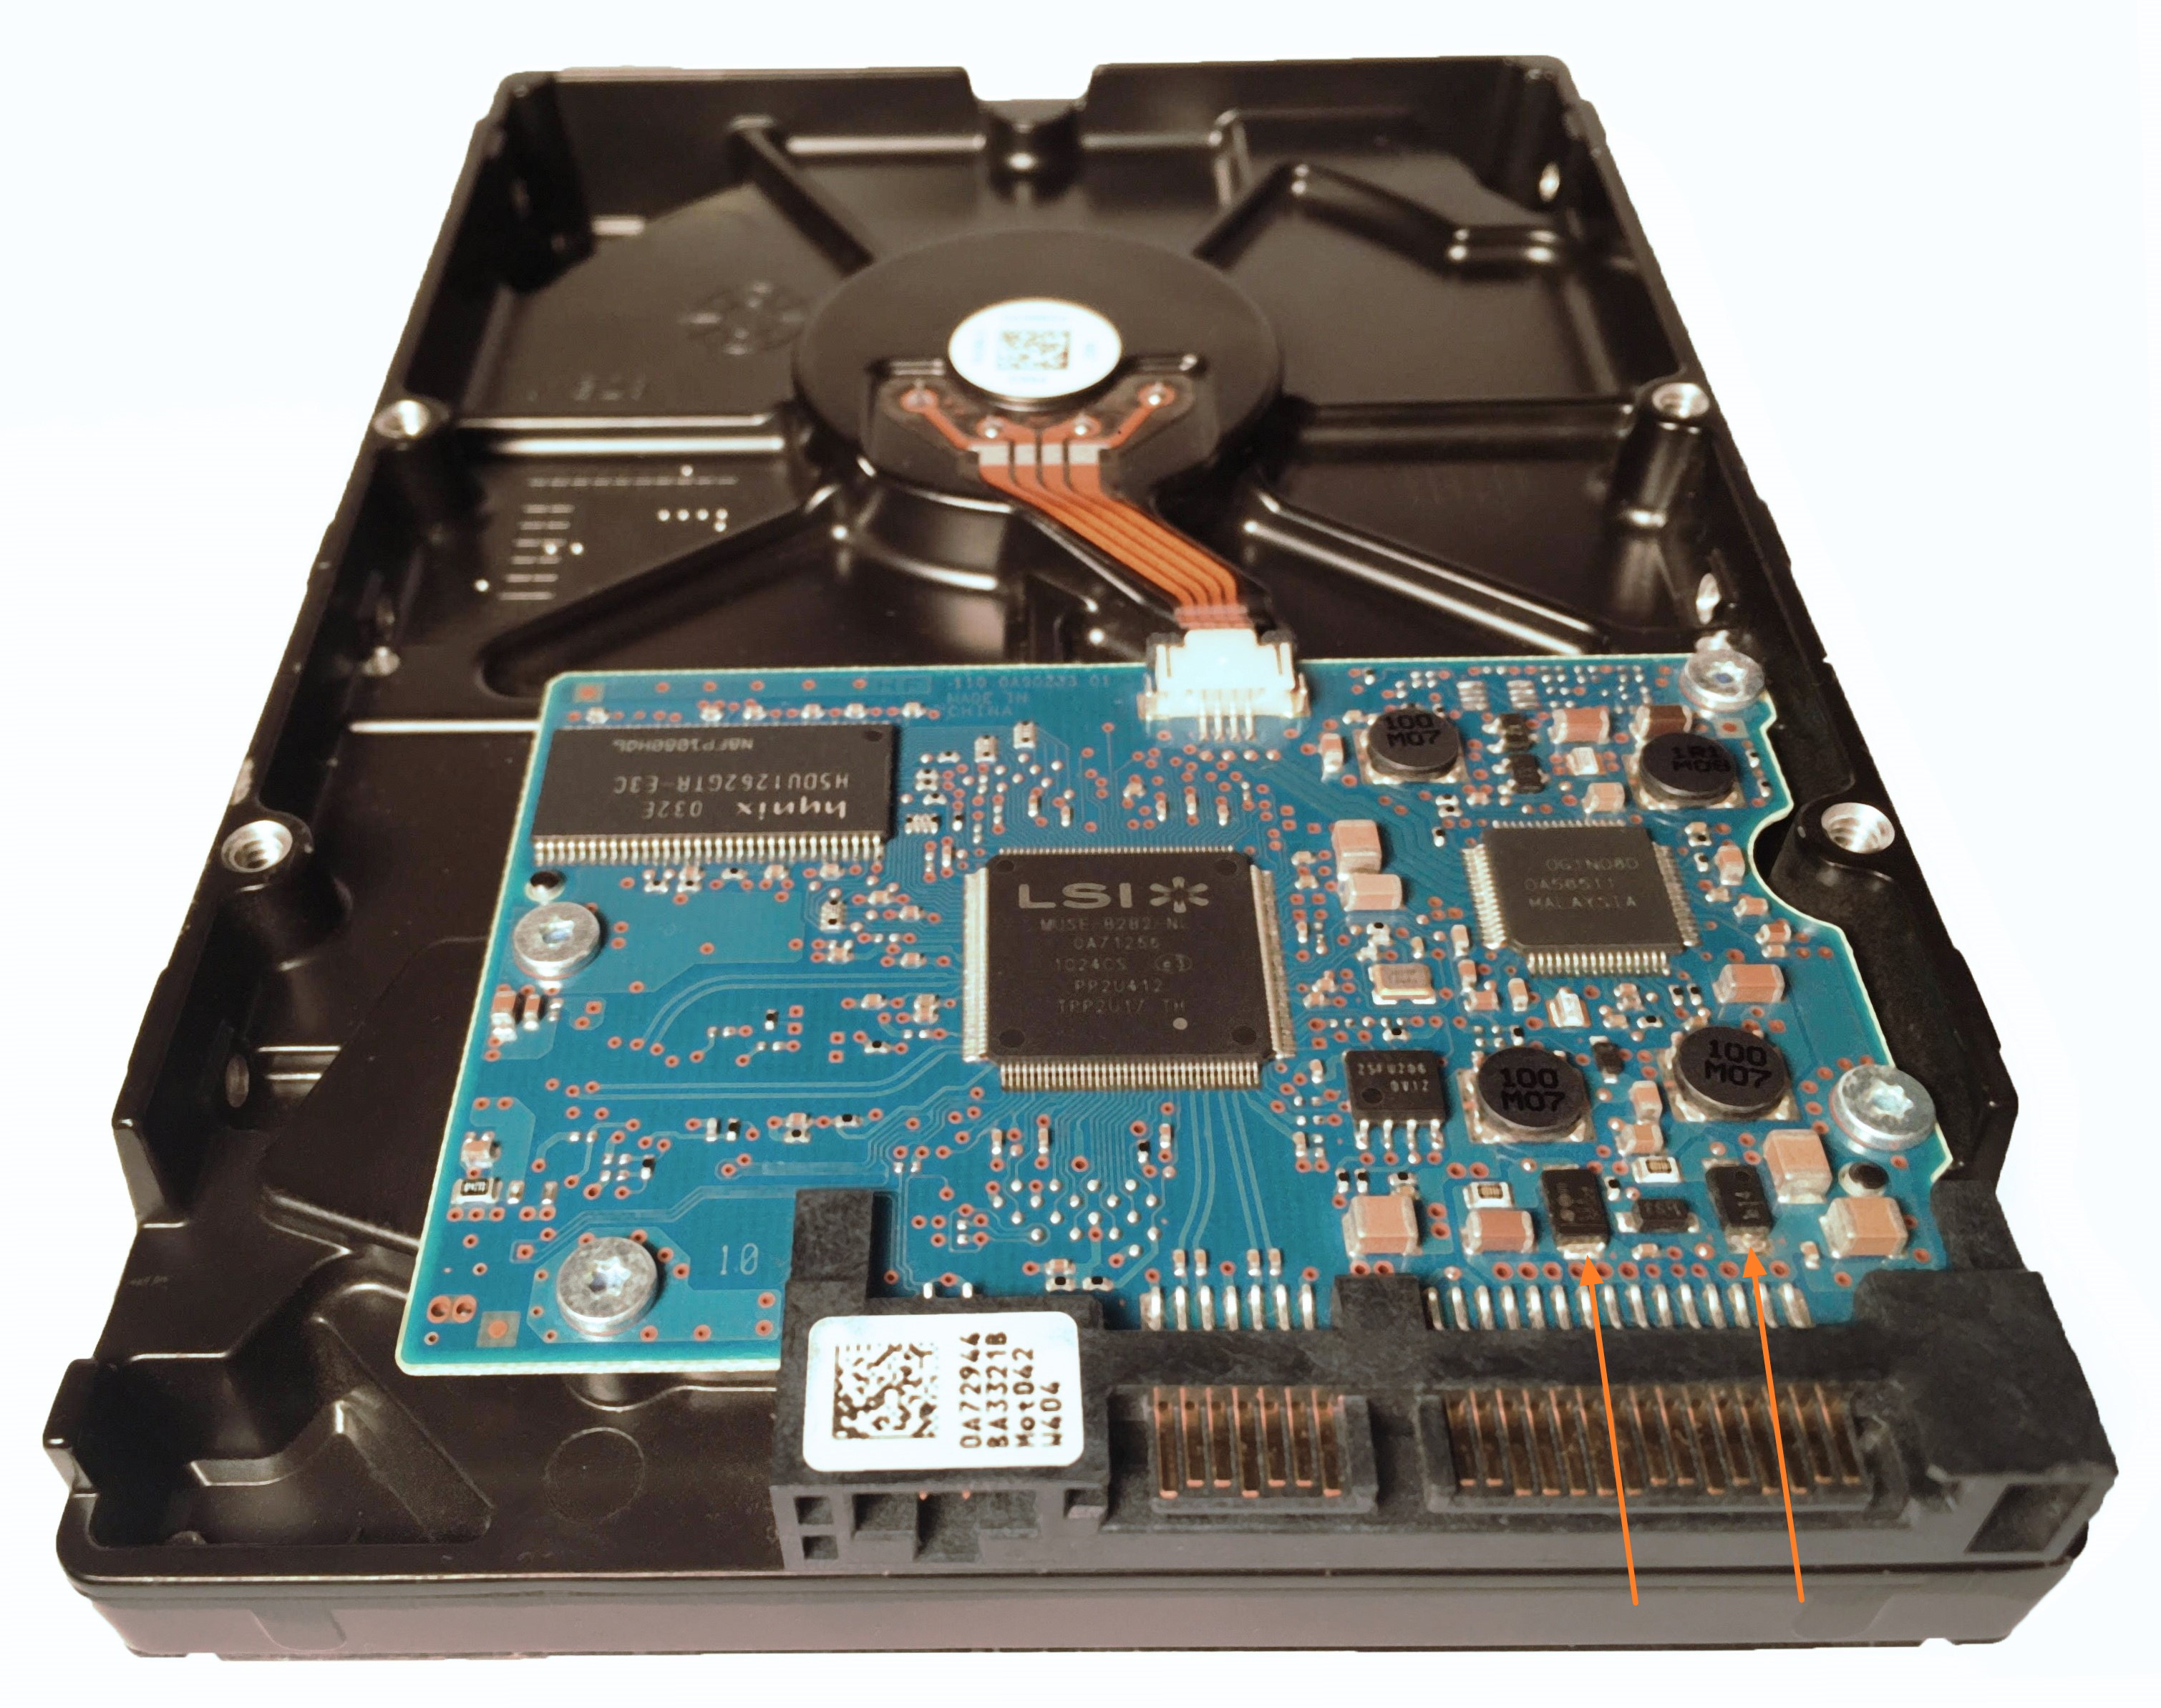
Hard drive with TVS diodes
If you try to connect such drive to Atola Insight Forensic, the Source window will have a short circuit alert to notify the operator about the detected issue.
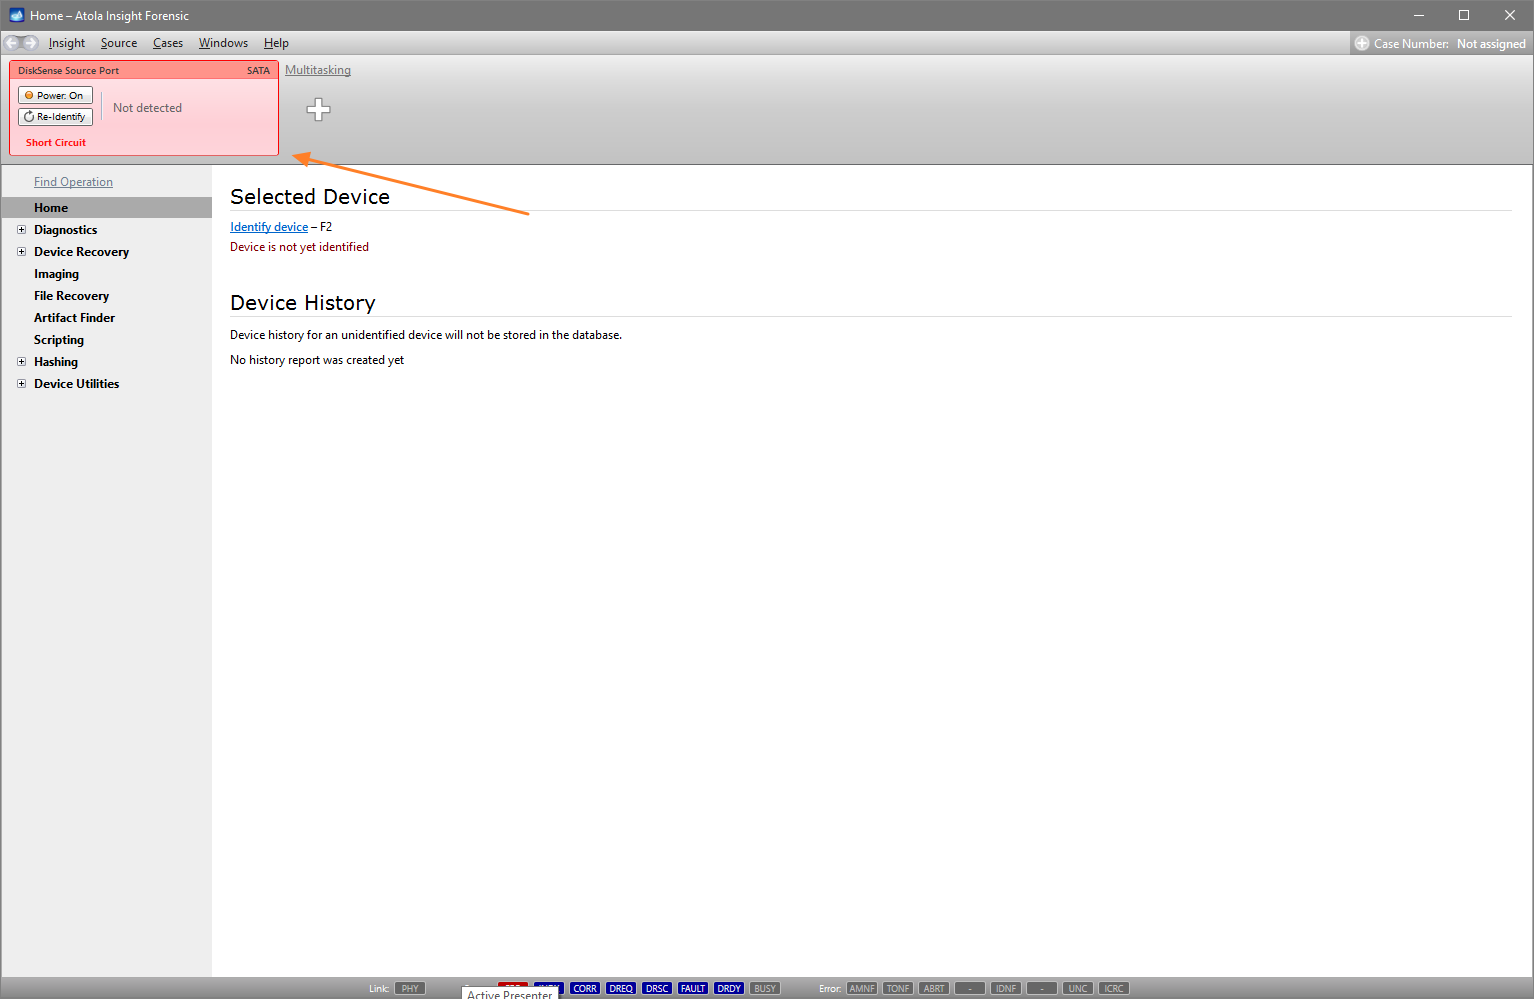
Short circuit alert
A drive with a shorted TVS diode cannot be identified or imaged. You can try to run diagnostics on the drive, although it cannot be properly
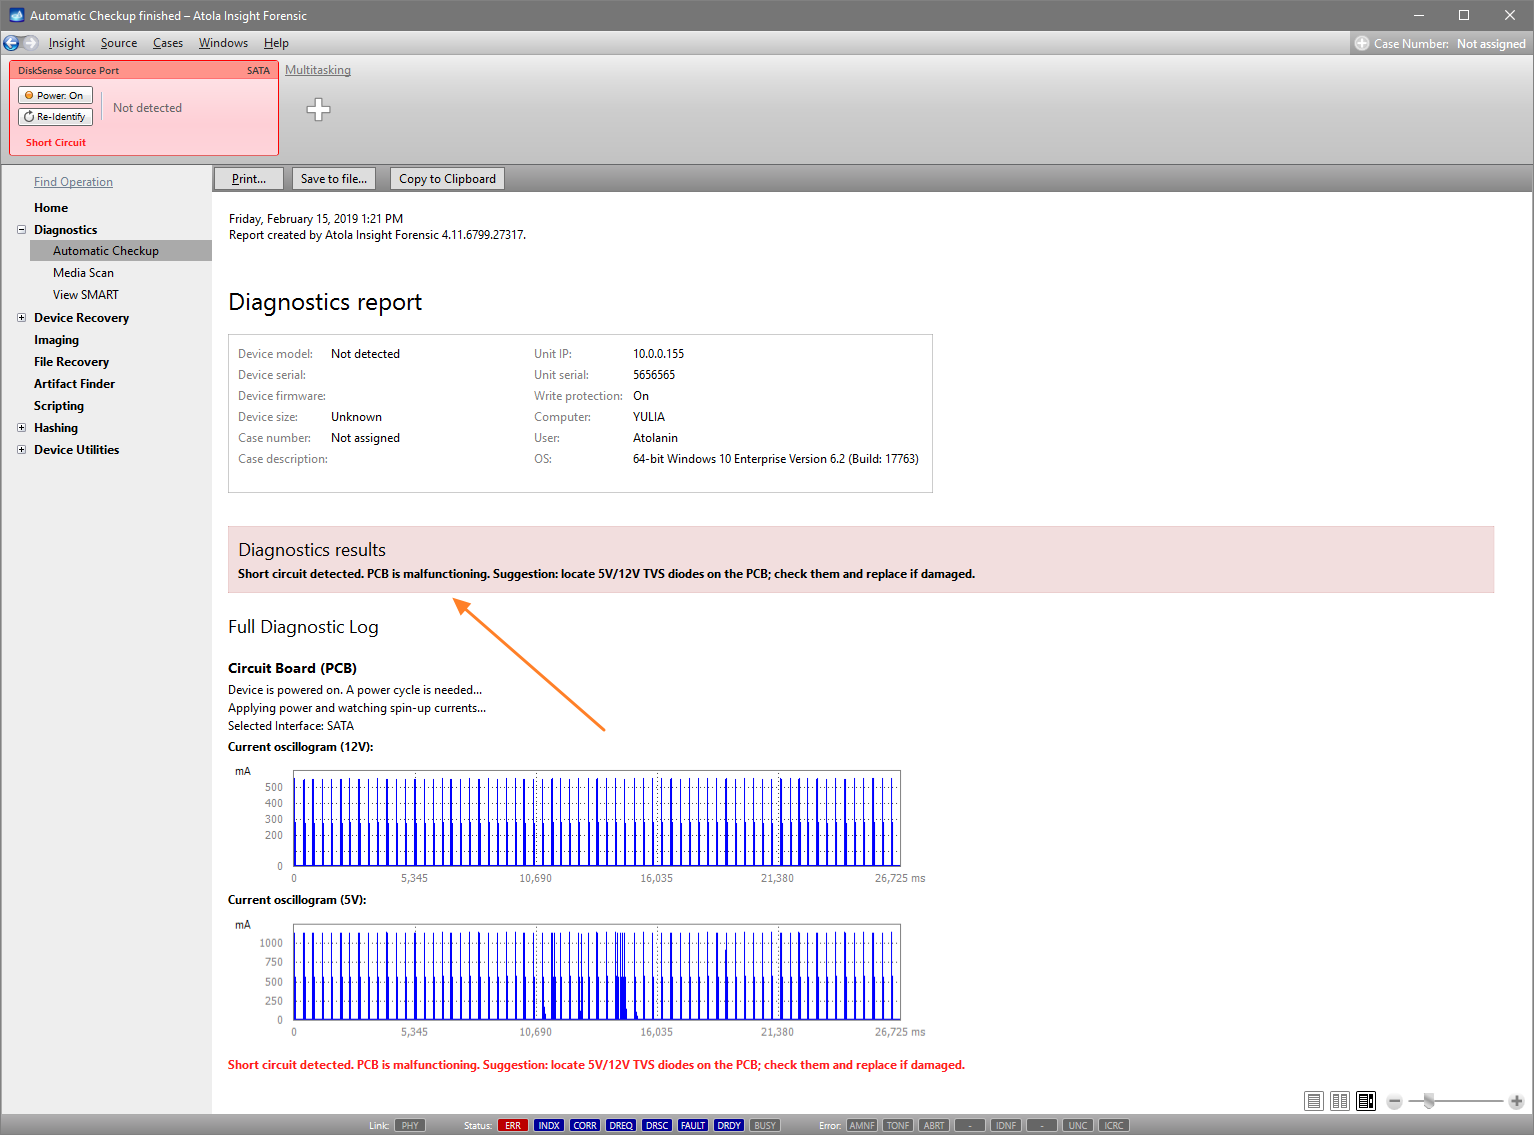
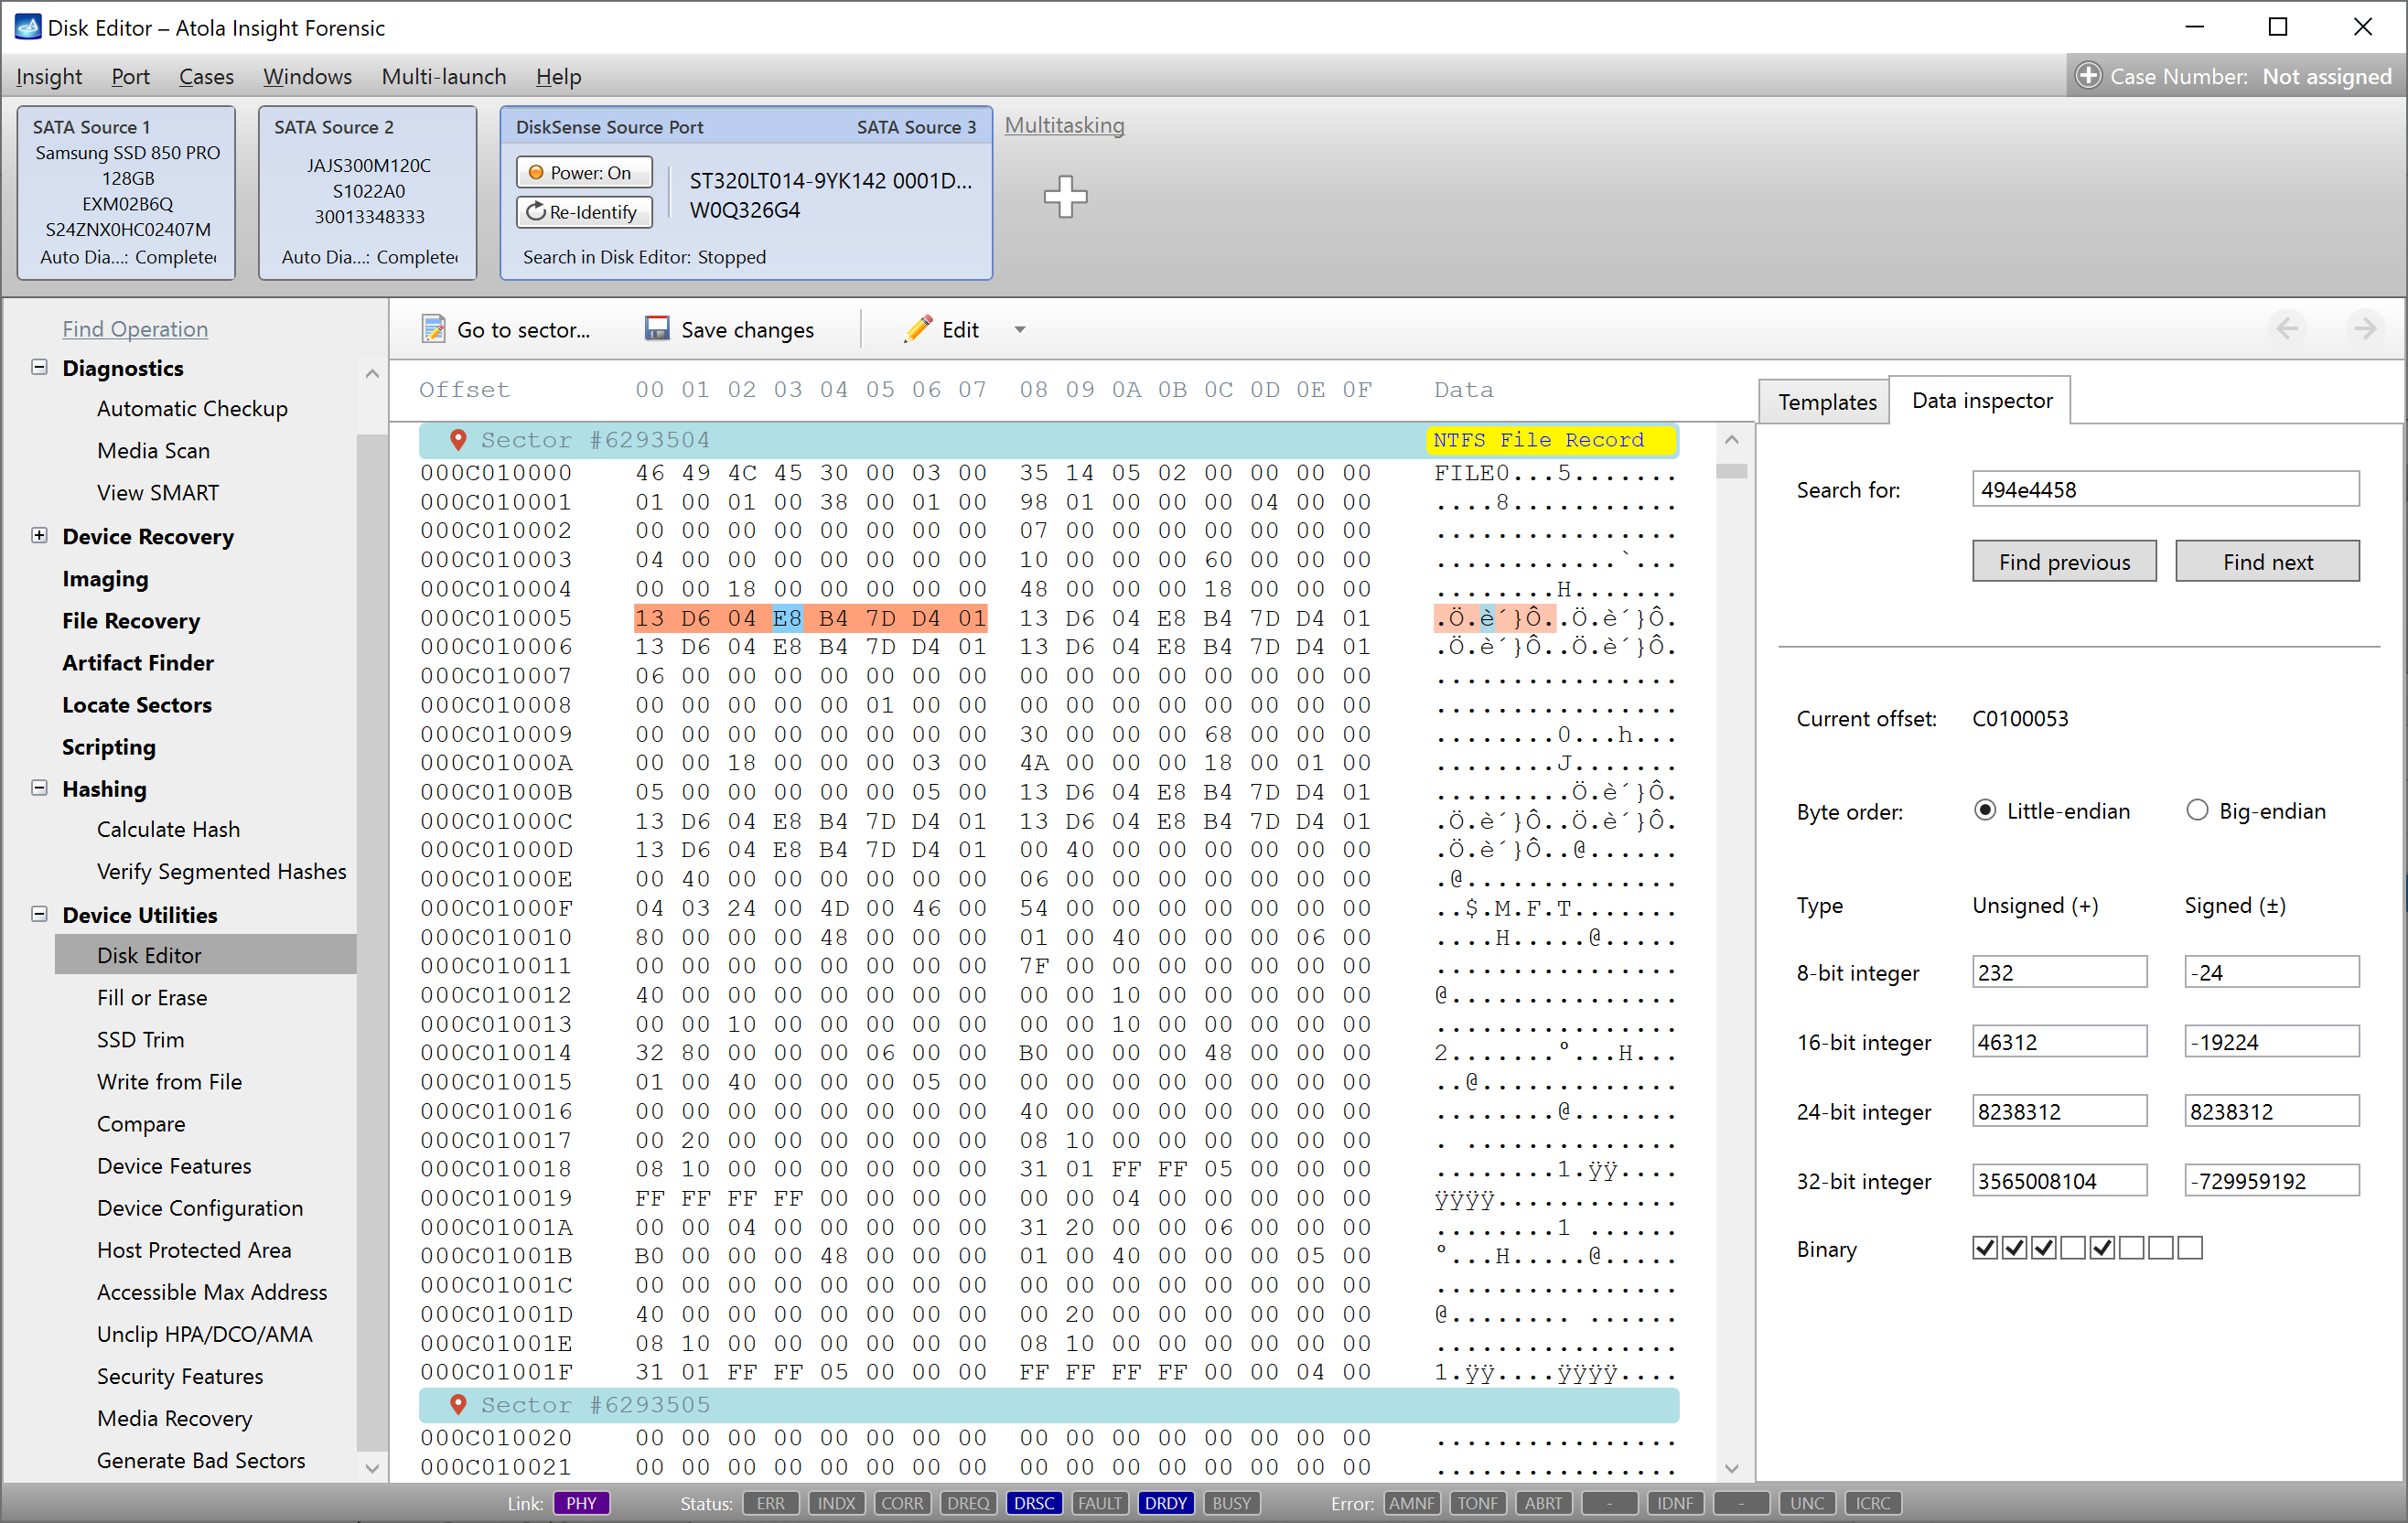
Diagnostics report of a shorted drive
However, if you need to image such drive and you have no new TVS diodes at hand to replace the
It is safe to image such drives with any Atola product. Both Atola TaskForce and Atola Insight Forensic have short circuit and overvoltage protection to secure both the imager and the drives attached to it from circuit failures.
The best way to remove the diodes is by heating the area of the drive where the they are located with a hot fan (e.g. in a hot air soldering station), and then gently
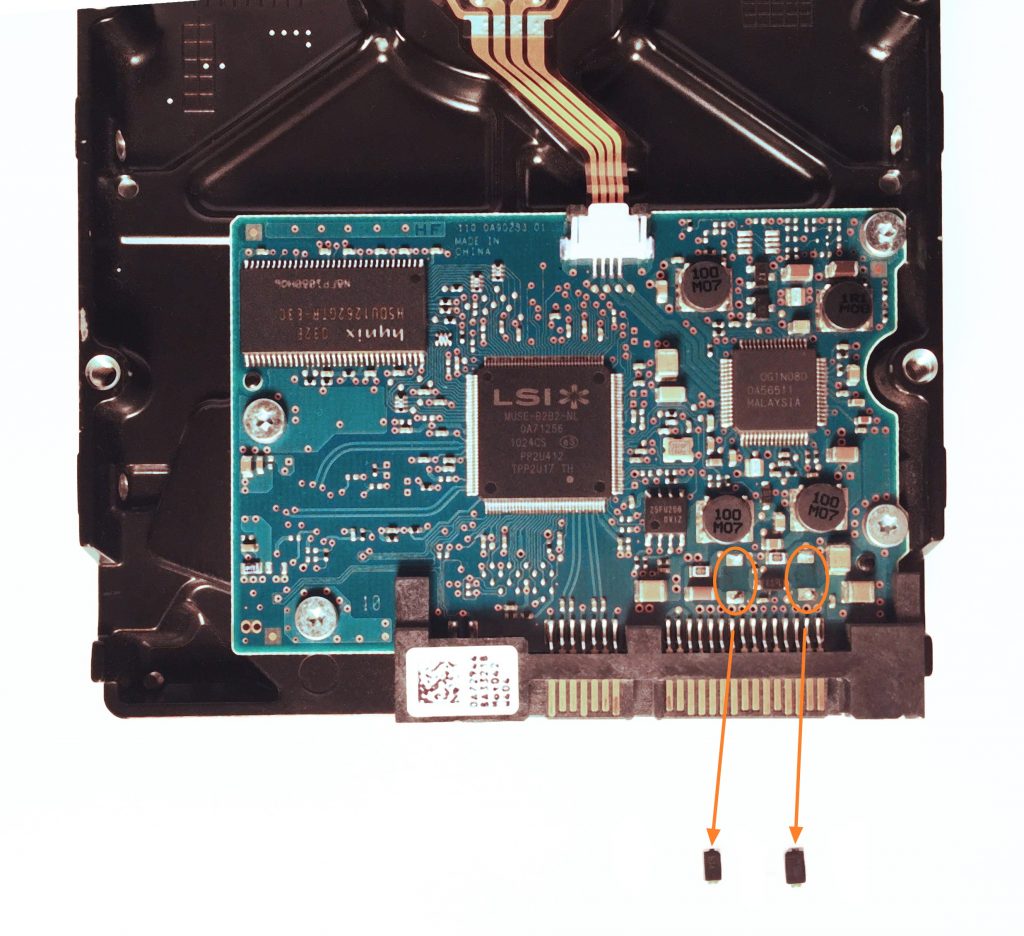
A hard drive with its detached TVS diodes
Once the diodes have been detached, you can plug the drive to Atola Insight Forensic and proceed with imaging data from its platters.
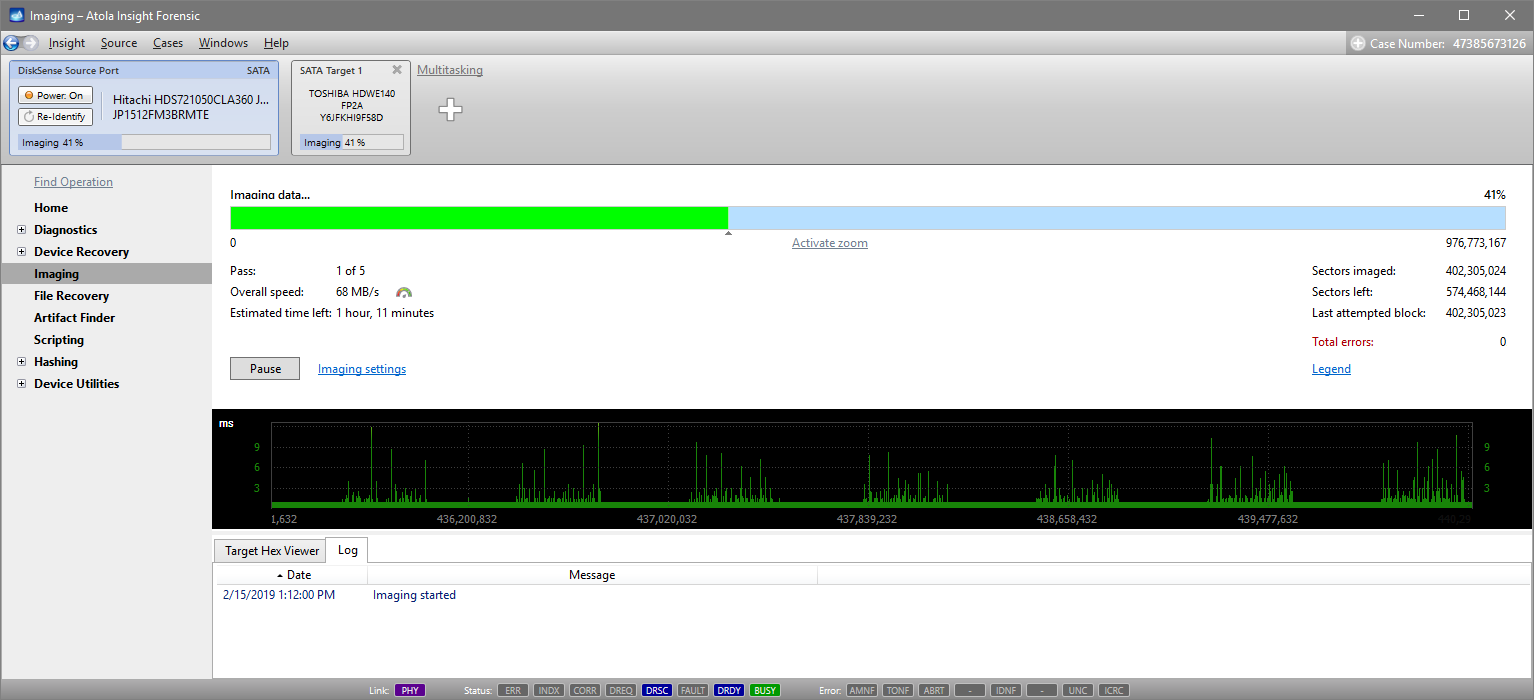
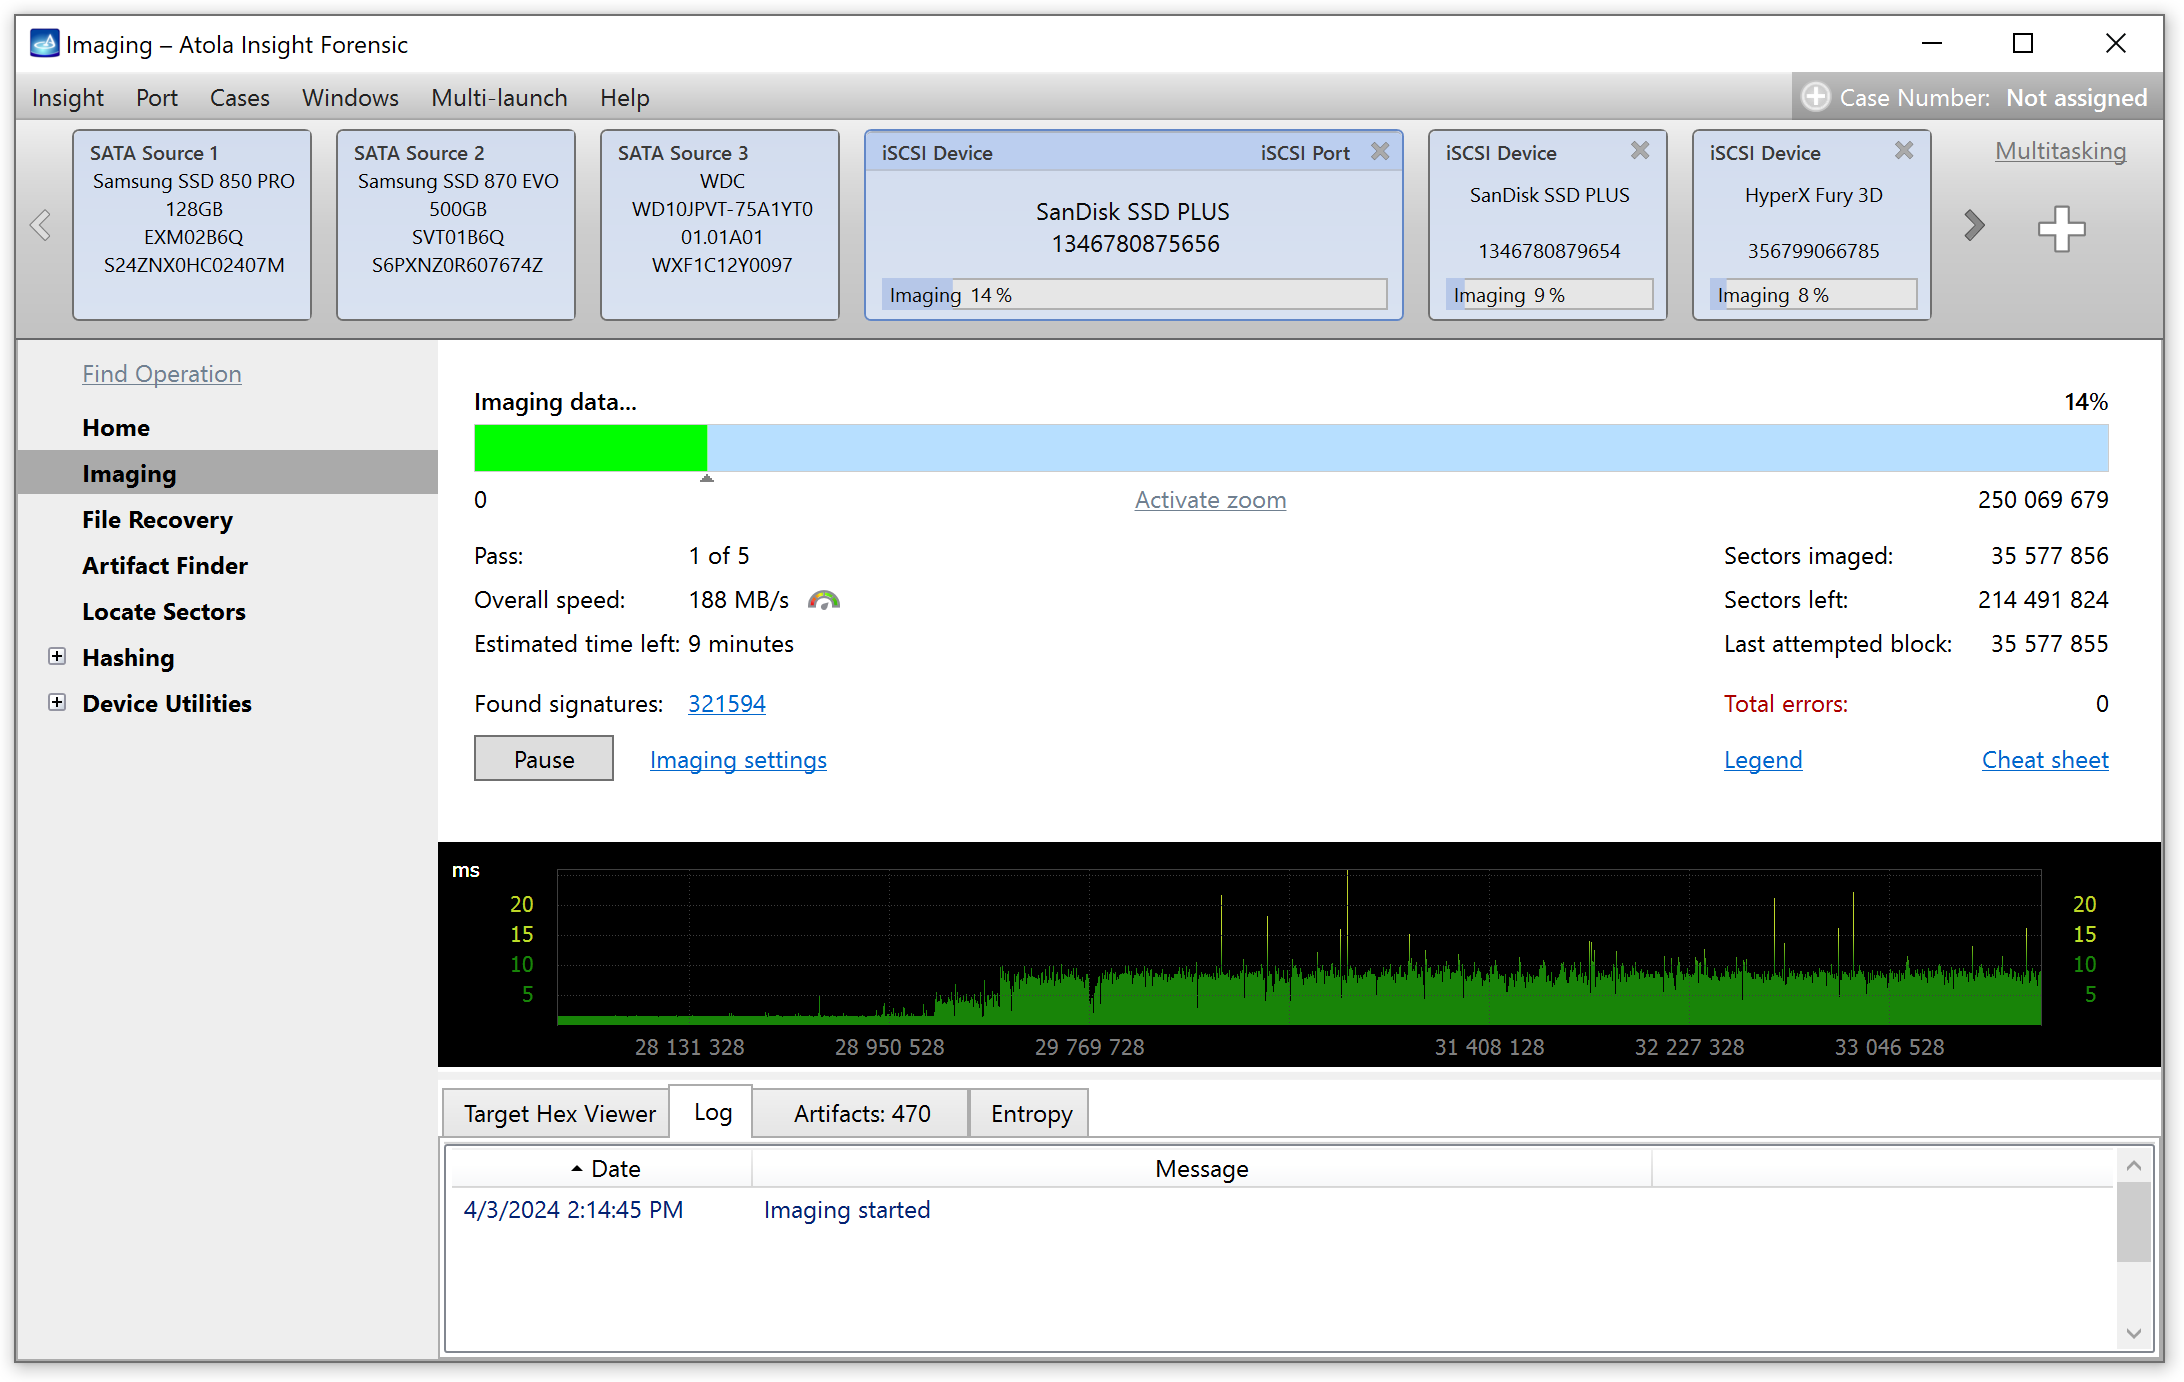
Imaging a drive with detached TVS diodes

Yulia believes that with a product that is exceptionally good at solving tasks of forensic experts, marketing is about explaining its capabilities to the users. Yulia regularly represents Atola at DFIR events, holds free workshops and webinars about Atola imagers functionality and advocates on the users' behalf to ensure that Atola keeps on adding value and raising the bar for the industry.
- Top digital forensic conferences in 2024 - January 1, 2024
- 2023. Year in Review - December 31, 2023
- Top digital forensics conferences in 2023 - January 1, 2023
Yulia Samoteykina
Director of Marketing Yulia believes that with a product that is exceptionally good at solving tasks of forensic experts, marketing is about explaining its capabilities to the users. Yulia regularly represents Atola at DFIR events, holds free workshops and webinars about Atola imagers functionality and advocates on the users' behalf to ensure that Atola keeps on adding value and raising the bar for the industry.