TaskForce has a unique RAID configuration detection module. Furthermore, it is able to sustain multiple high-speed imaging sessions on its 18 ports. This makes it a perfect imager to perform reassembly of RAID with an unknown configuration and fast forensic imaging of such arrays. Here is how imaging RAID 0 array becomes an effortless job!
Assembling a RAID 0 array
To assemble RAID 0, follow these steps:
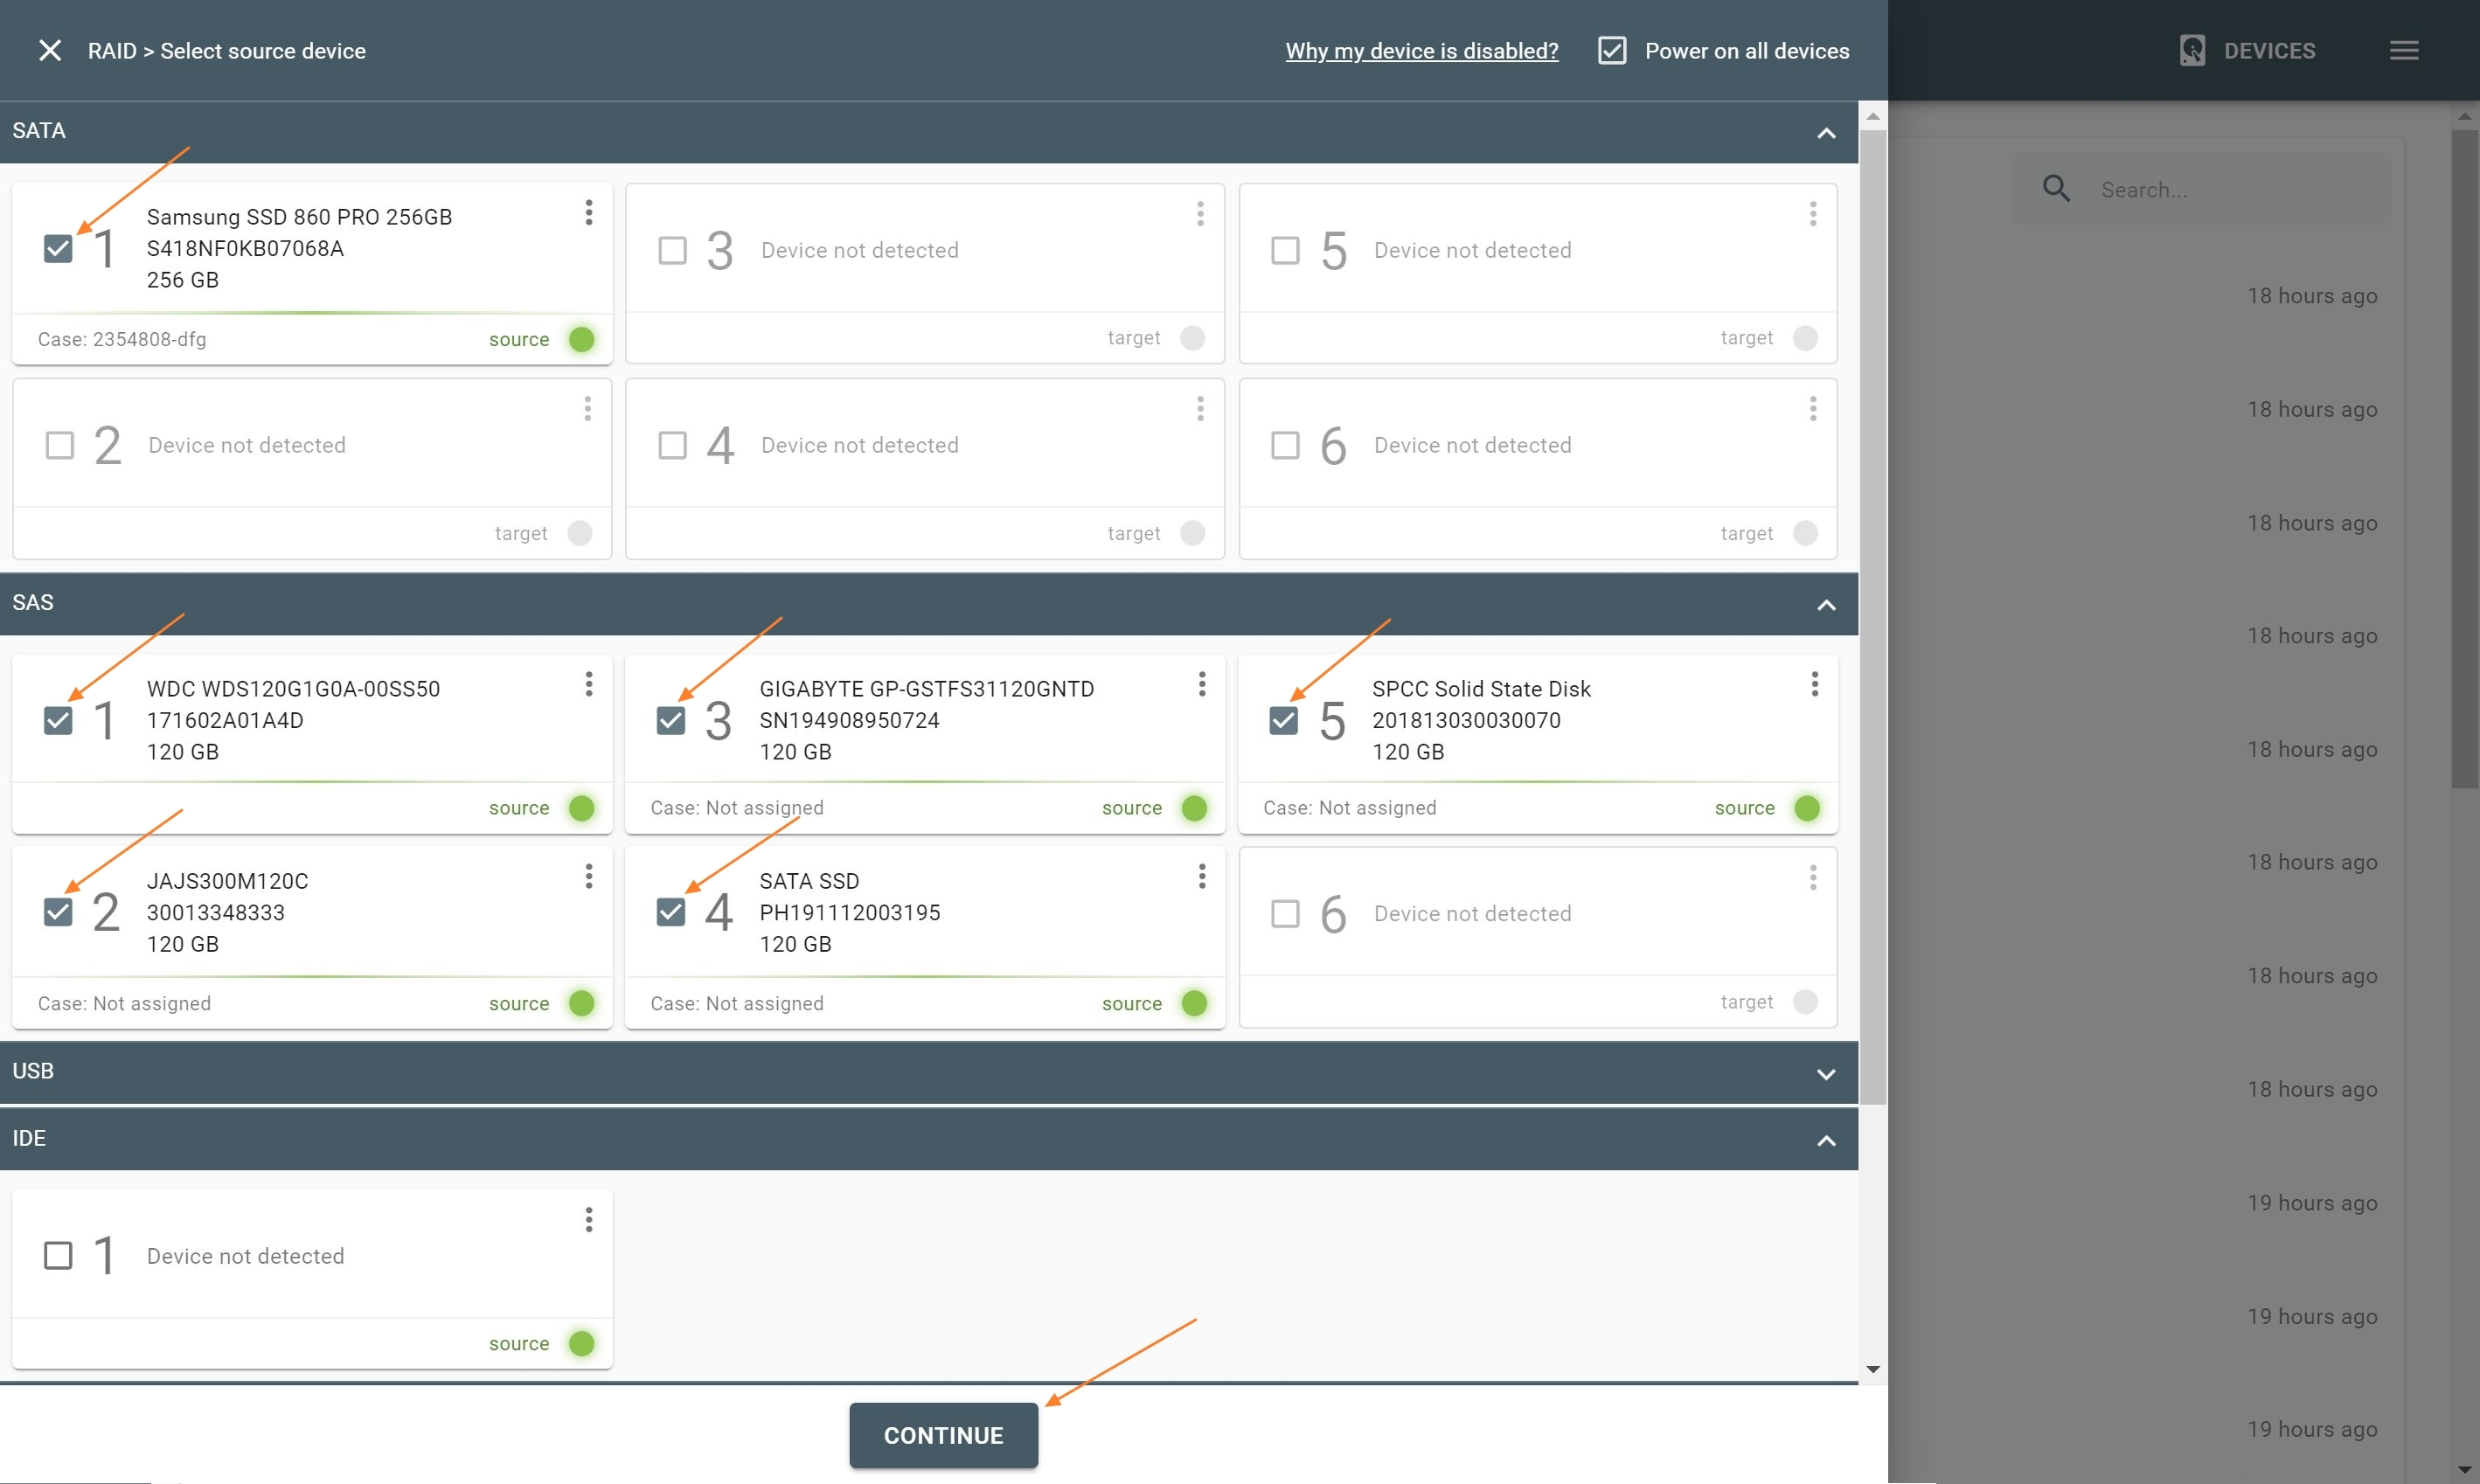
- Connect the drives that make up a RAID array to the TaskForce hardware unit. Most importantly, make sure to switch the ports to the Source mode;
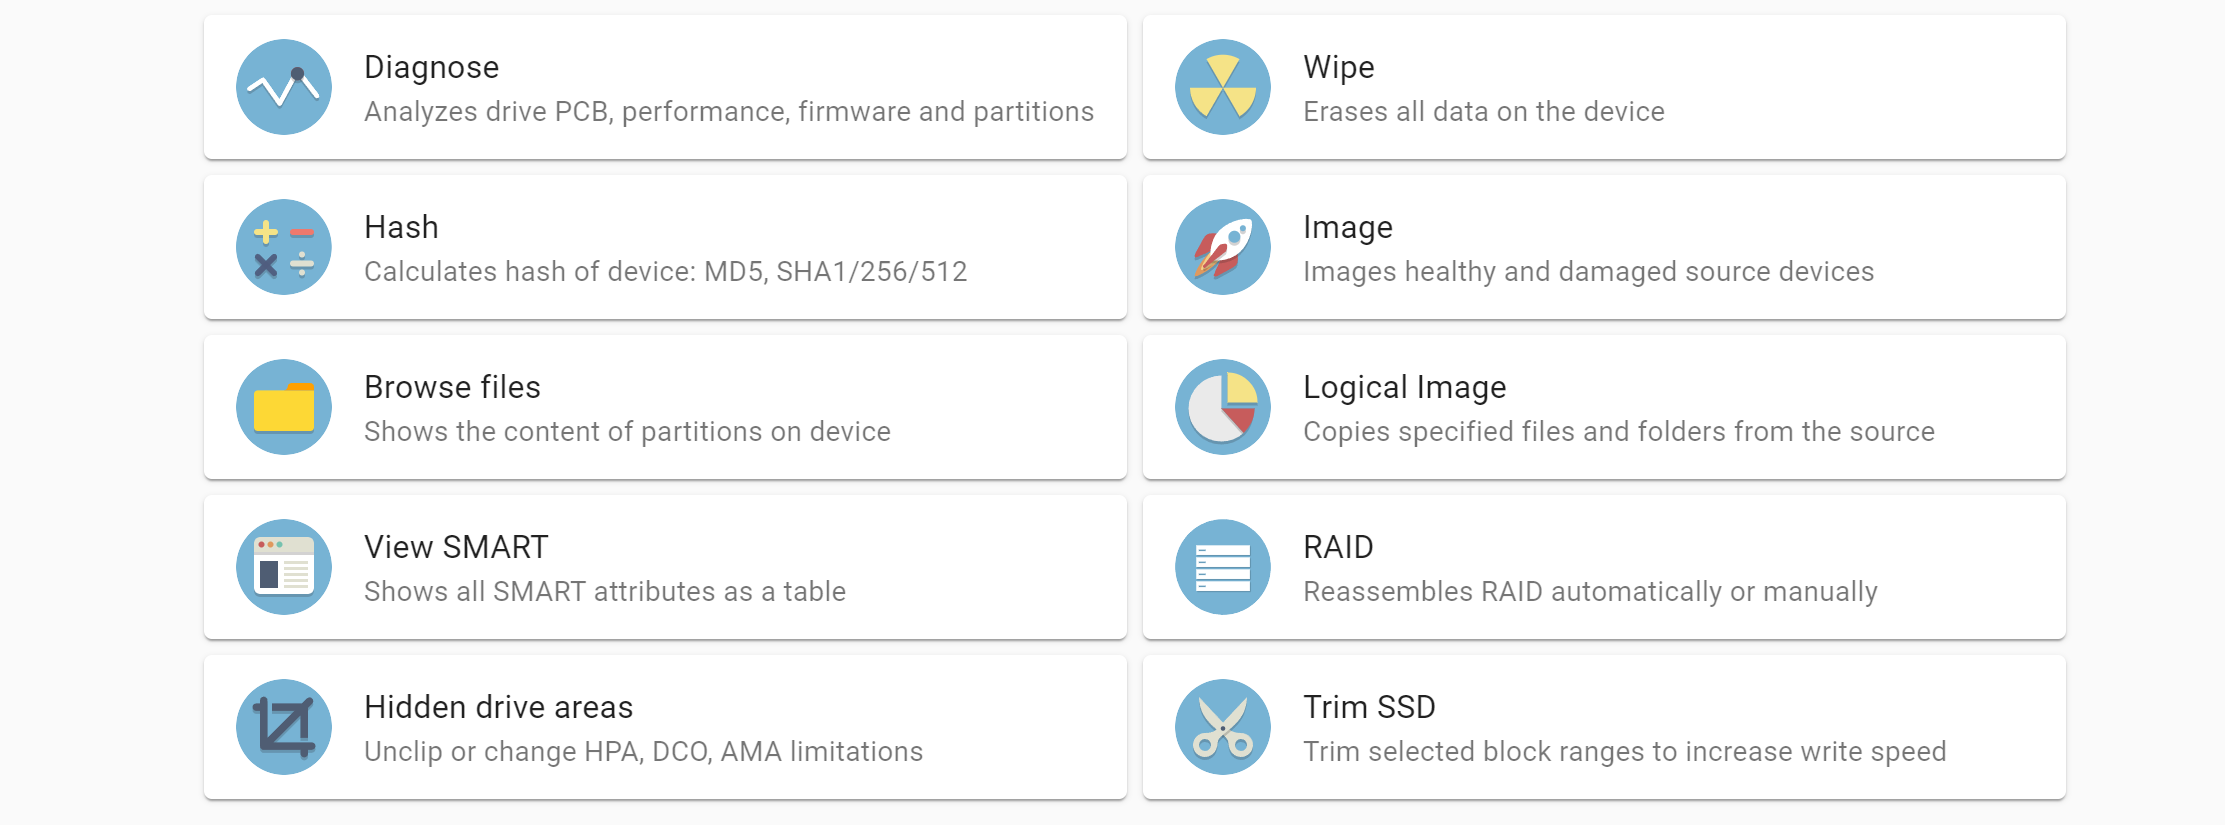
- Click the RAID button in the left-side taskbar
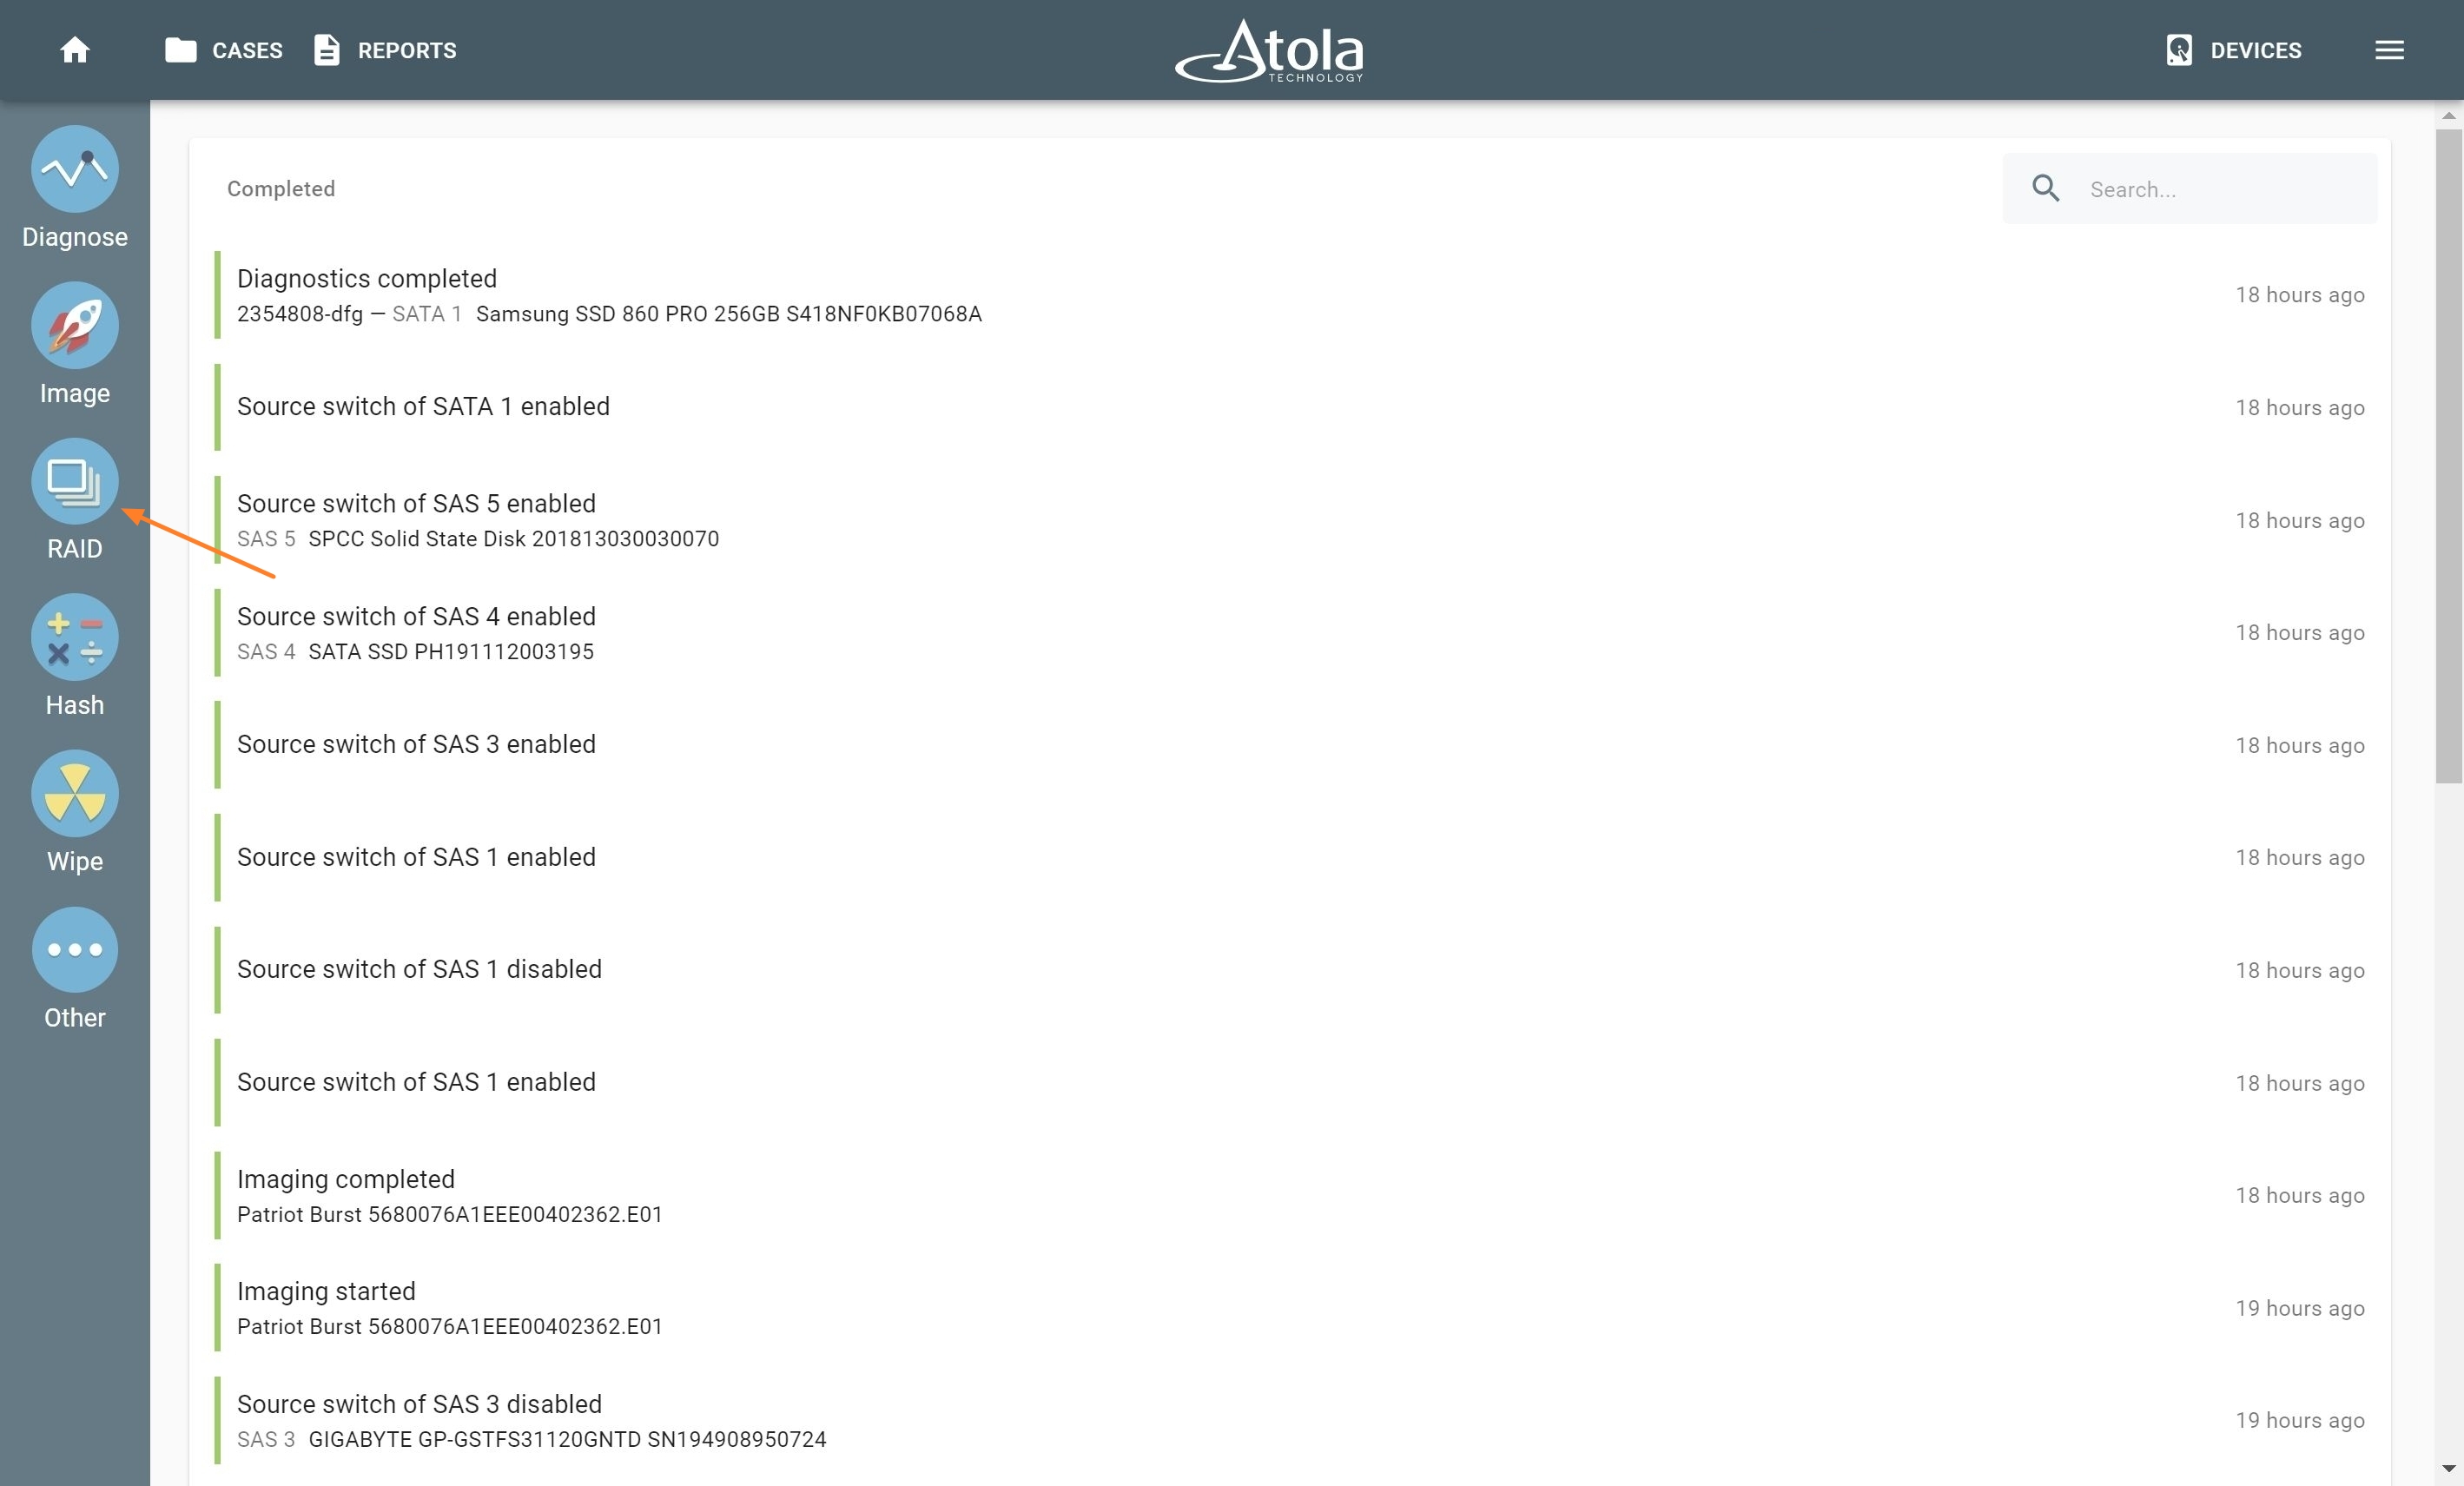
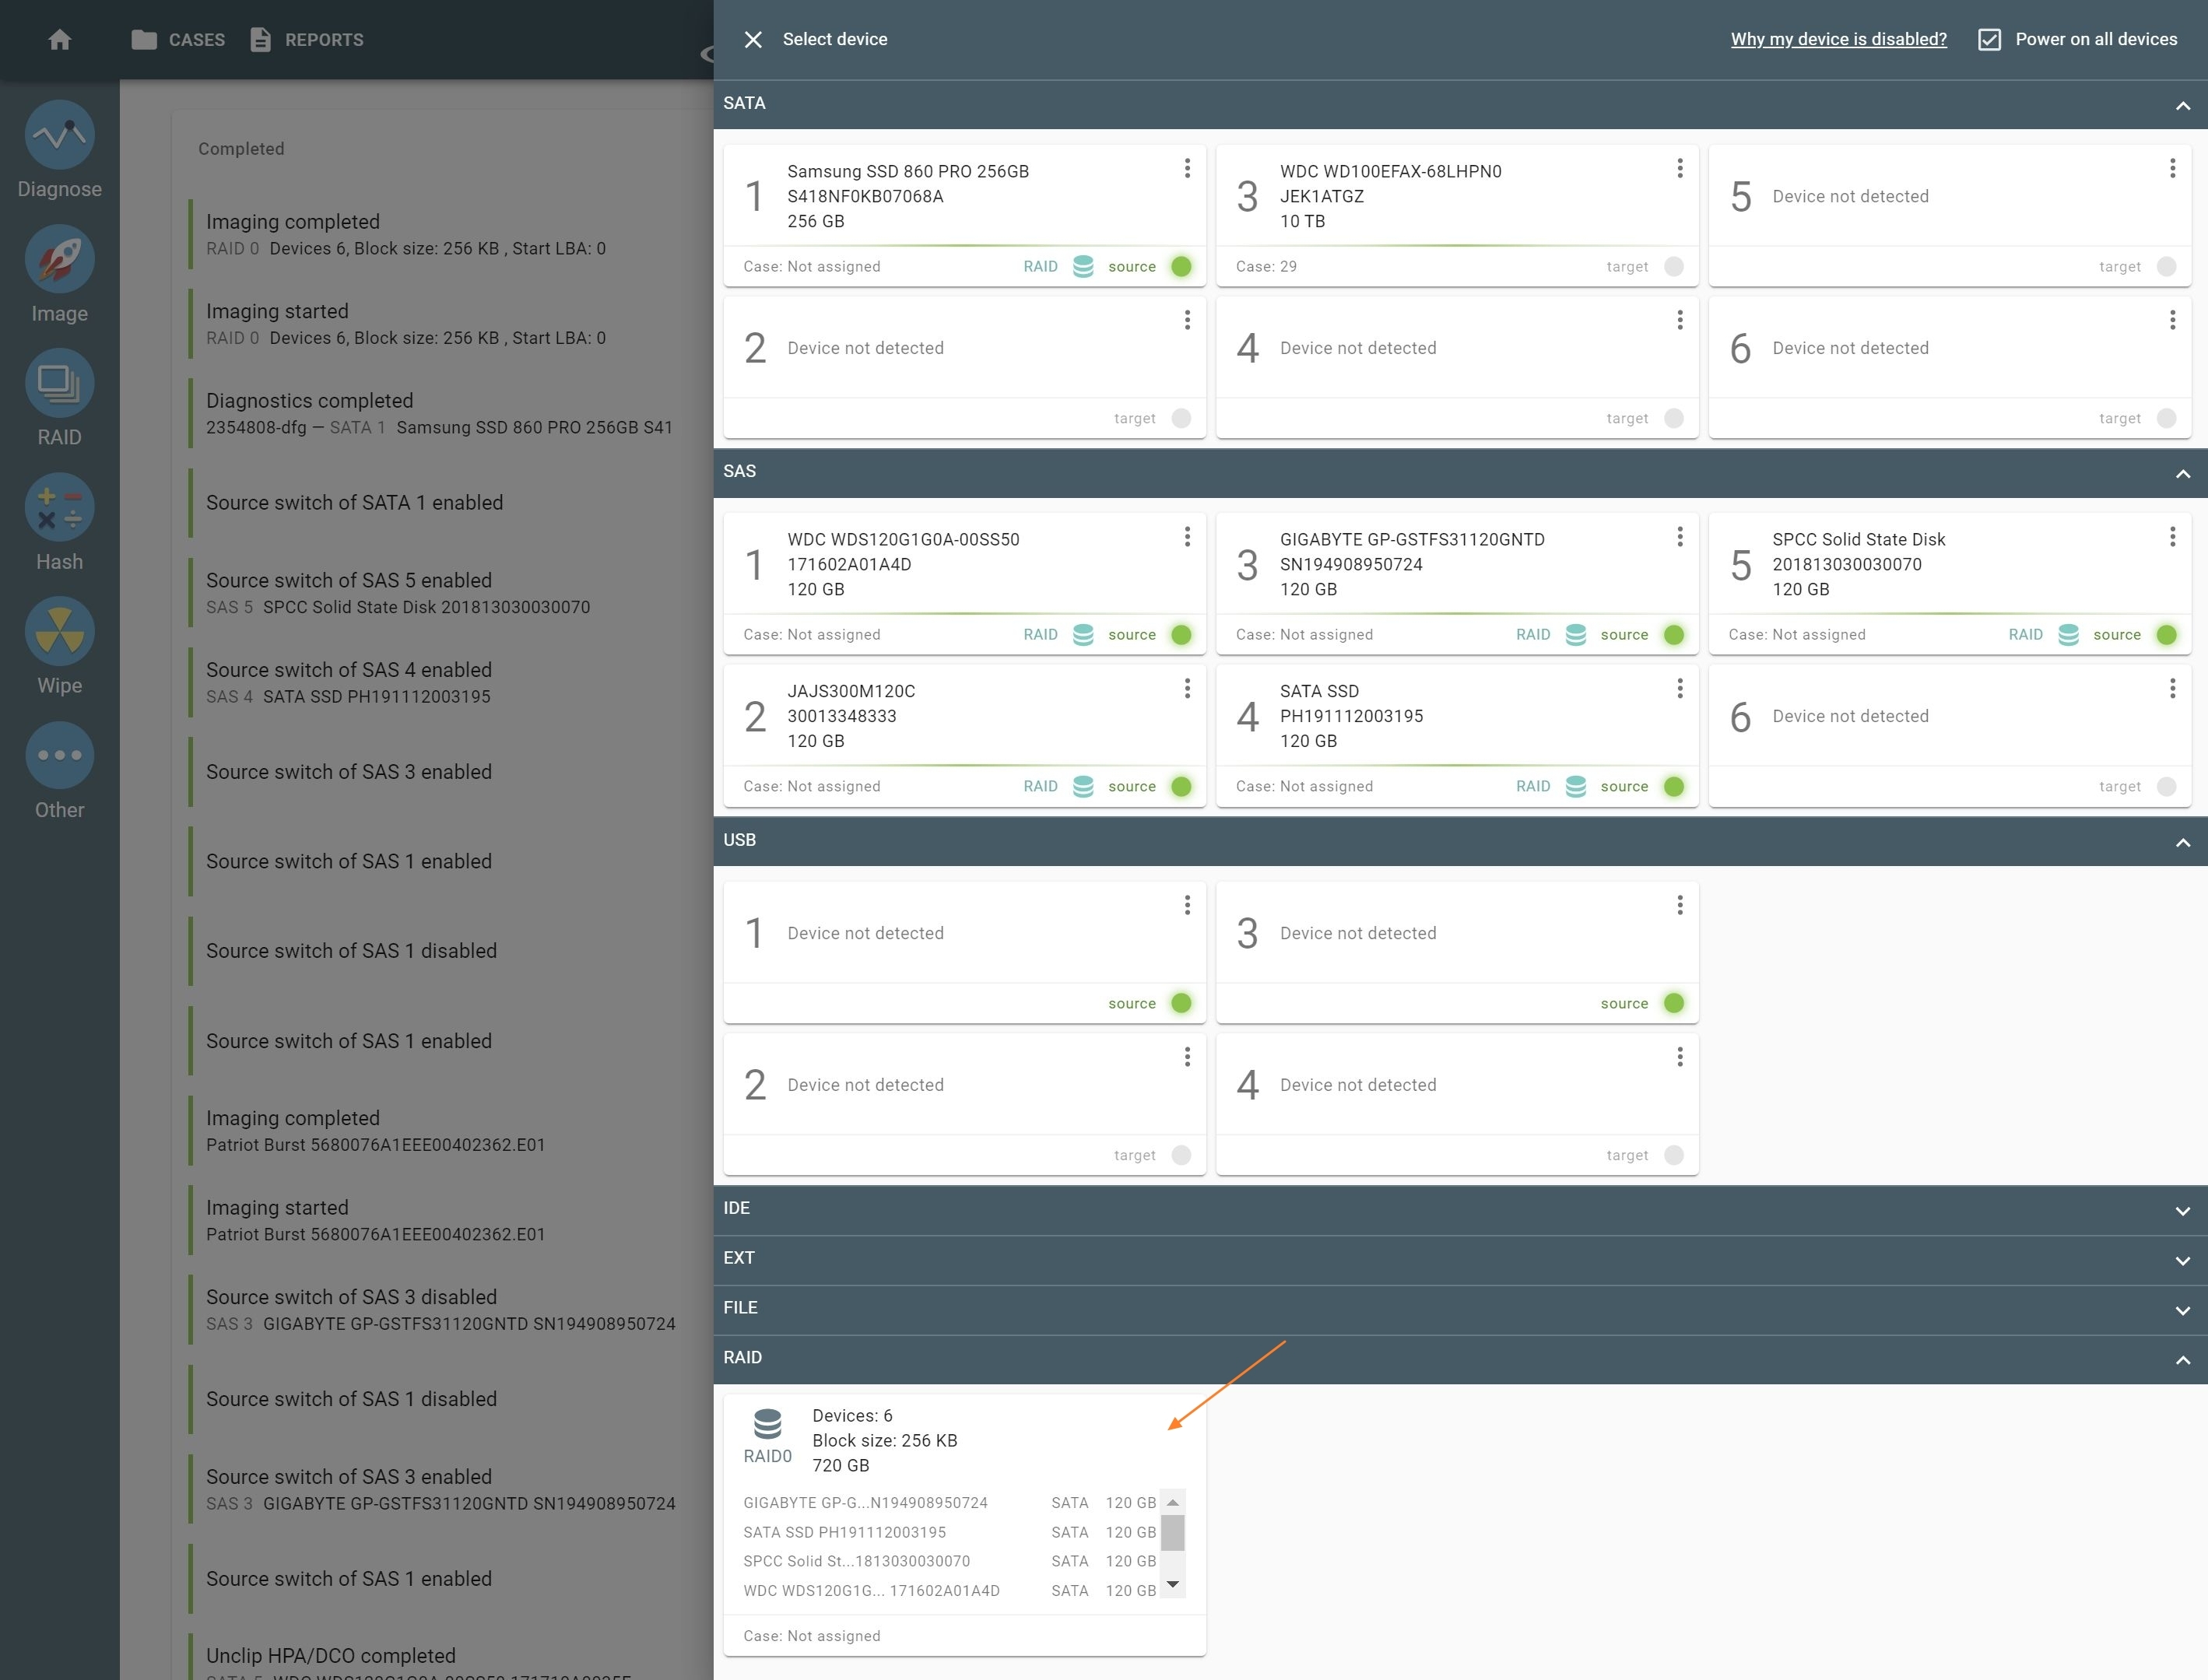
3. Select the drives in Select source device panel and click Continue
Autodetection of RAID configuration
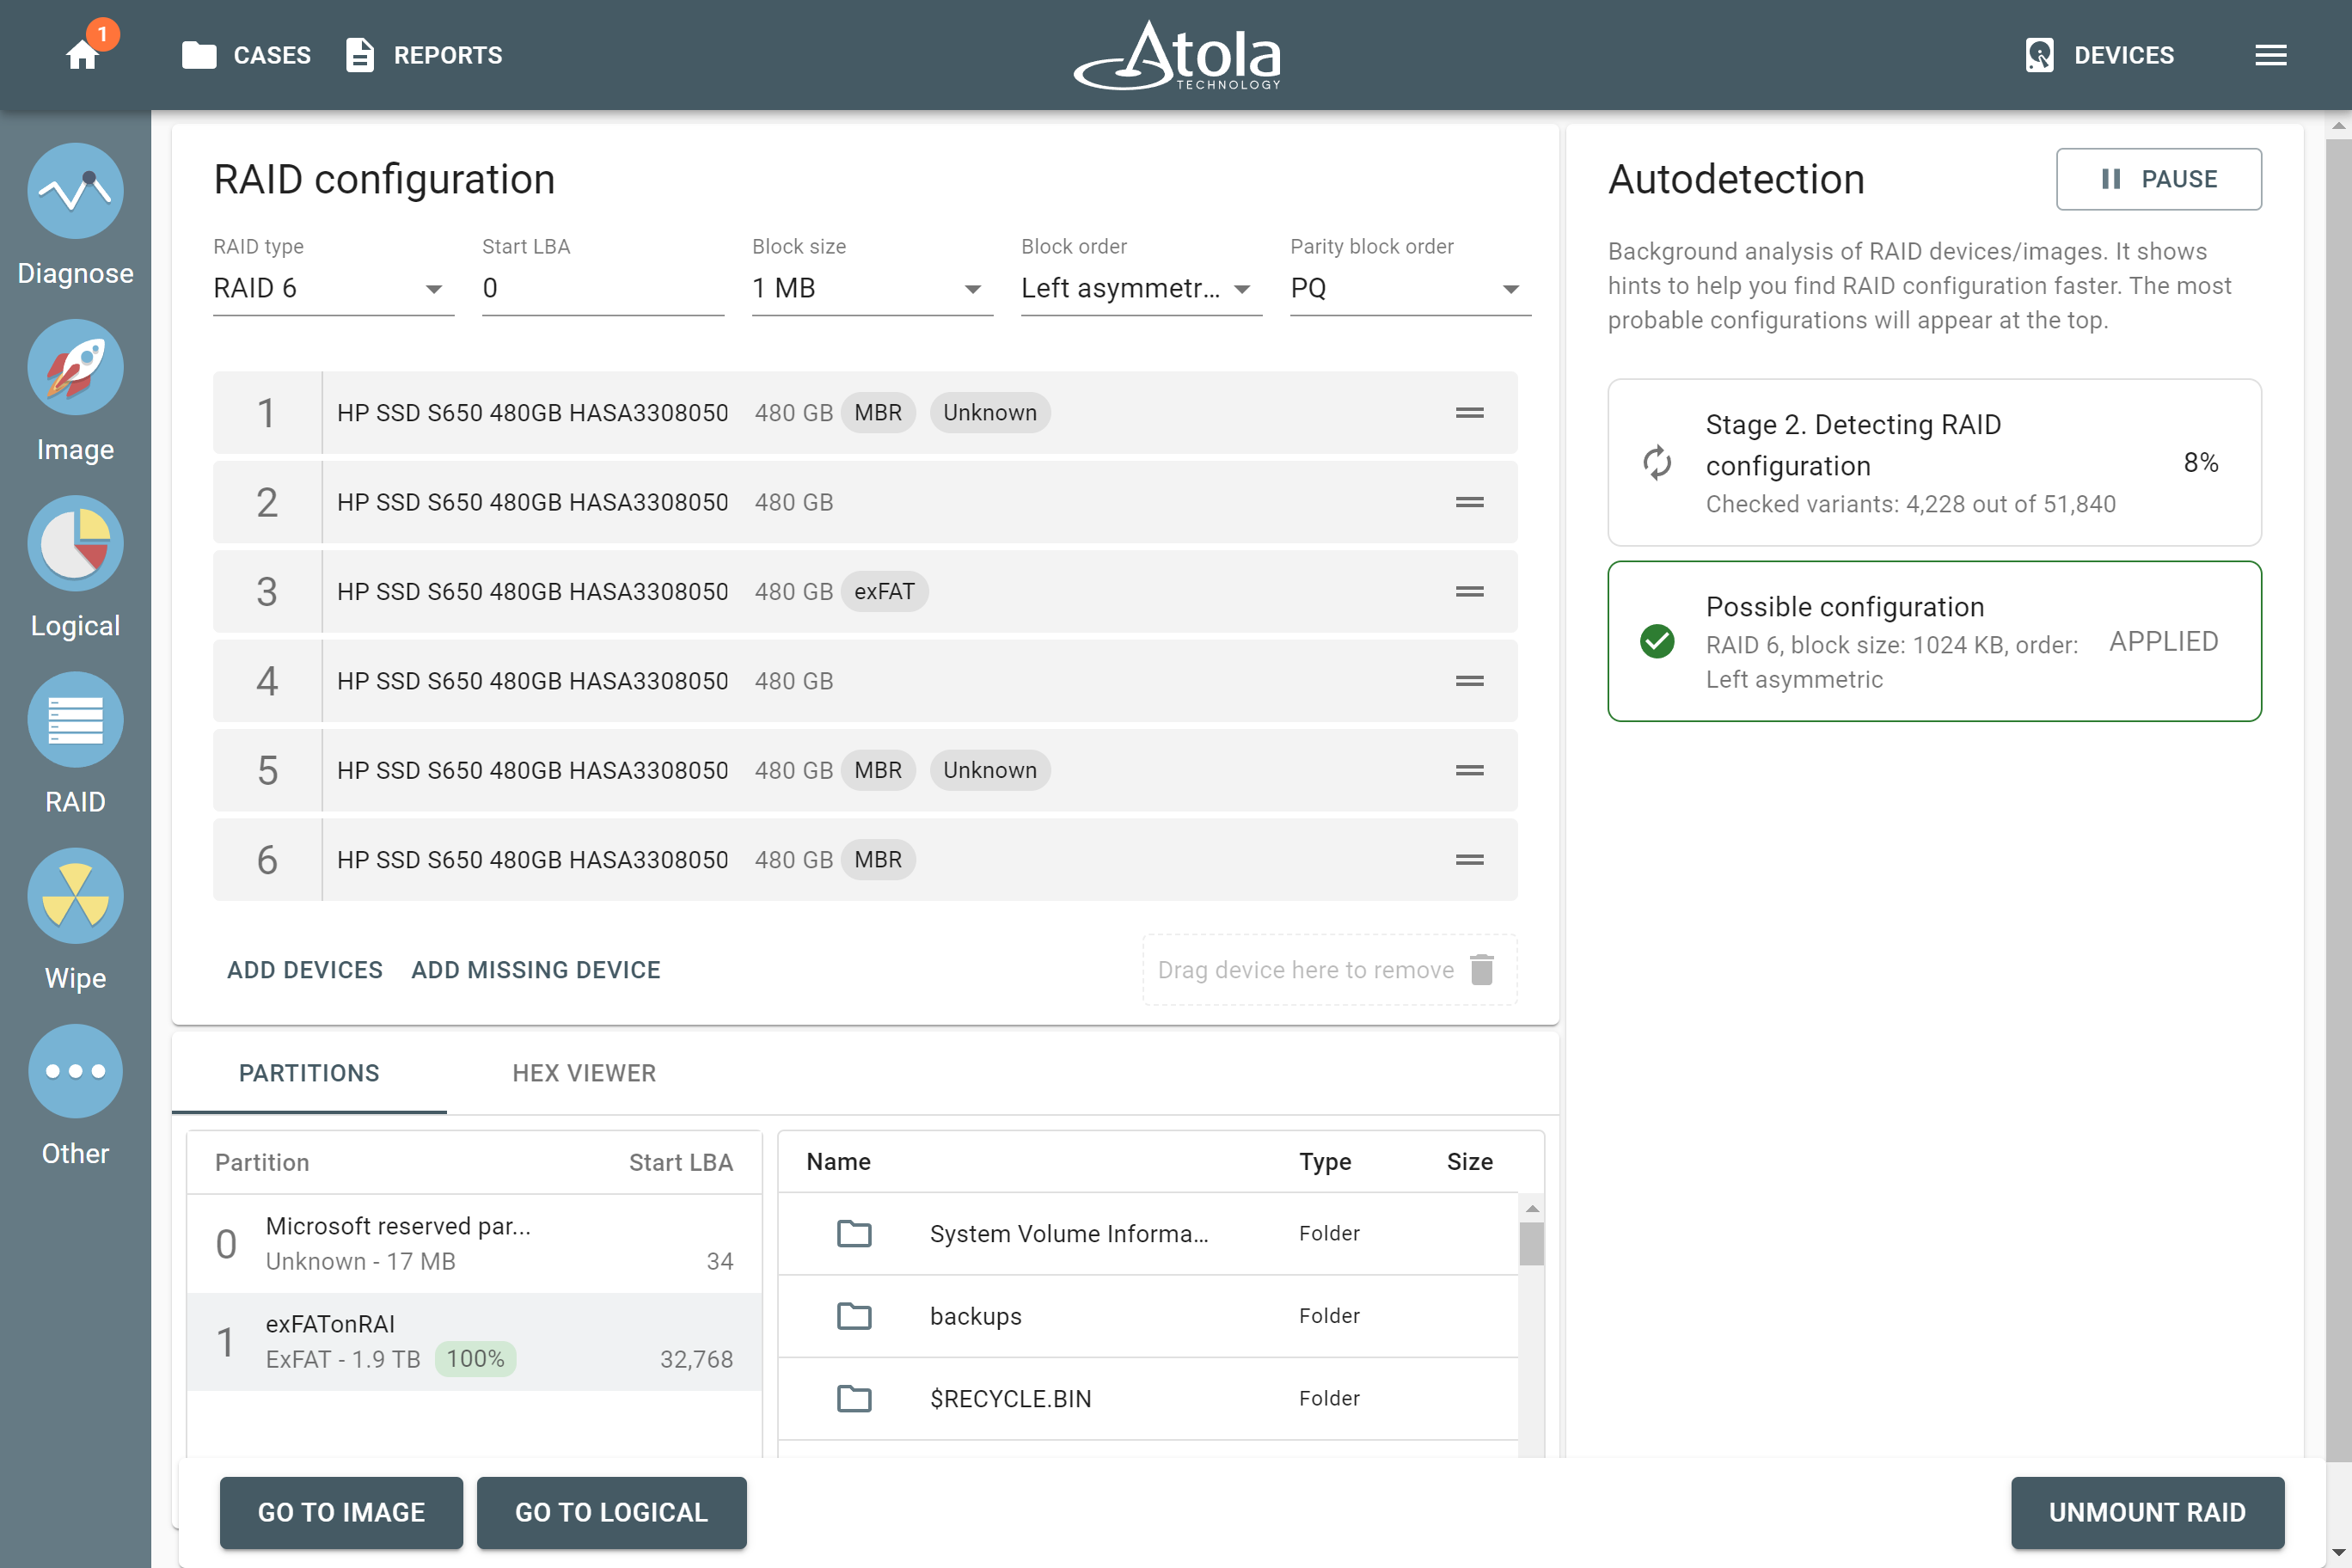
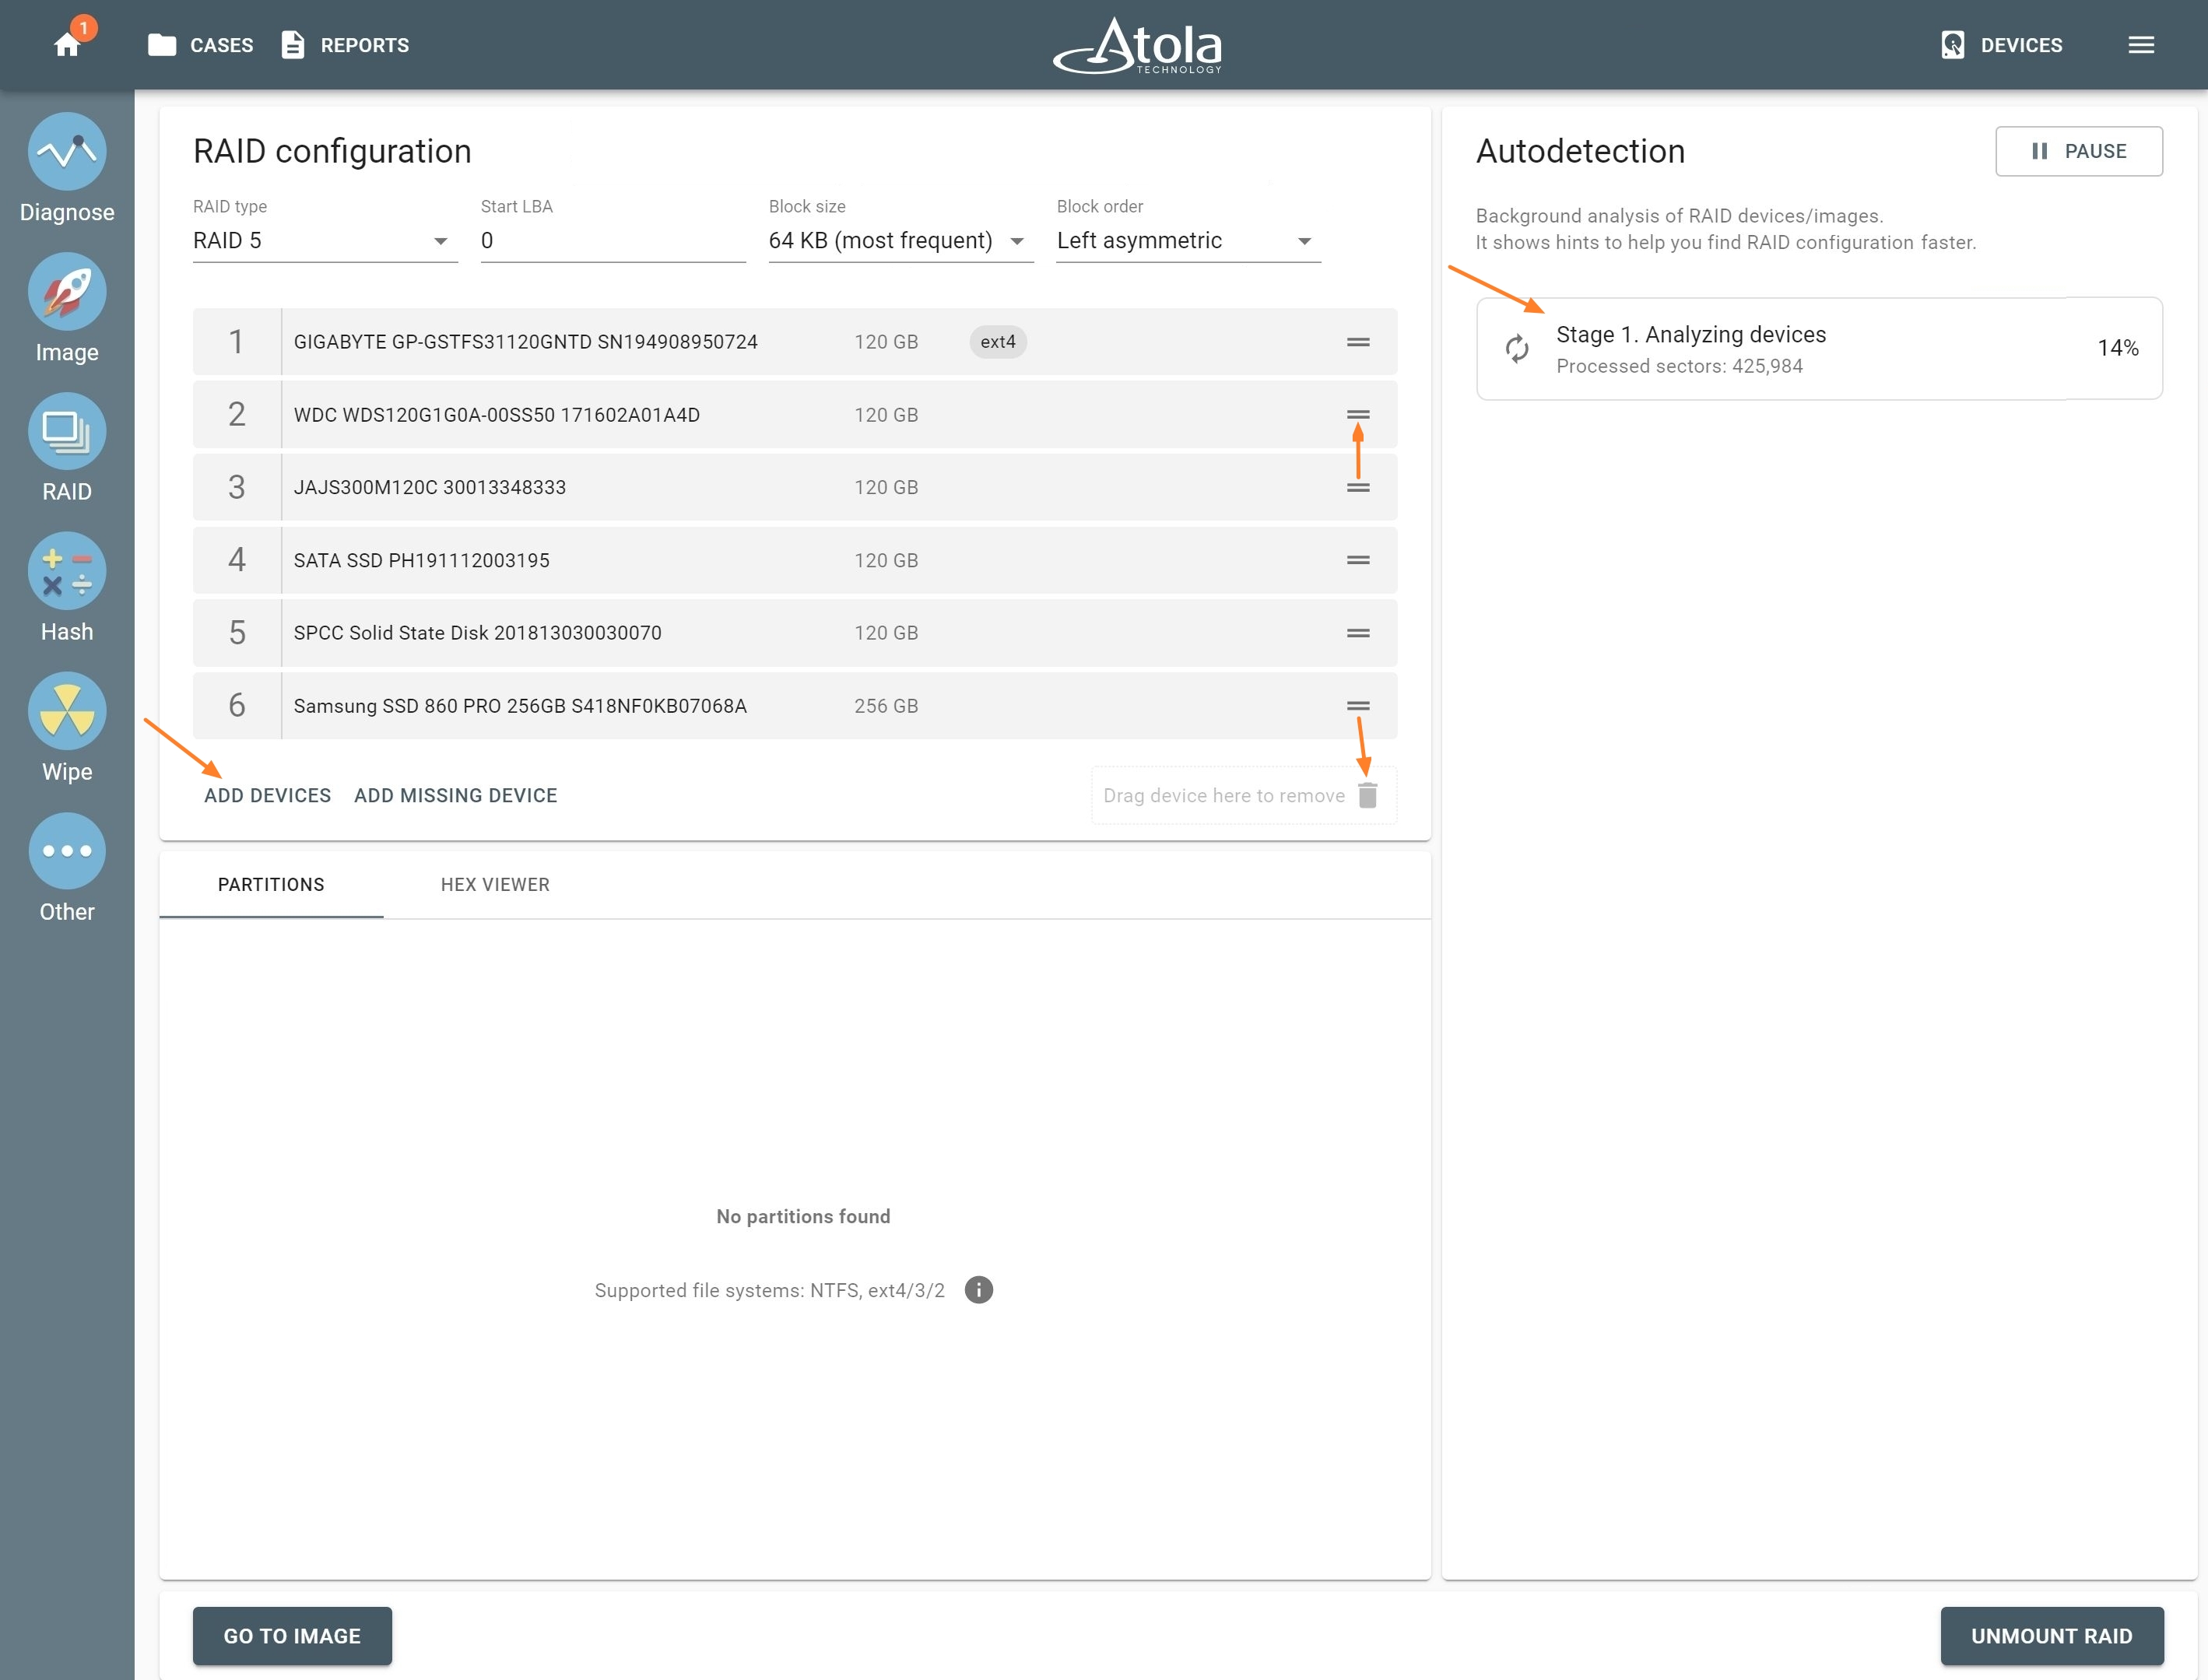
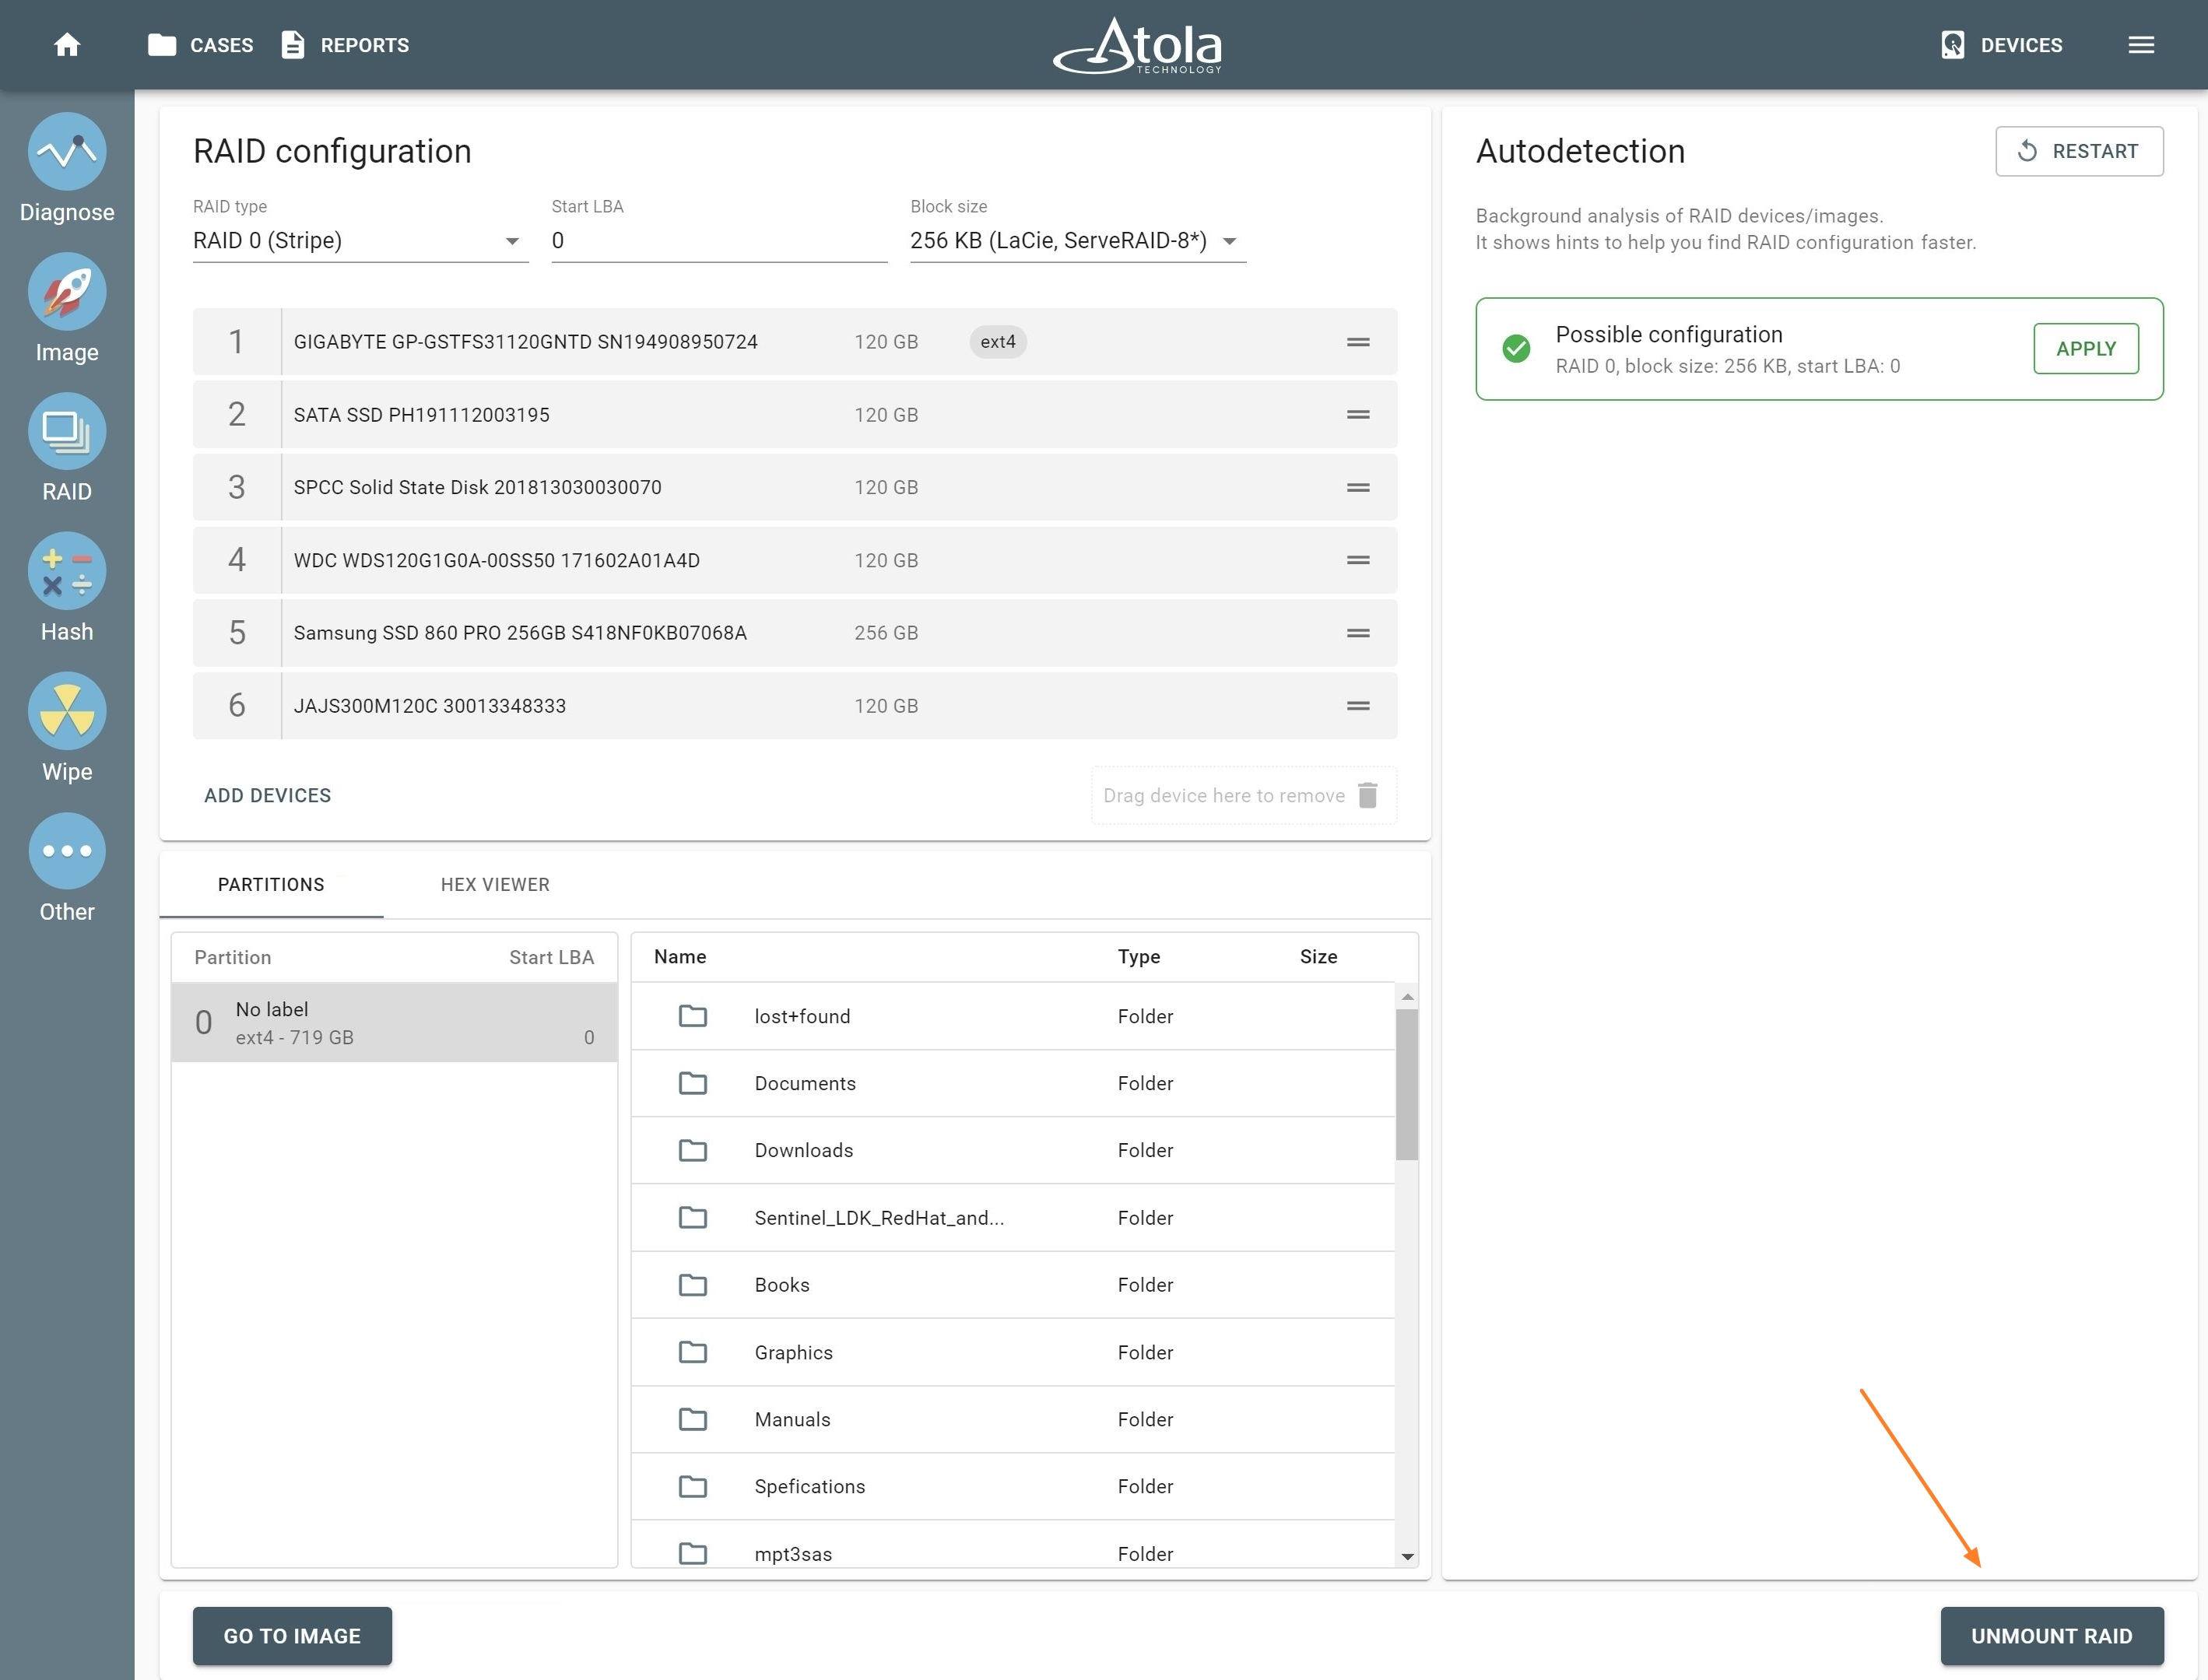
Let’s look at the RAID page in TaskForce interface. At the top of the page, there are key parameters of a RAID configuration:
- RAID type
- Start LBA
- Block size
- Block order (RAID 5 only)
TaskForce smartly uses defaults for these fields specific to the number of drives, found MBR and partition boot sectors. However, you can enter values manually if the RAID configuration is known. Alternatively, simply apply the results produced by the Autodetection module displayed in the right-hand part of the page.
Immediately upon the RAID page is loaded, the Autodetection module starts running. In Stage 1, TaskForce is linearly reading data on the drives to identify the RAID type.
NB You can add or remove drives if needed. Also, you can change the order of the drives in RAID configuration. Simply grab the drive and drag it to change its position or to remove it from the current array by dragging it to the bin.
In Stage 2, TaskForce goes through thousands of possible variants of RAID parameters (Block size, order, and Start LBA).
4. Click Apply as soon as Possible configuration tile appears. However, you don’t have to wait for Stage 2 to be completed:
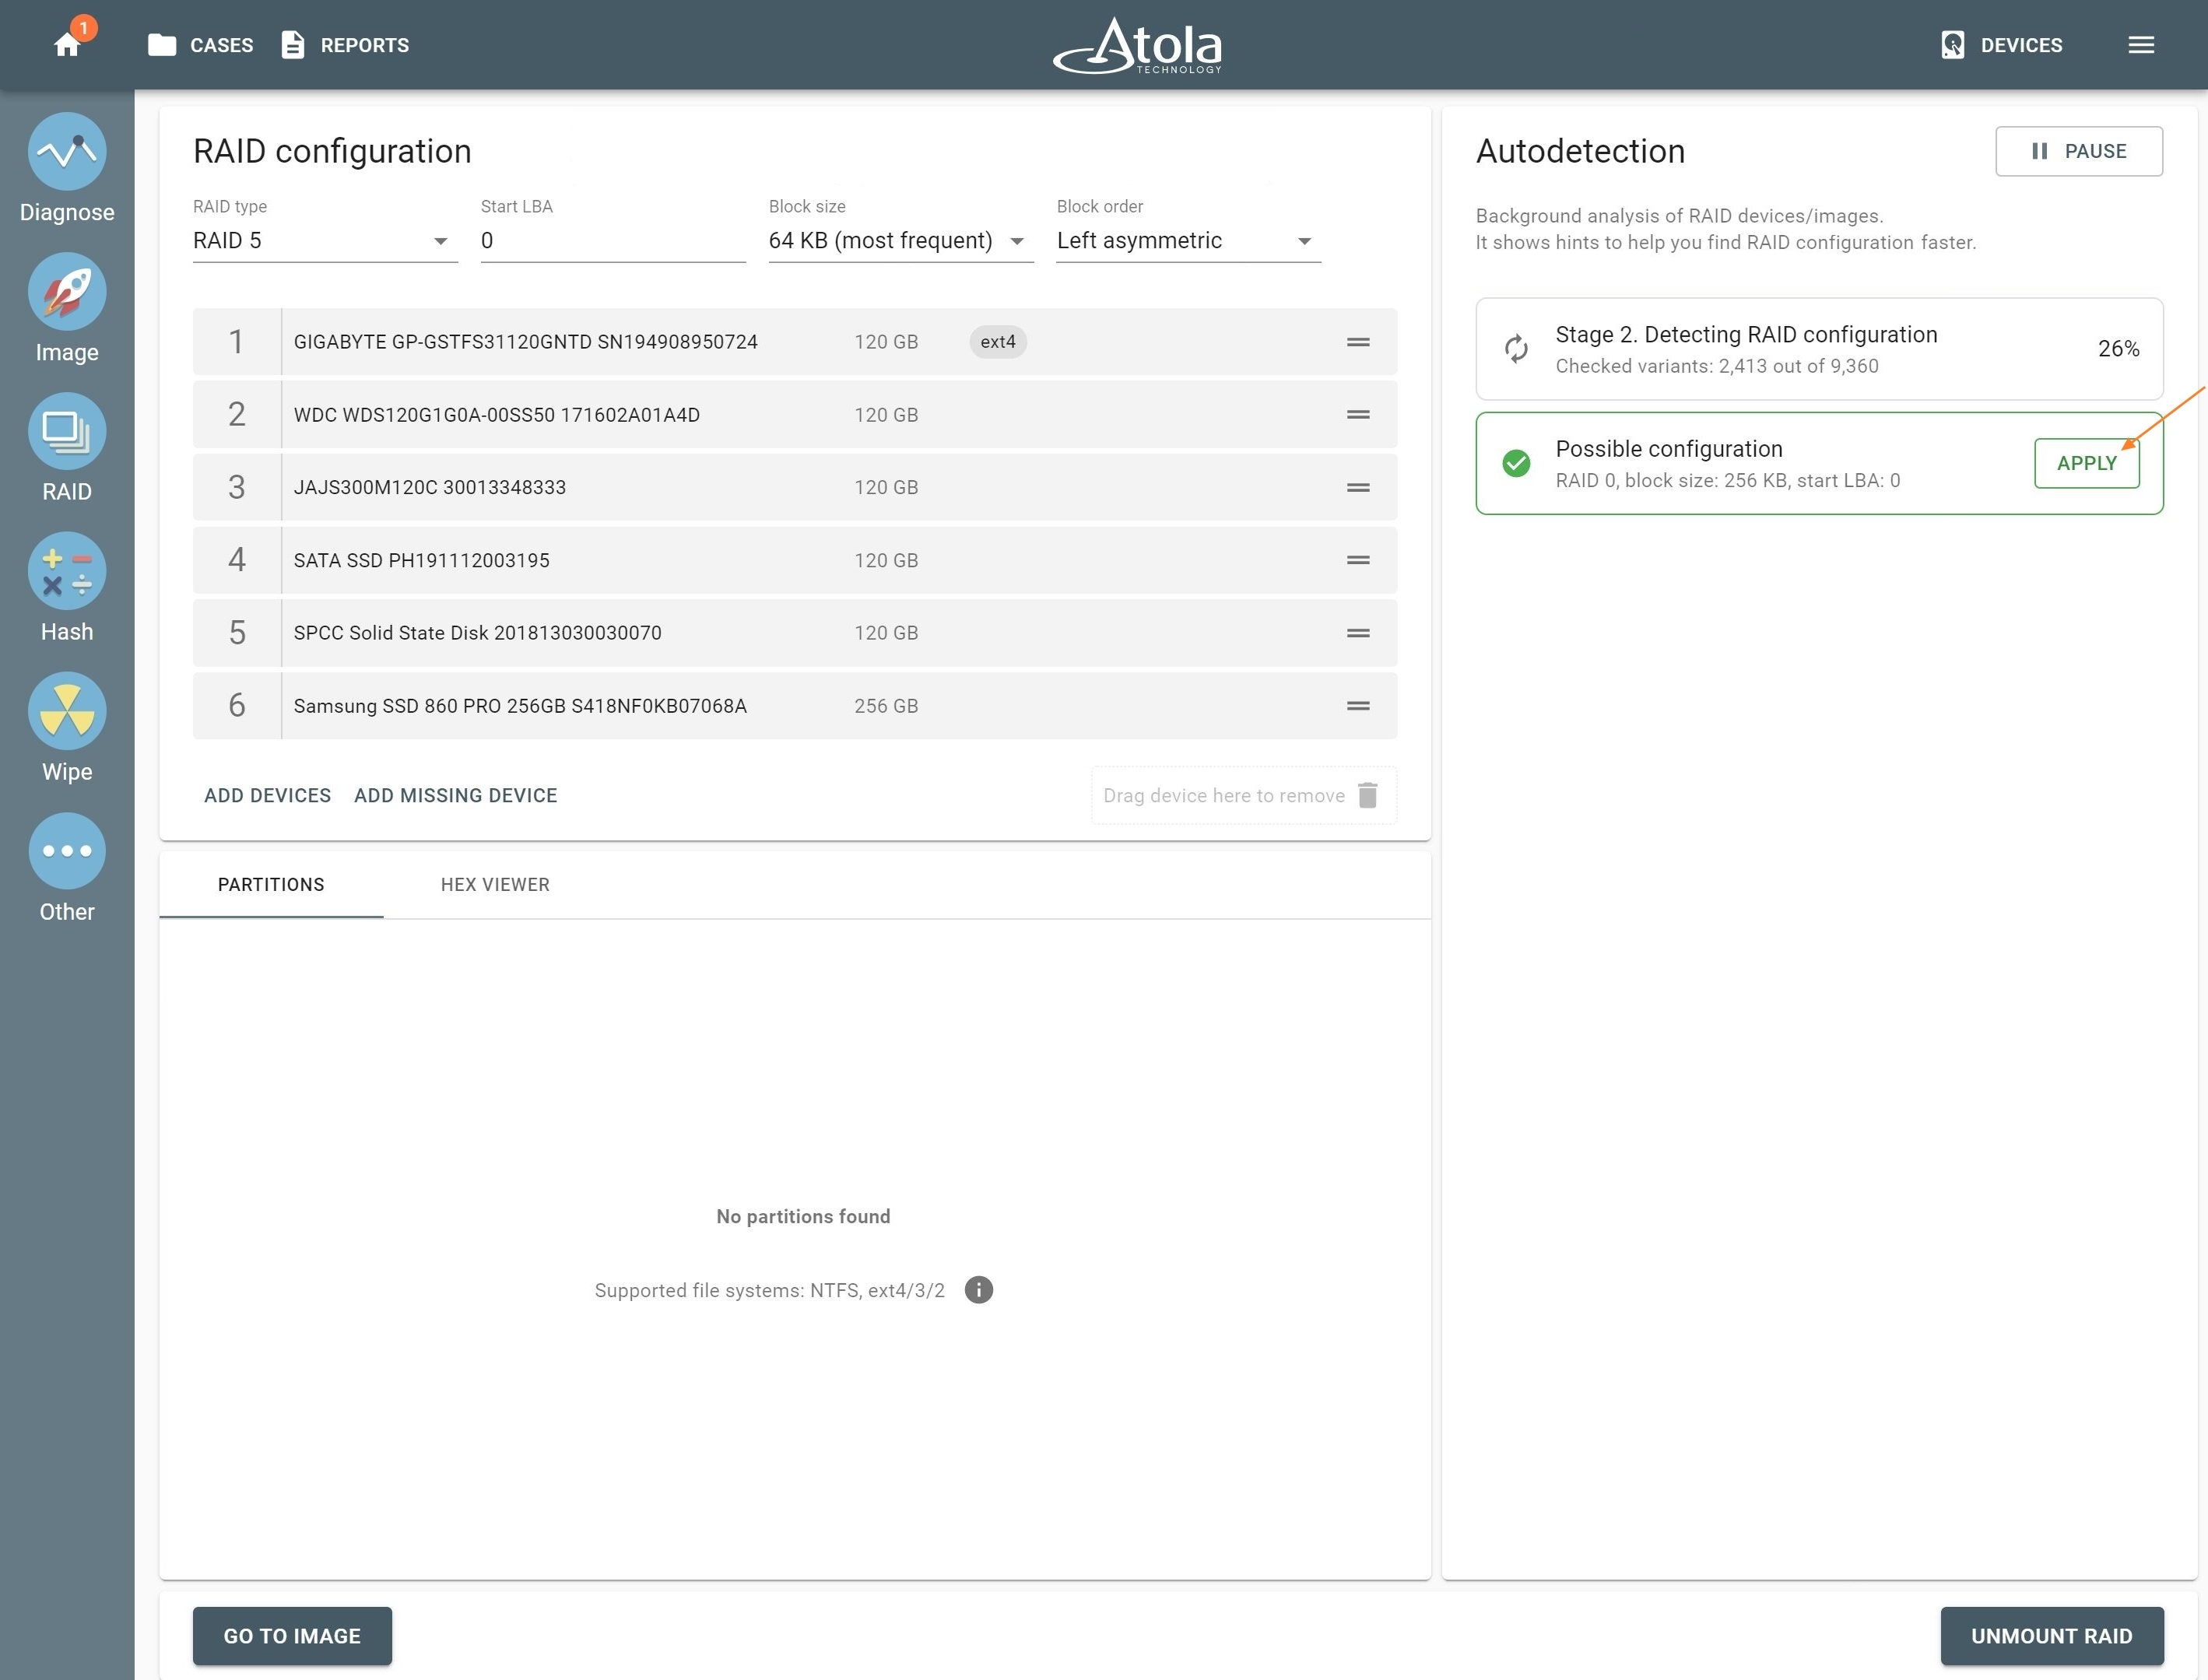
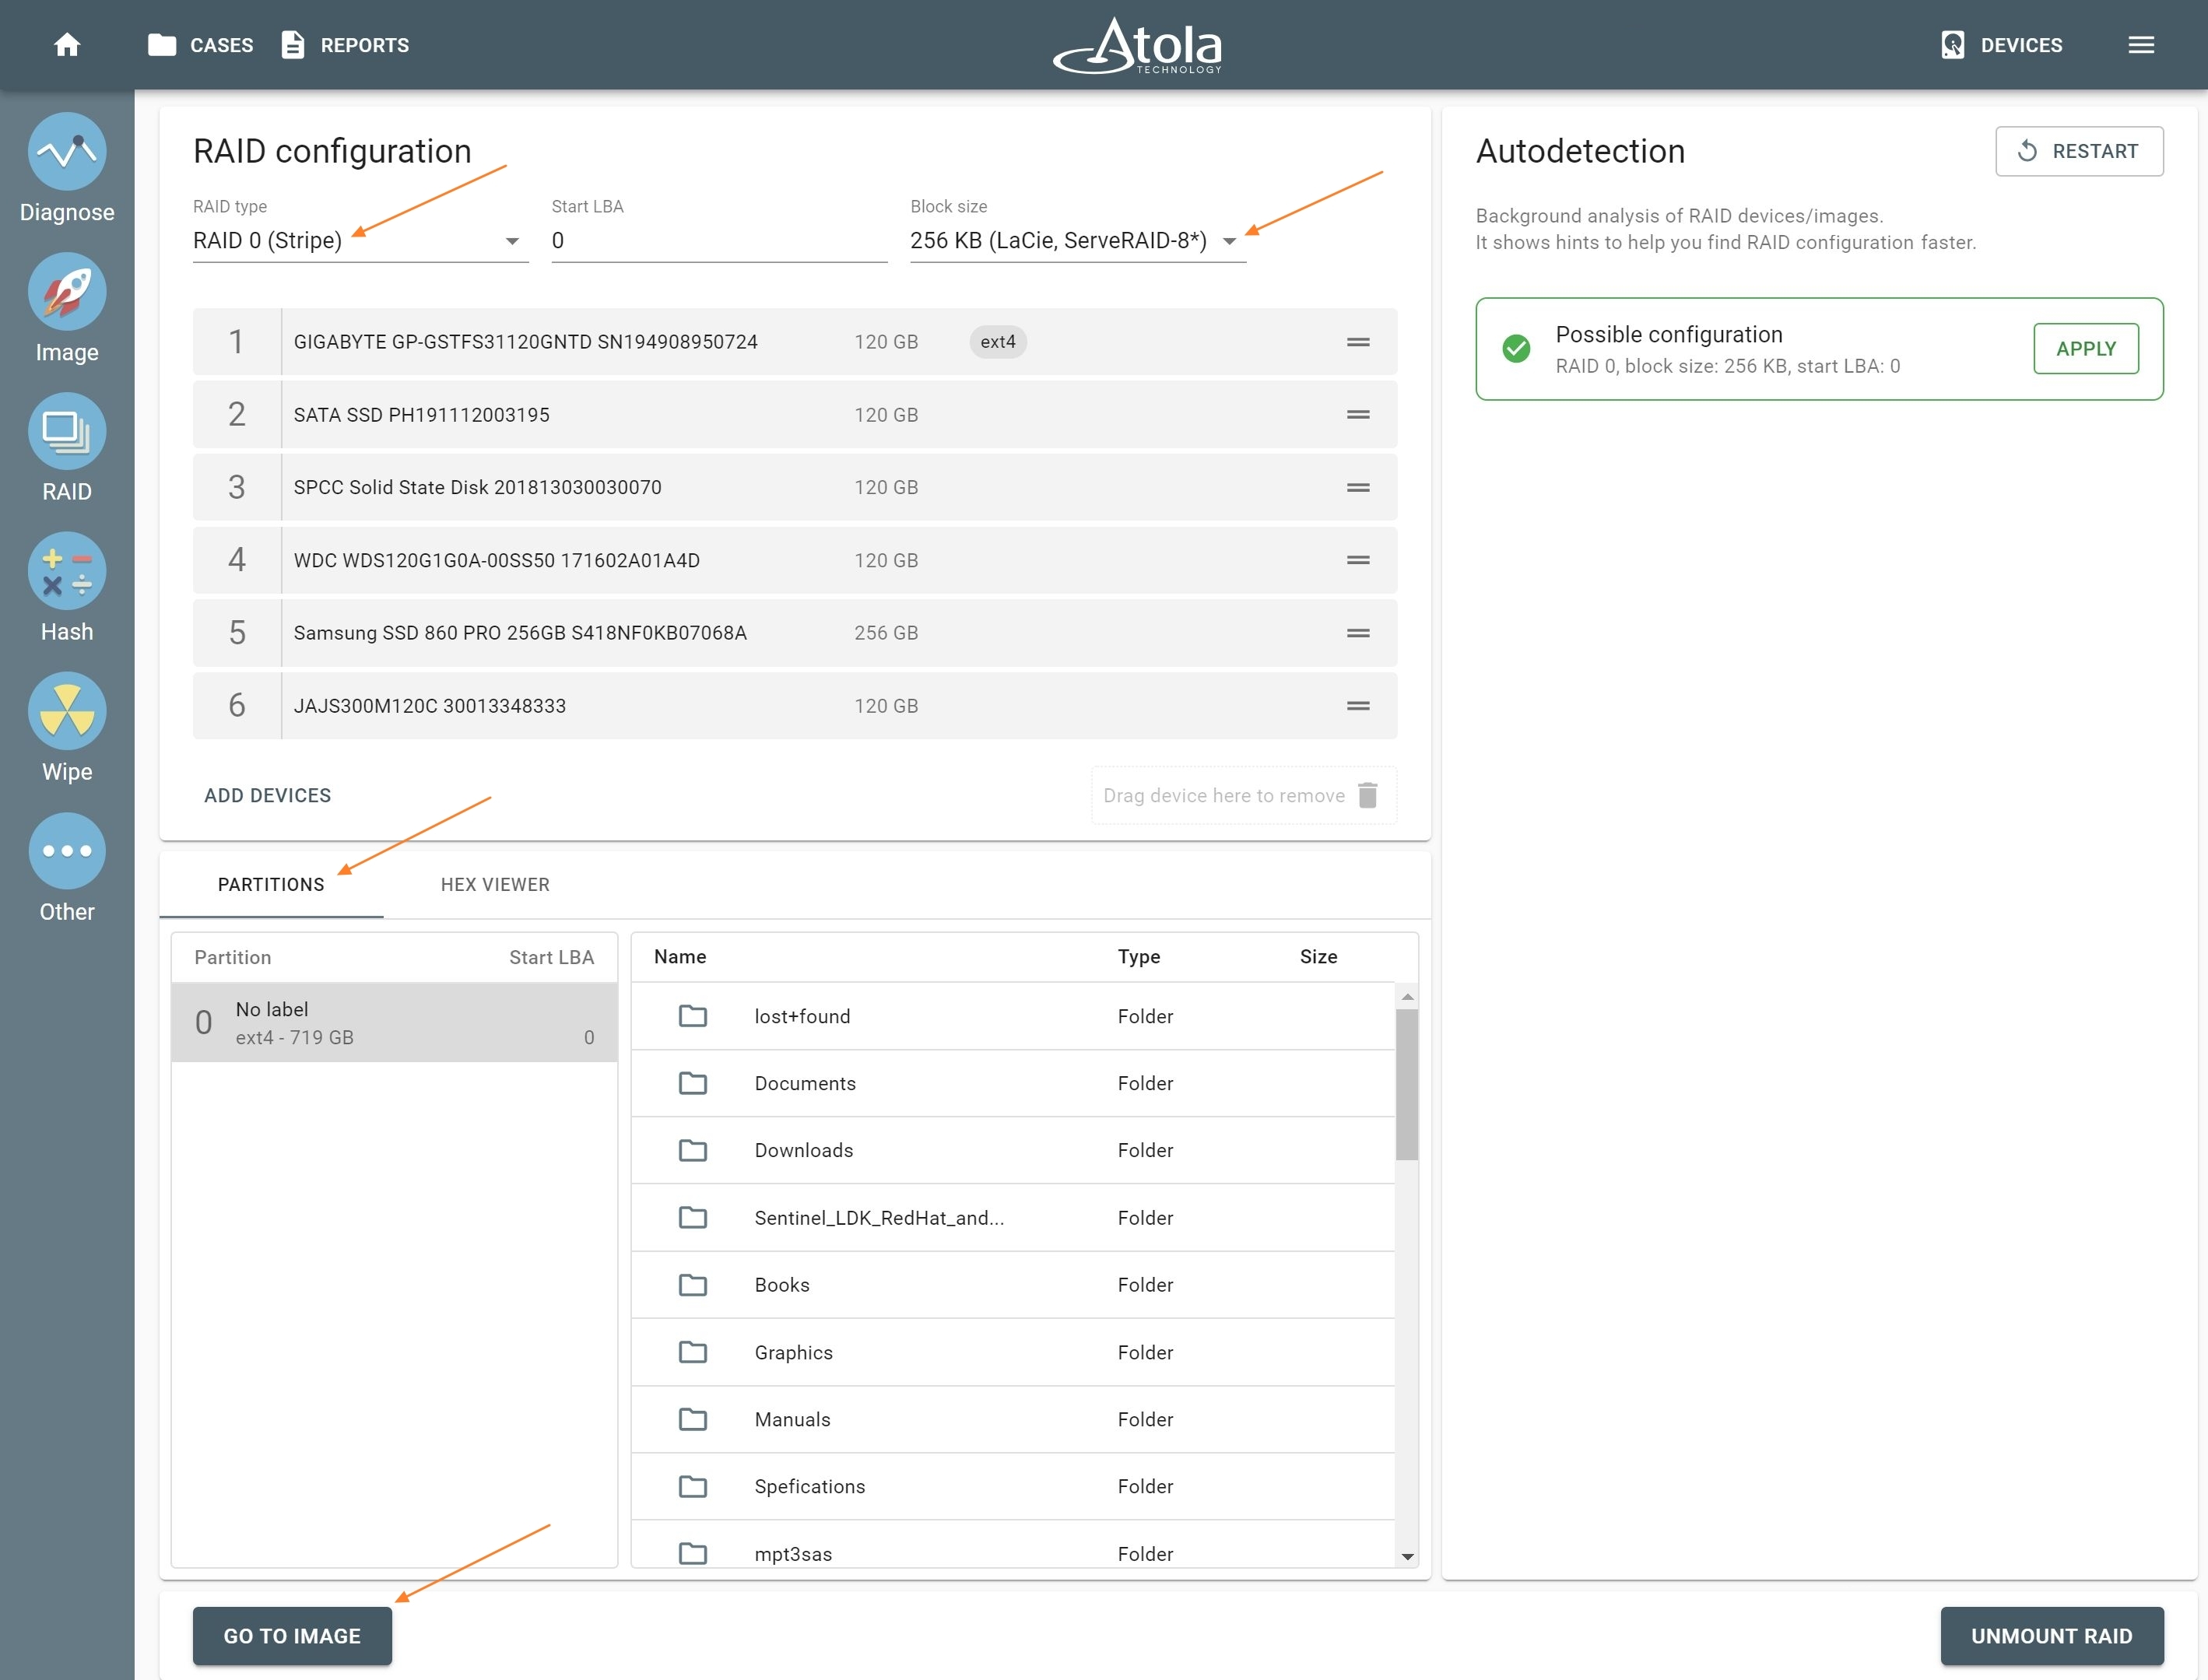
After you click Apply, TaskForce automatically applies the suggested configuration and checks for partitions. In addition, at the bottom of the screen, a preview of the partitions is available.
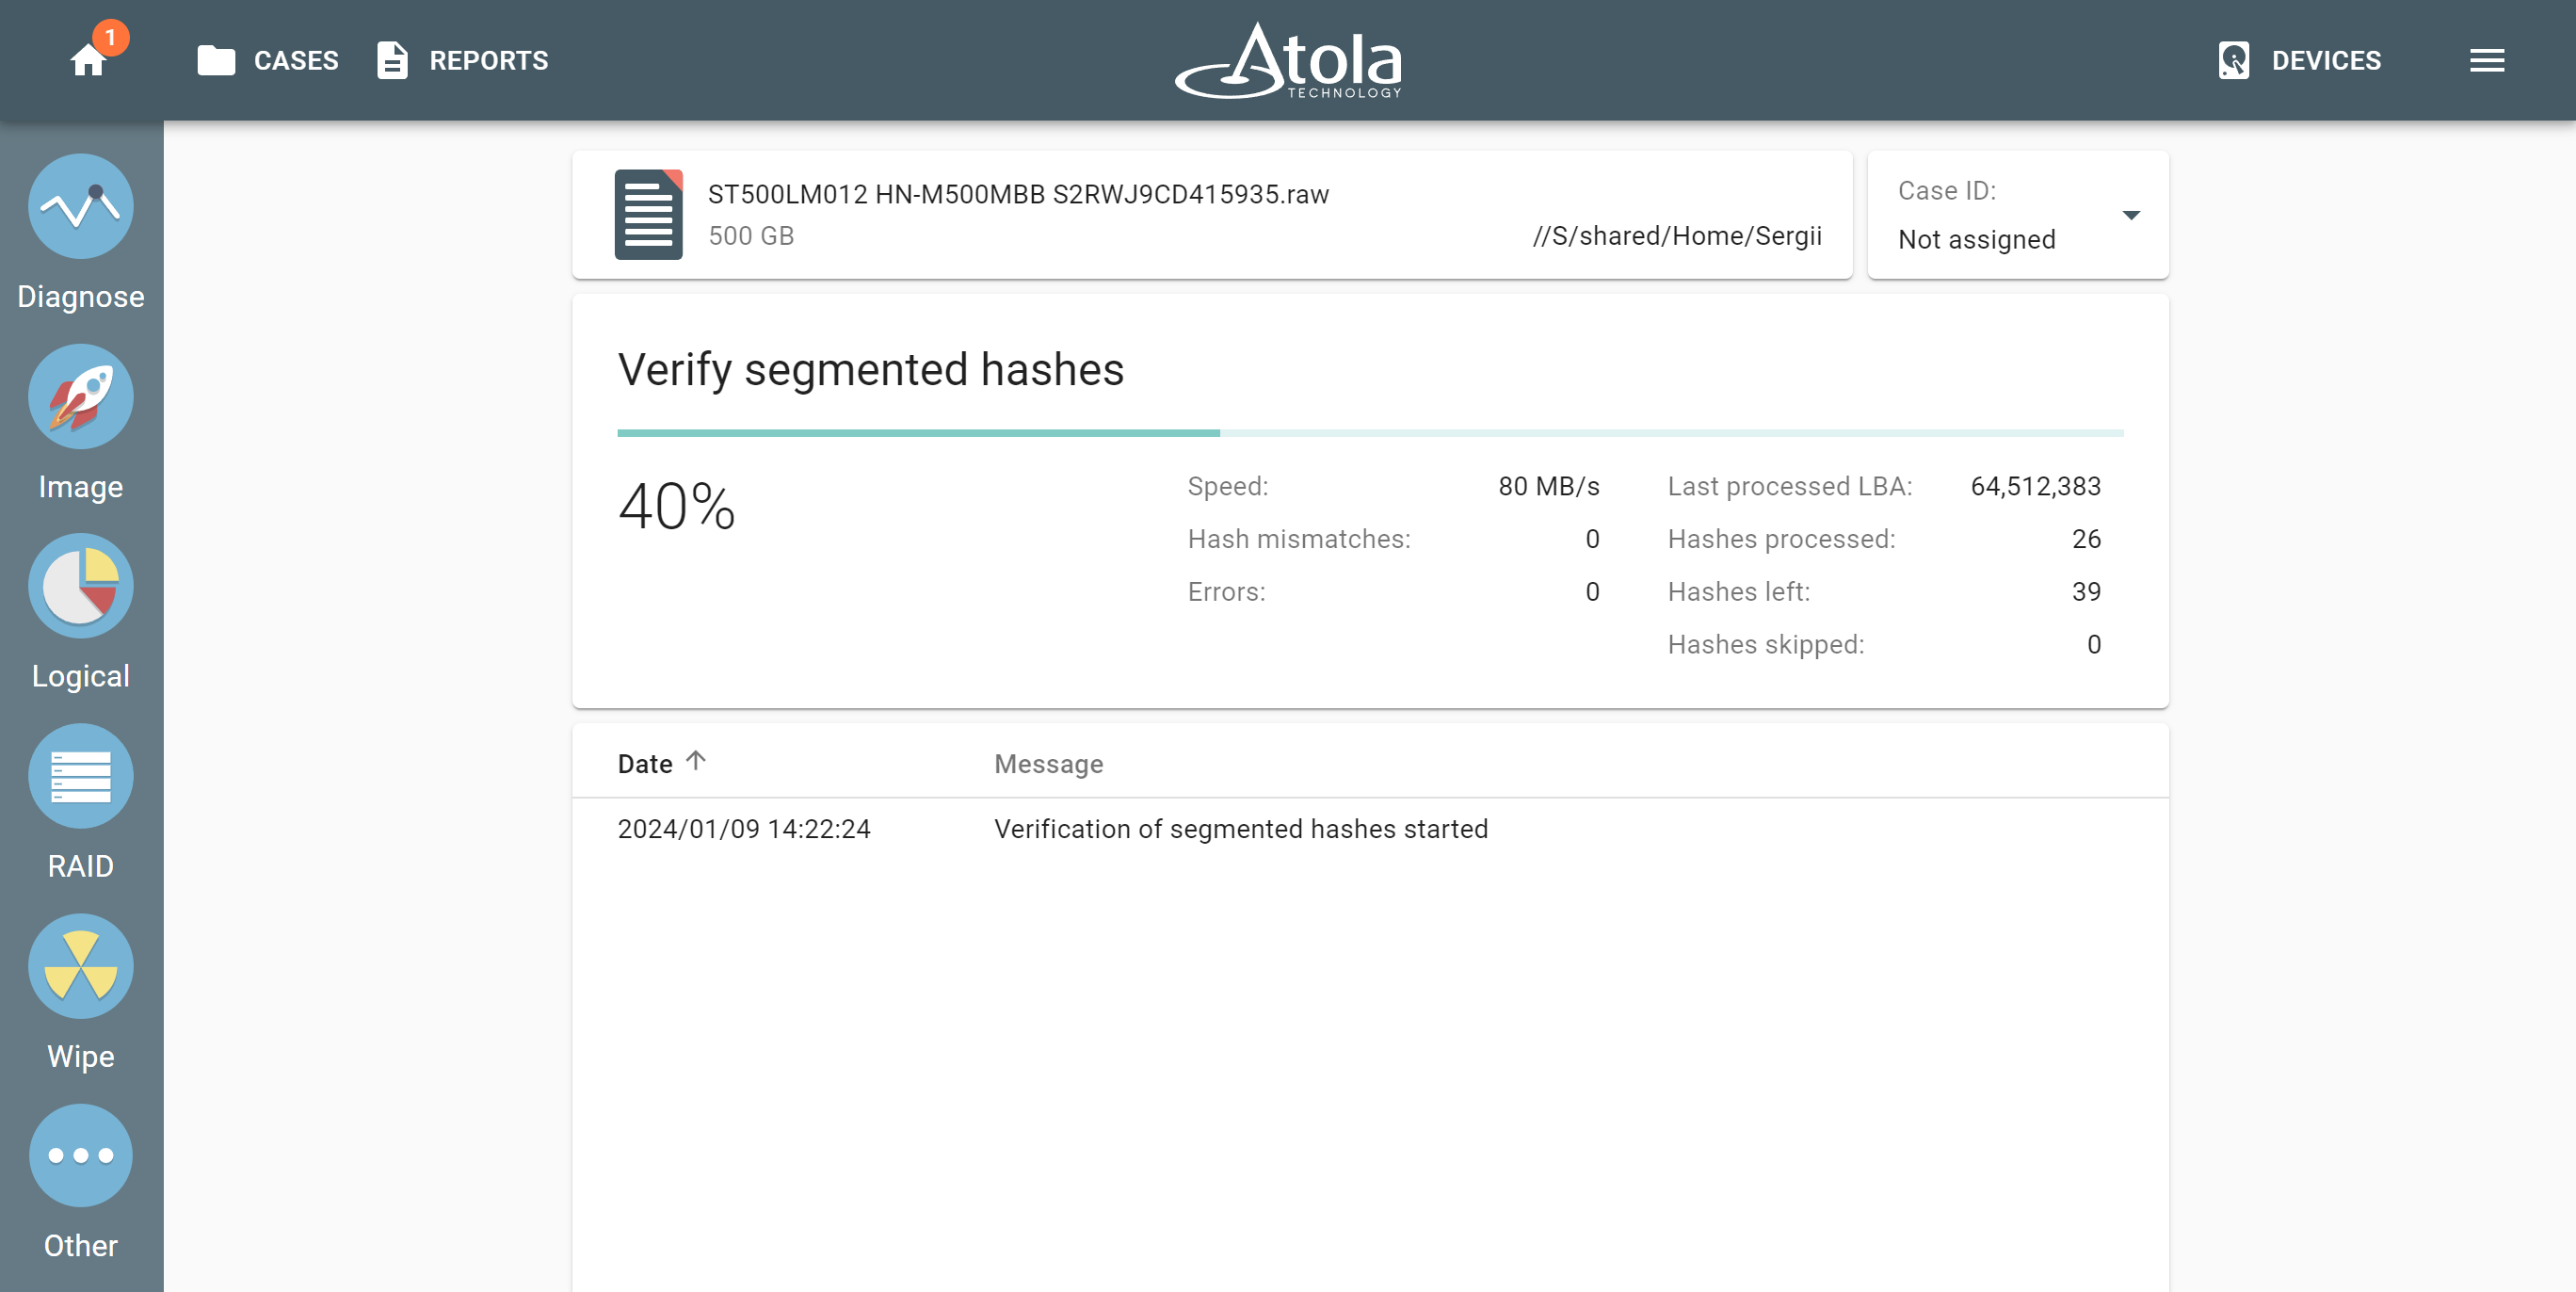
Imaging the RAID
6. After RAID is assembled, you can proceed with imaging RAID 0 array by clicking Go to Image button:
7. Select your target device and click the Continue button
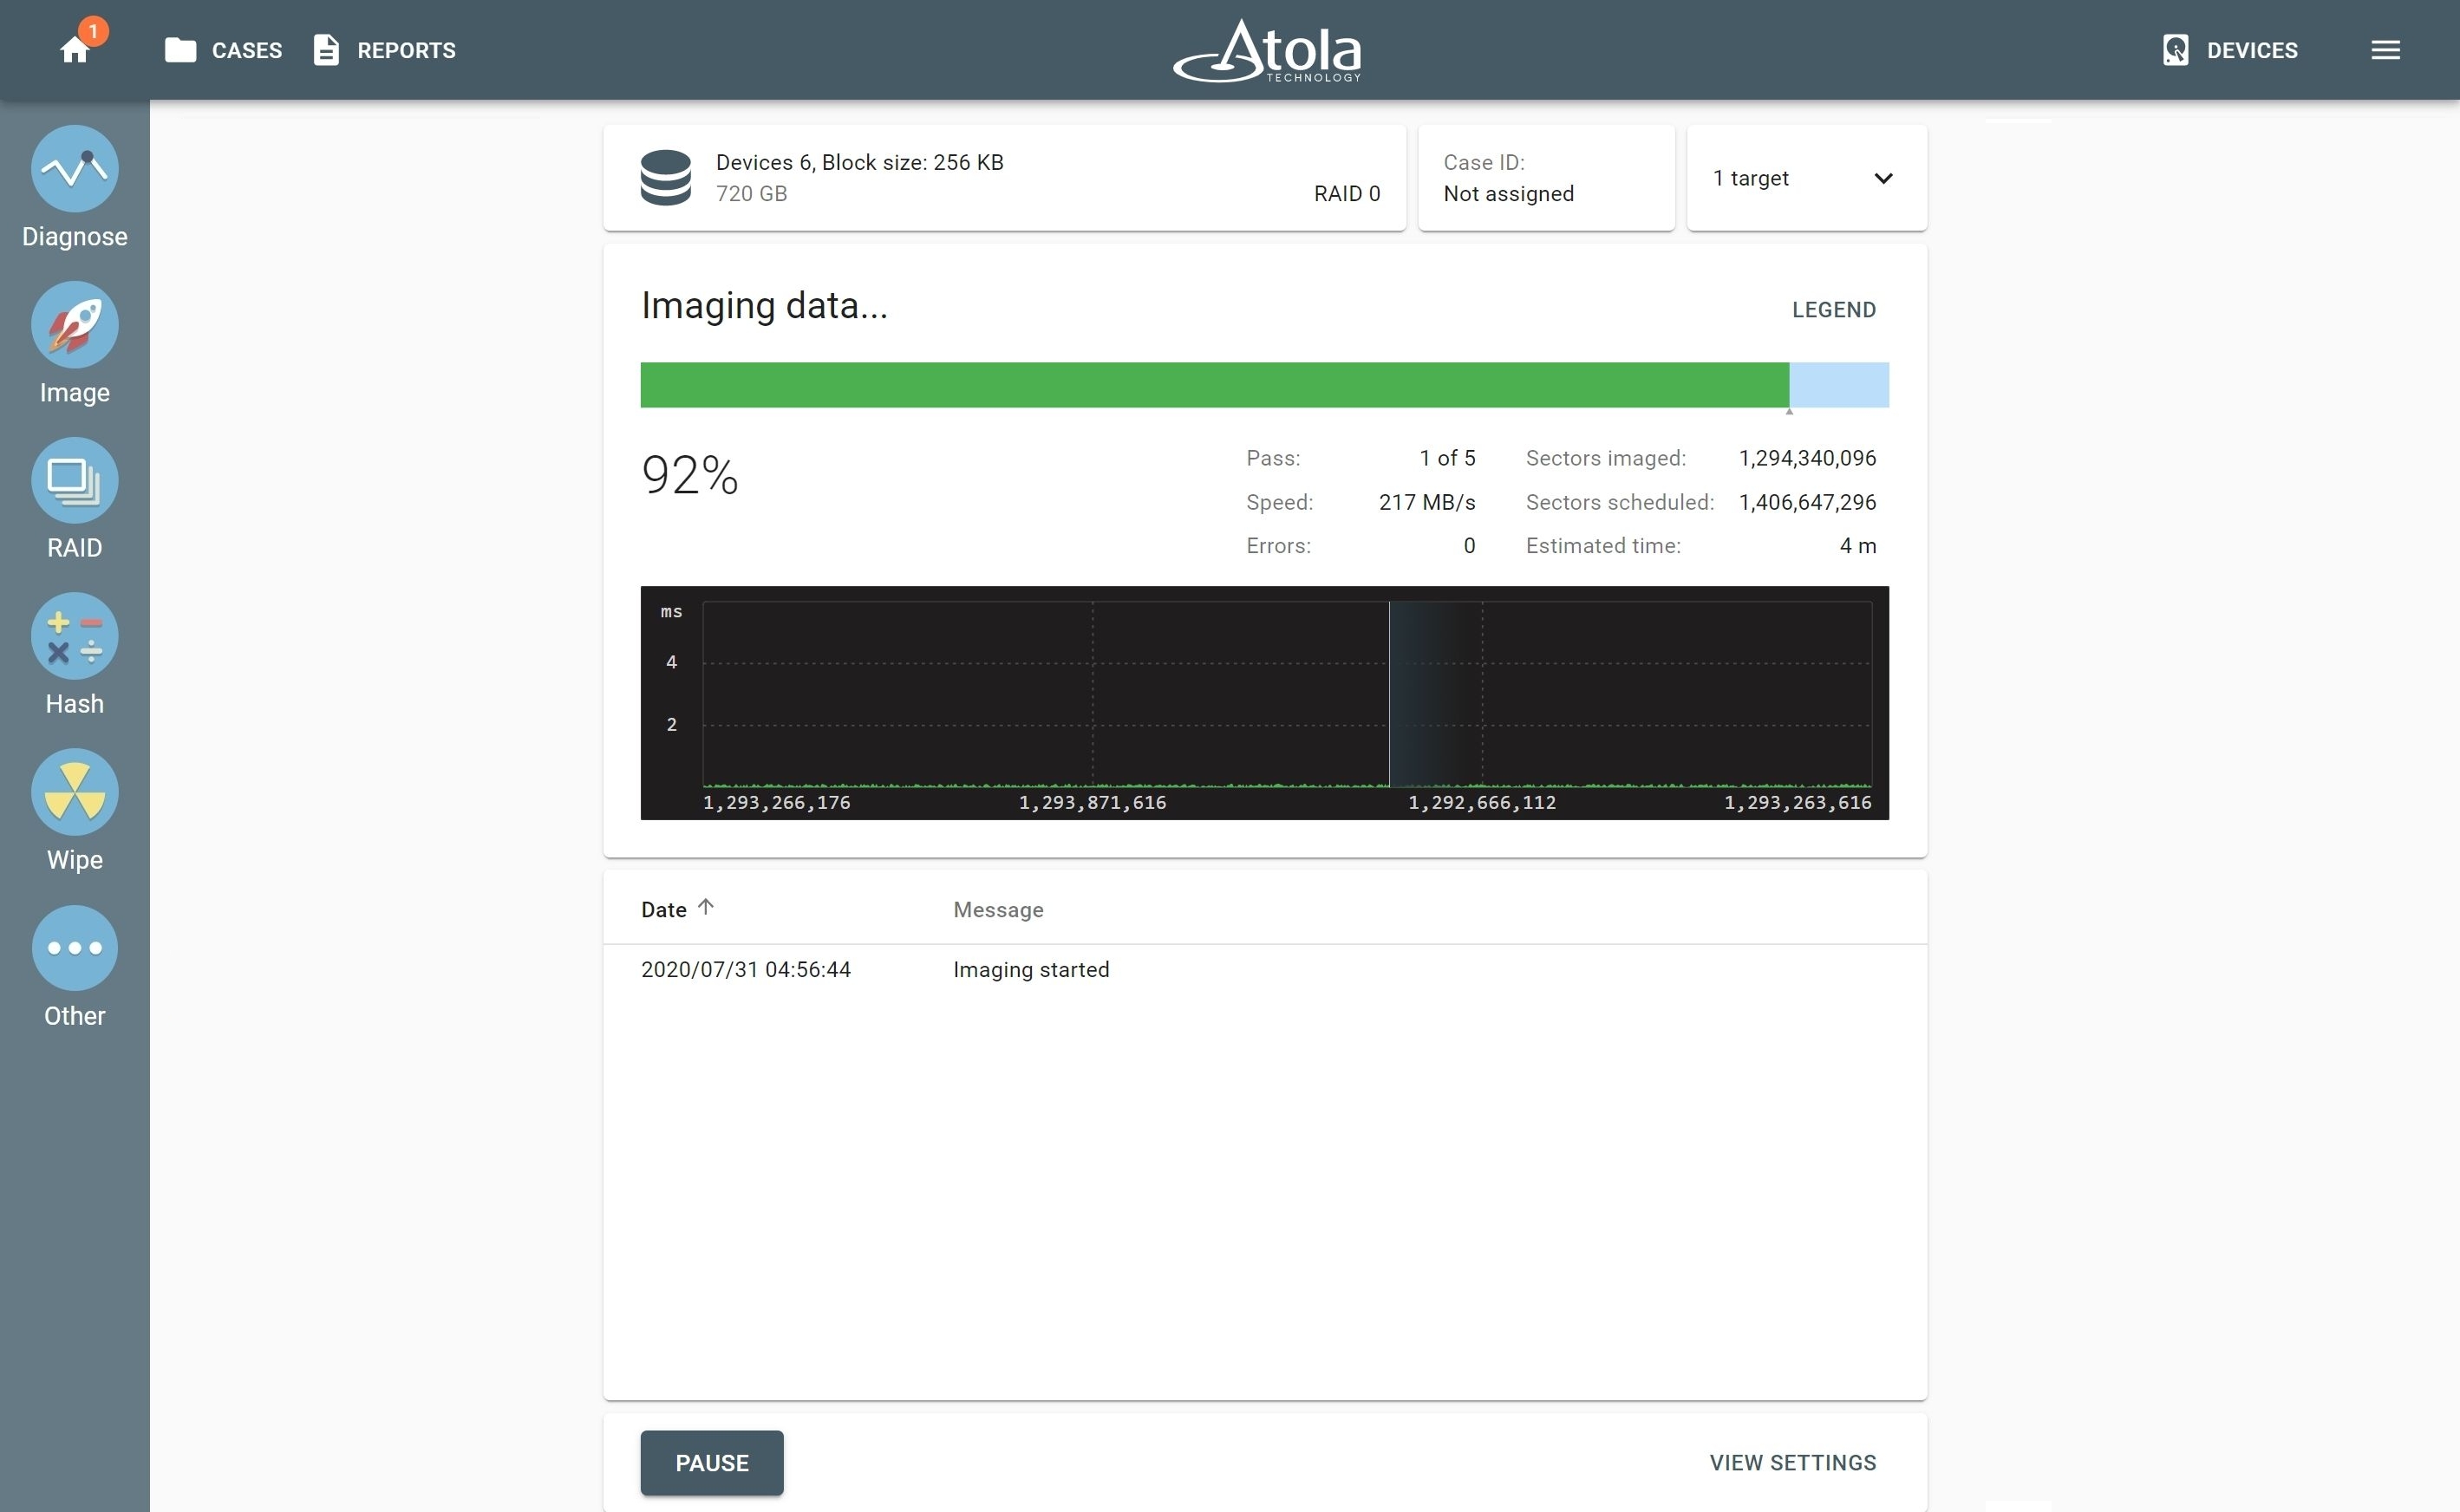
8. Click the Start button to launch your imaging session
Please note that RAID imaging may take longer than ordinary drive-to-drive imaging due to the typically large size of an array. However, to optimize the speed of imaging, you can use a fast target device or a high-speed server.
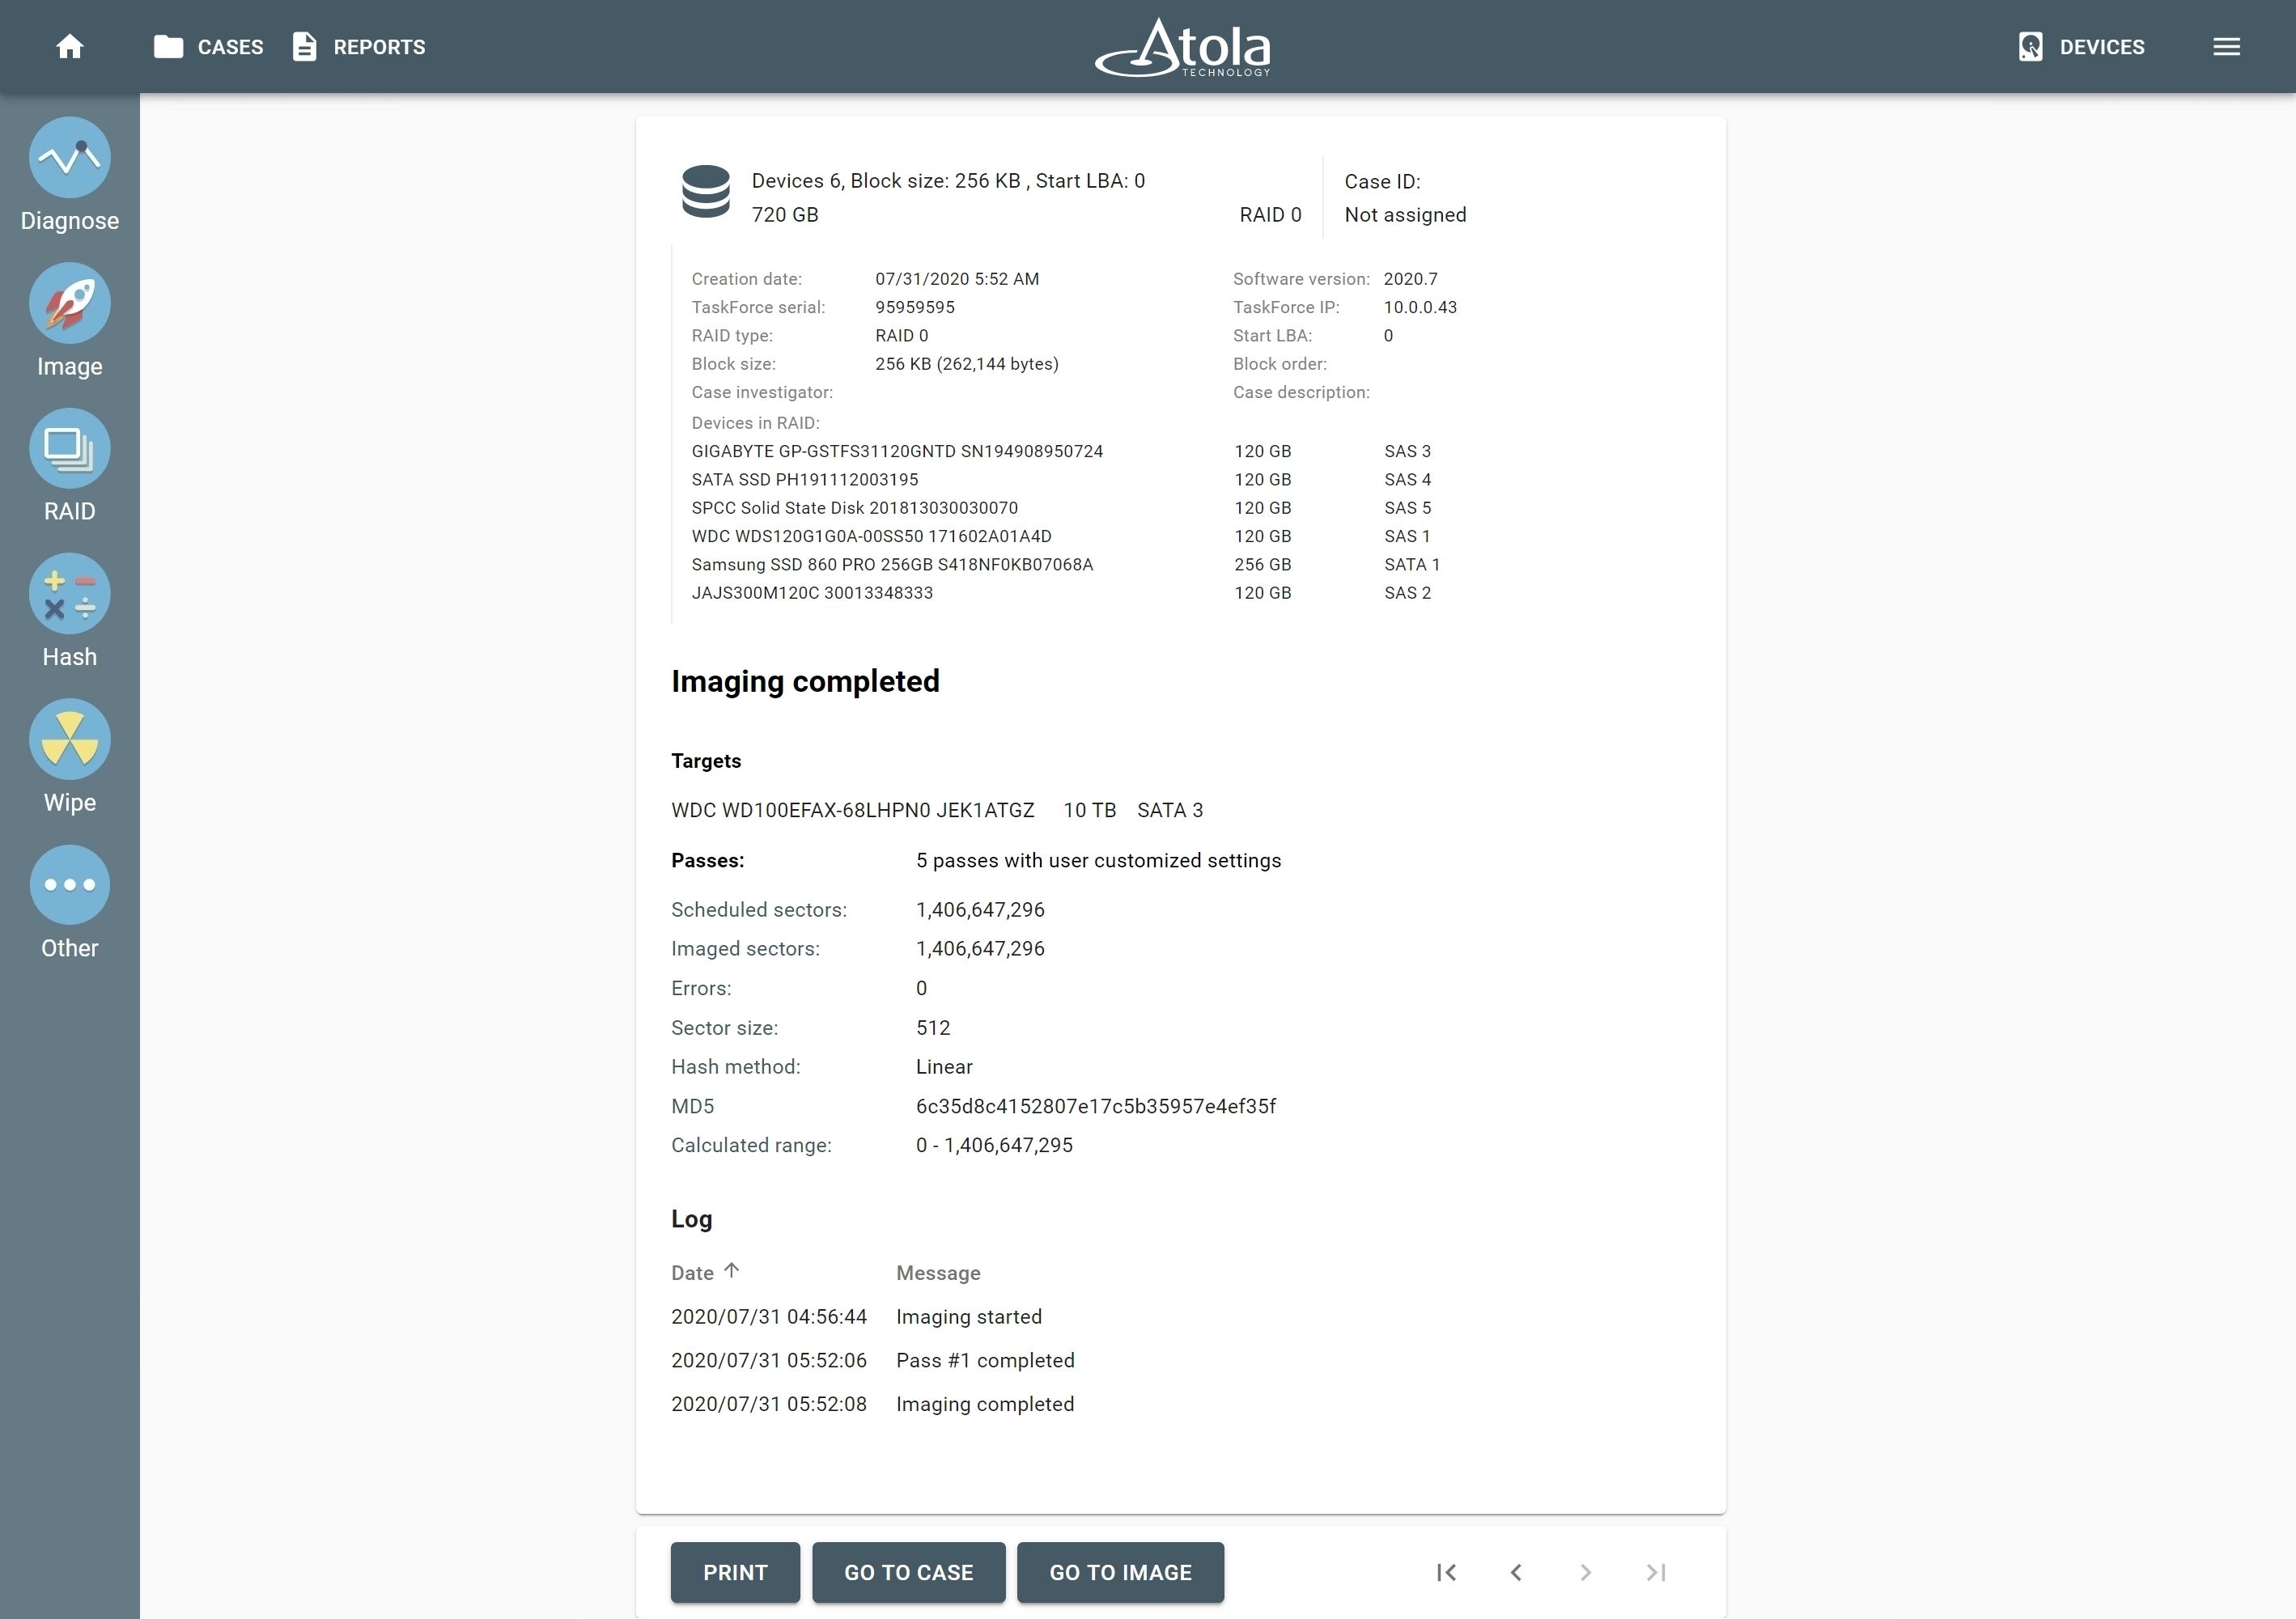
Atola TaskForce automatically generates reports for every session.
Unmount RAID array
Subsequently, you can unmount the RAID array to make the individual drives available for other tasks.
To unmount the assembled RAID, follow these steps:
- Click “Devices” in the top right corner;

2. Scroll down to the bottom of the page and click RAID 0 array
3. Click the Unmount RAID button at the bottom of the page
Now that RAID is unmounted, you can proceed with other sessions, using any of the 6 drives connected to the unit.
***
If you want to learn how to autodetect and image RAID 5 array with Atola TaskForce, read our blog:

- RAID imaging made easy with TaskForce - May 3, 2022
- Image. Anything. Fast.What makes TaskForce the ultimate forensic imager - February 9, 2022
- RAID configuration detection in Atola TaskForce - April 7, 2021
Olga Milishenko
Olga believes that marketing is about letting the target audience fall in love with your product. She takes pleasure in catching the coolest features of Atola imagers with her camera.