E01 file format
To image a source evidence drive to an E01 file, you have to create a new target file.
Creating a new E01 file
- Click Image in the left-side menu
- Select the source evidence drive in Select source device panel
- Click Select File in Select target devices panel
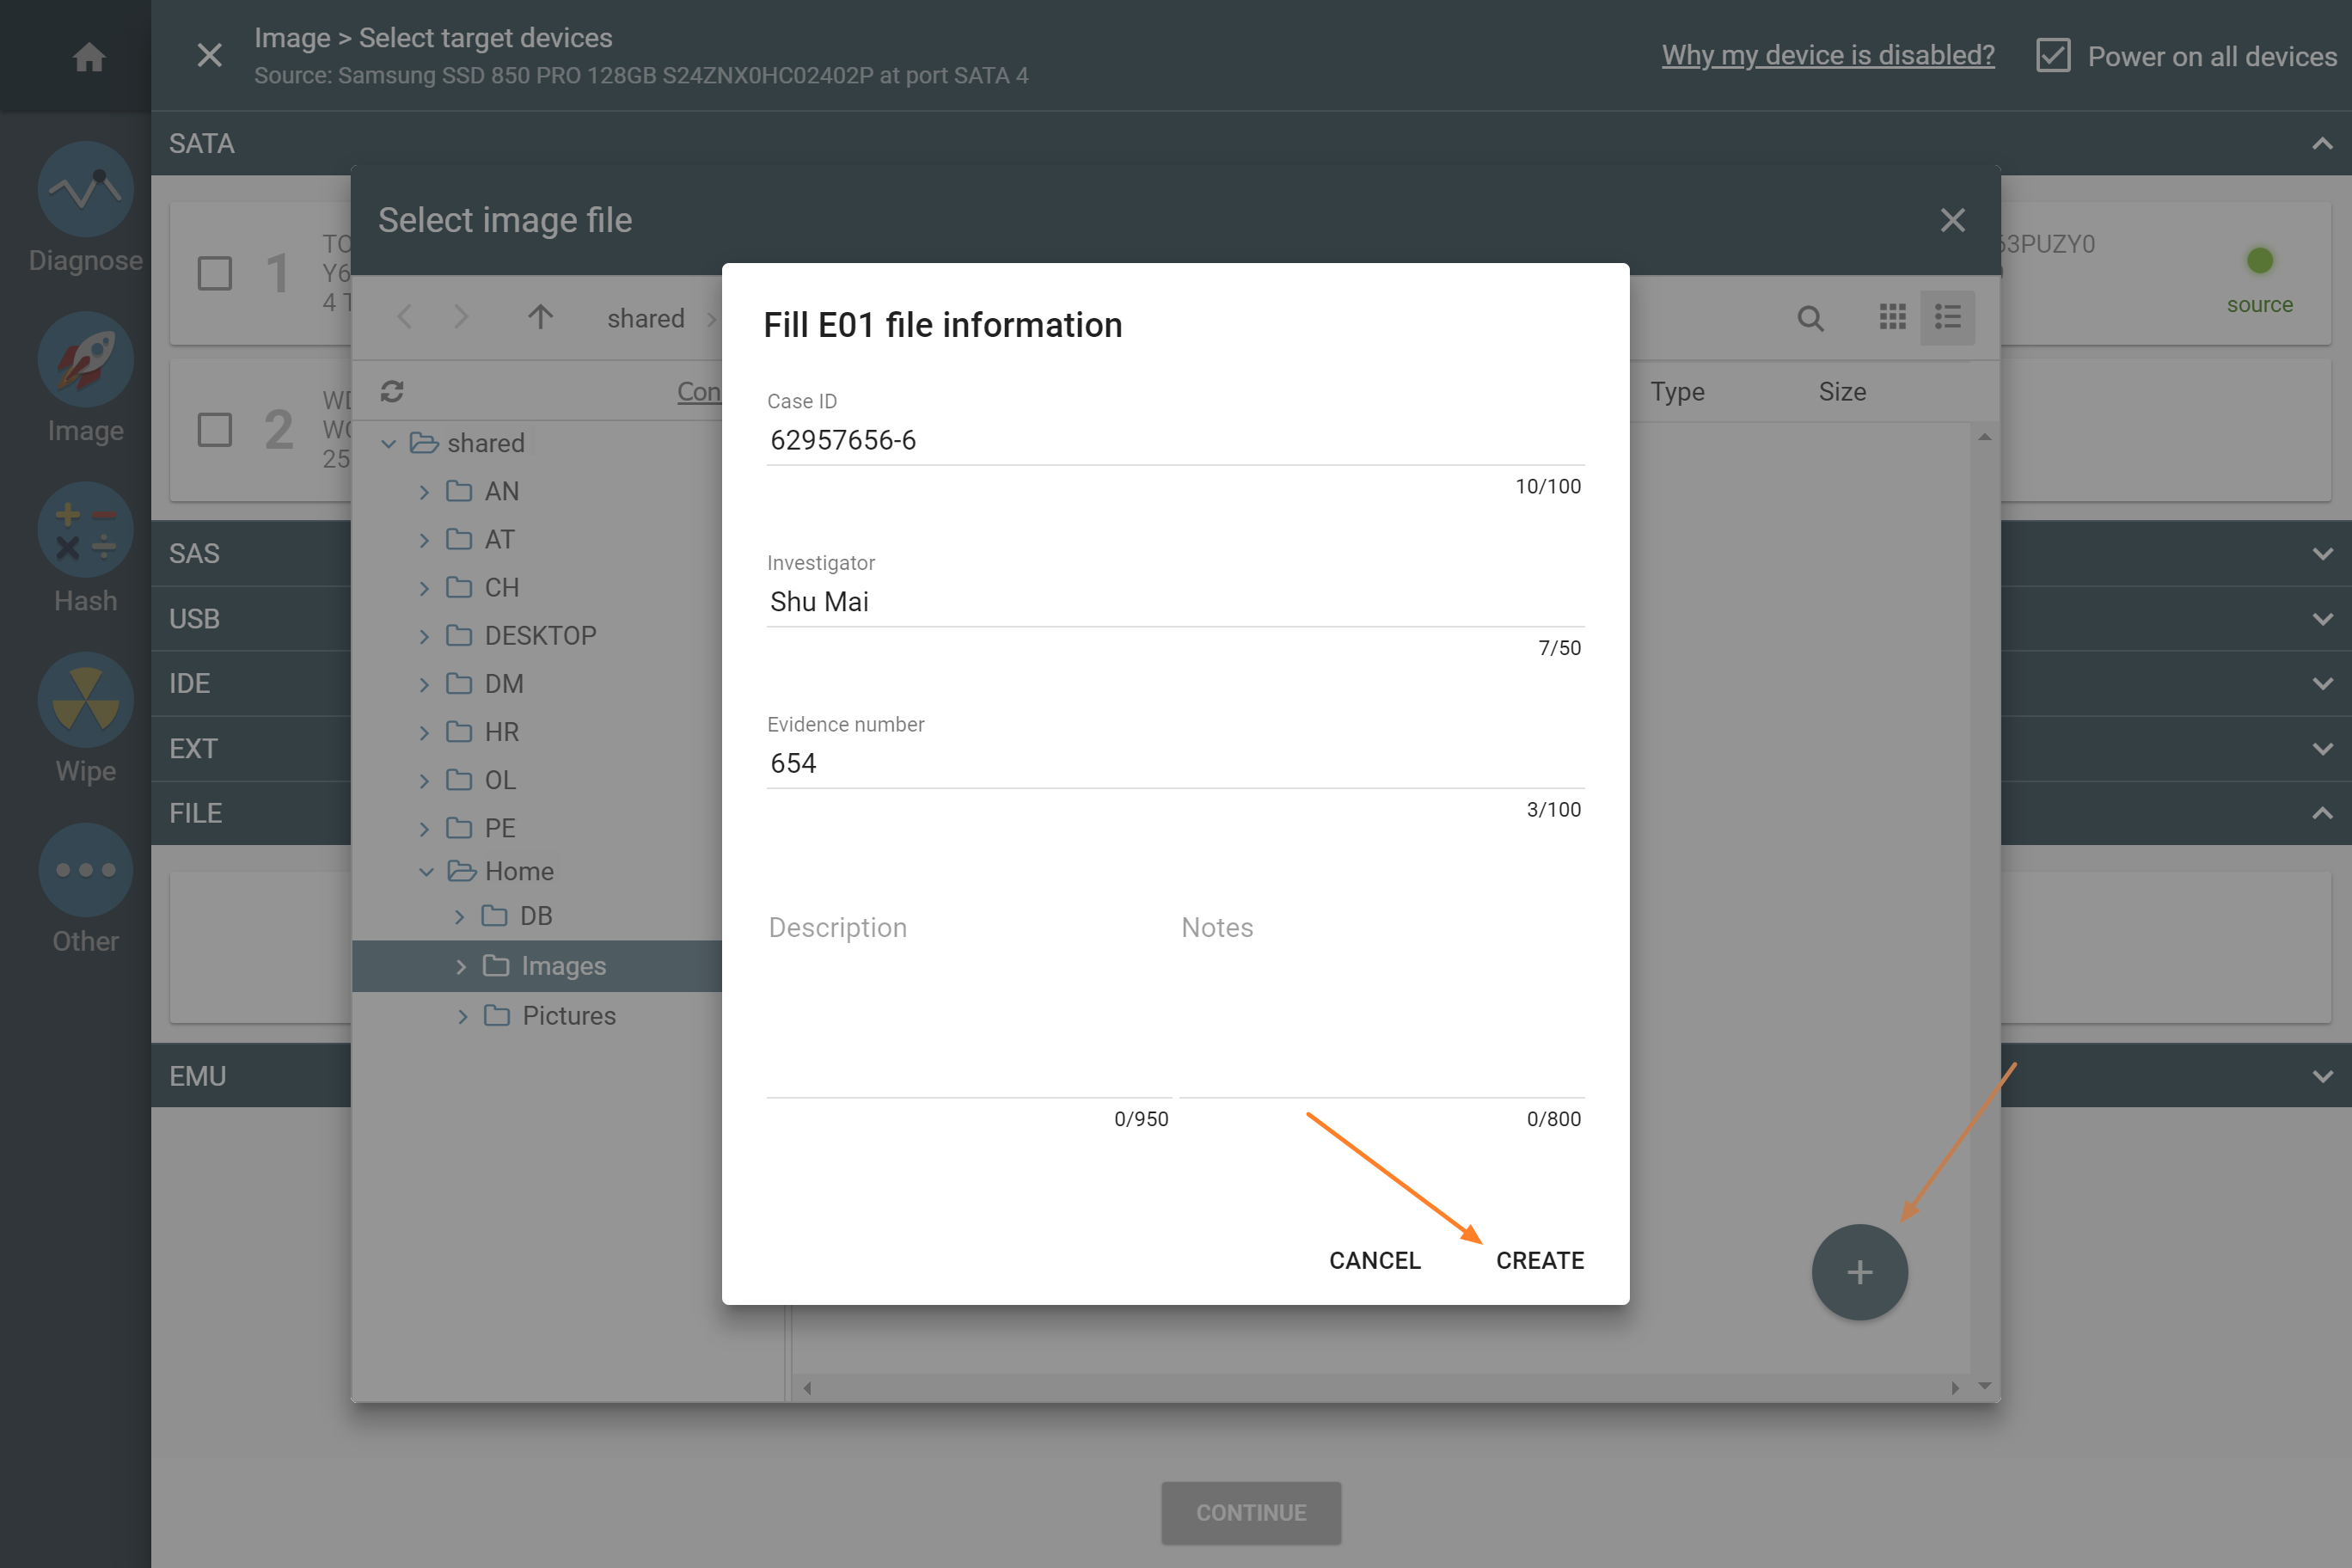
- In the file
selector , find the folder to store the image and click the plus (+) button in the bottom right corner - In the pop-window, select E01 file type and click Create button
- Fill in E01 file information and click Create button.
- Click Continue button
Enable dual-hash and start imaging
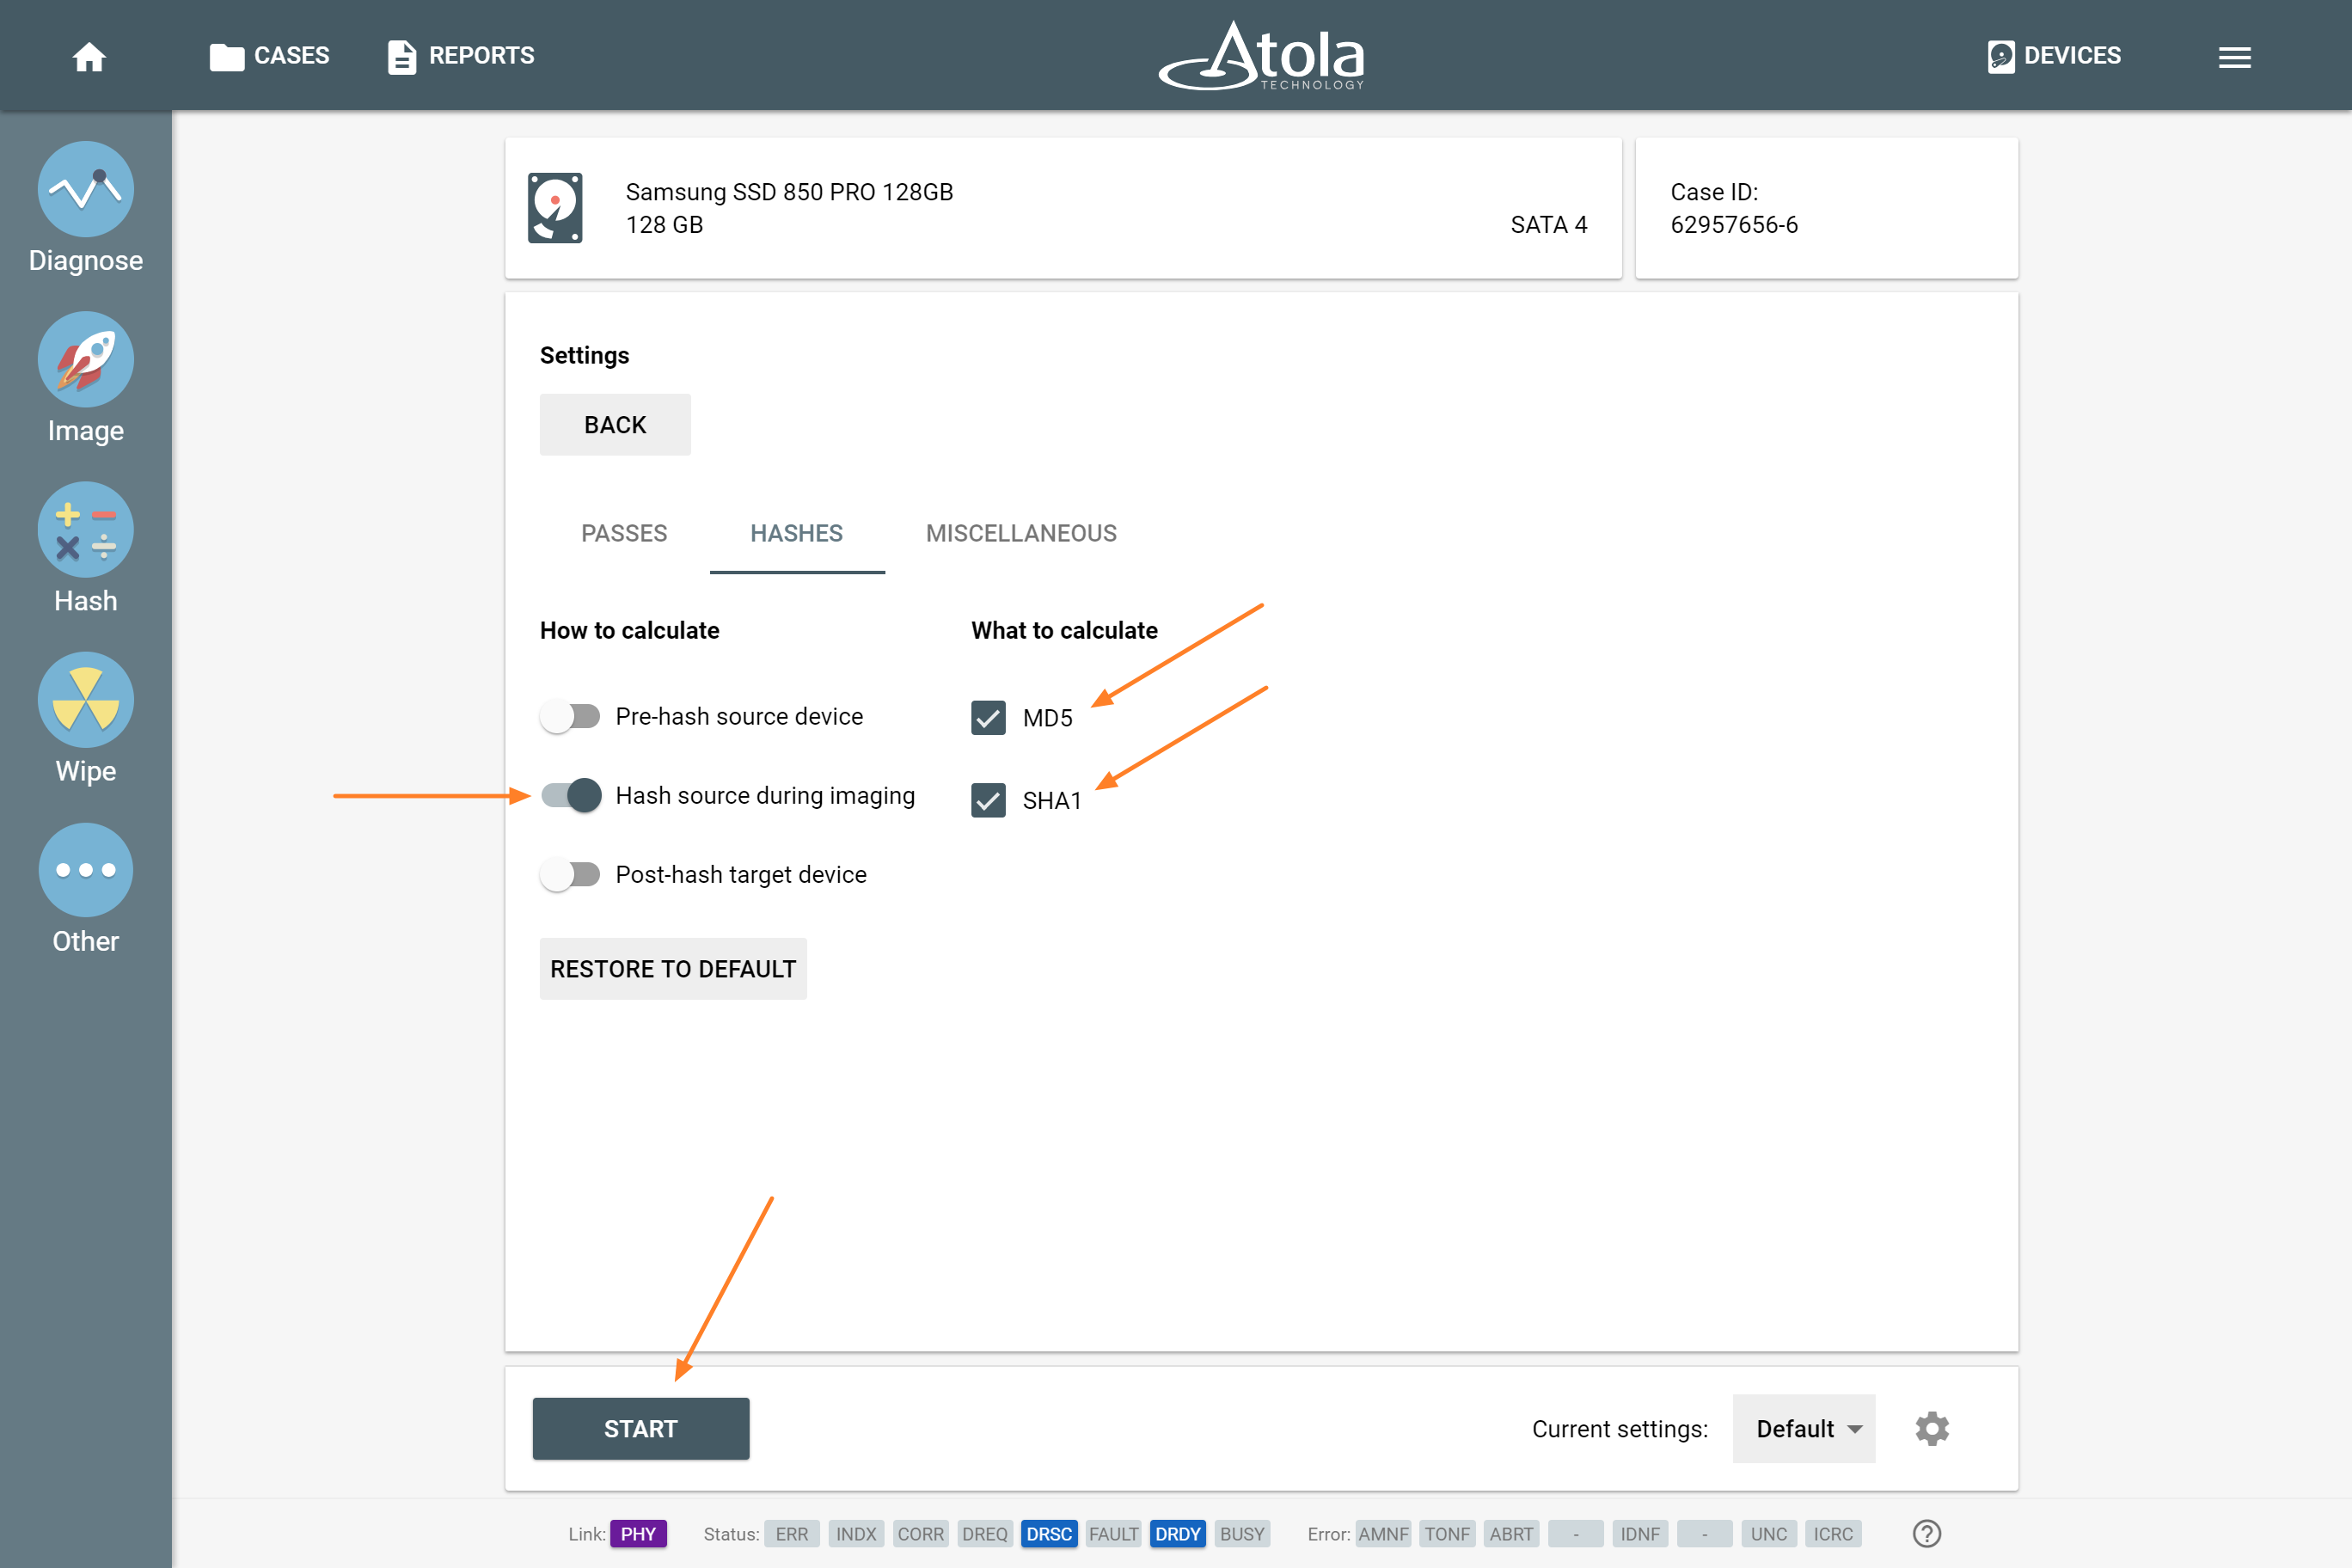
- Once you have selected the source drive and created the target file, you end up in Settings summary page. Click
Change button to adjust the imaging settings. - In the Hashes tab make sure that Hash source during imaging is selected, also select both MD5 and SHA1 hash types.
- Click
Start button to proceed with imaging.
The report and the E01 file
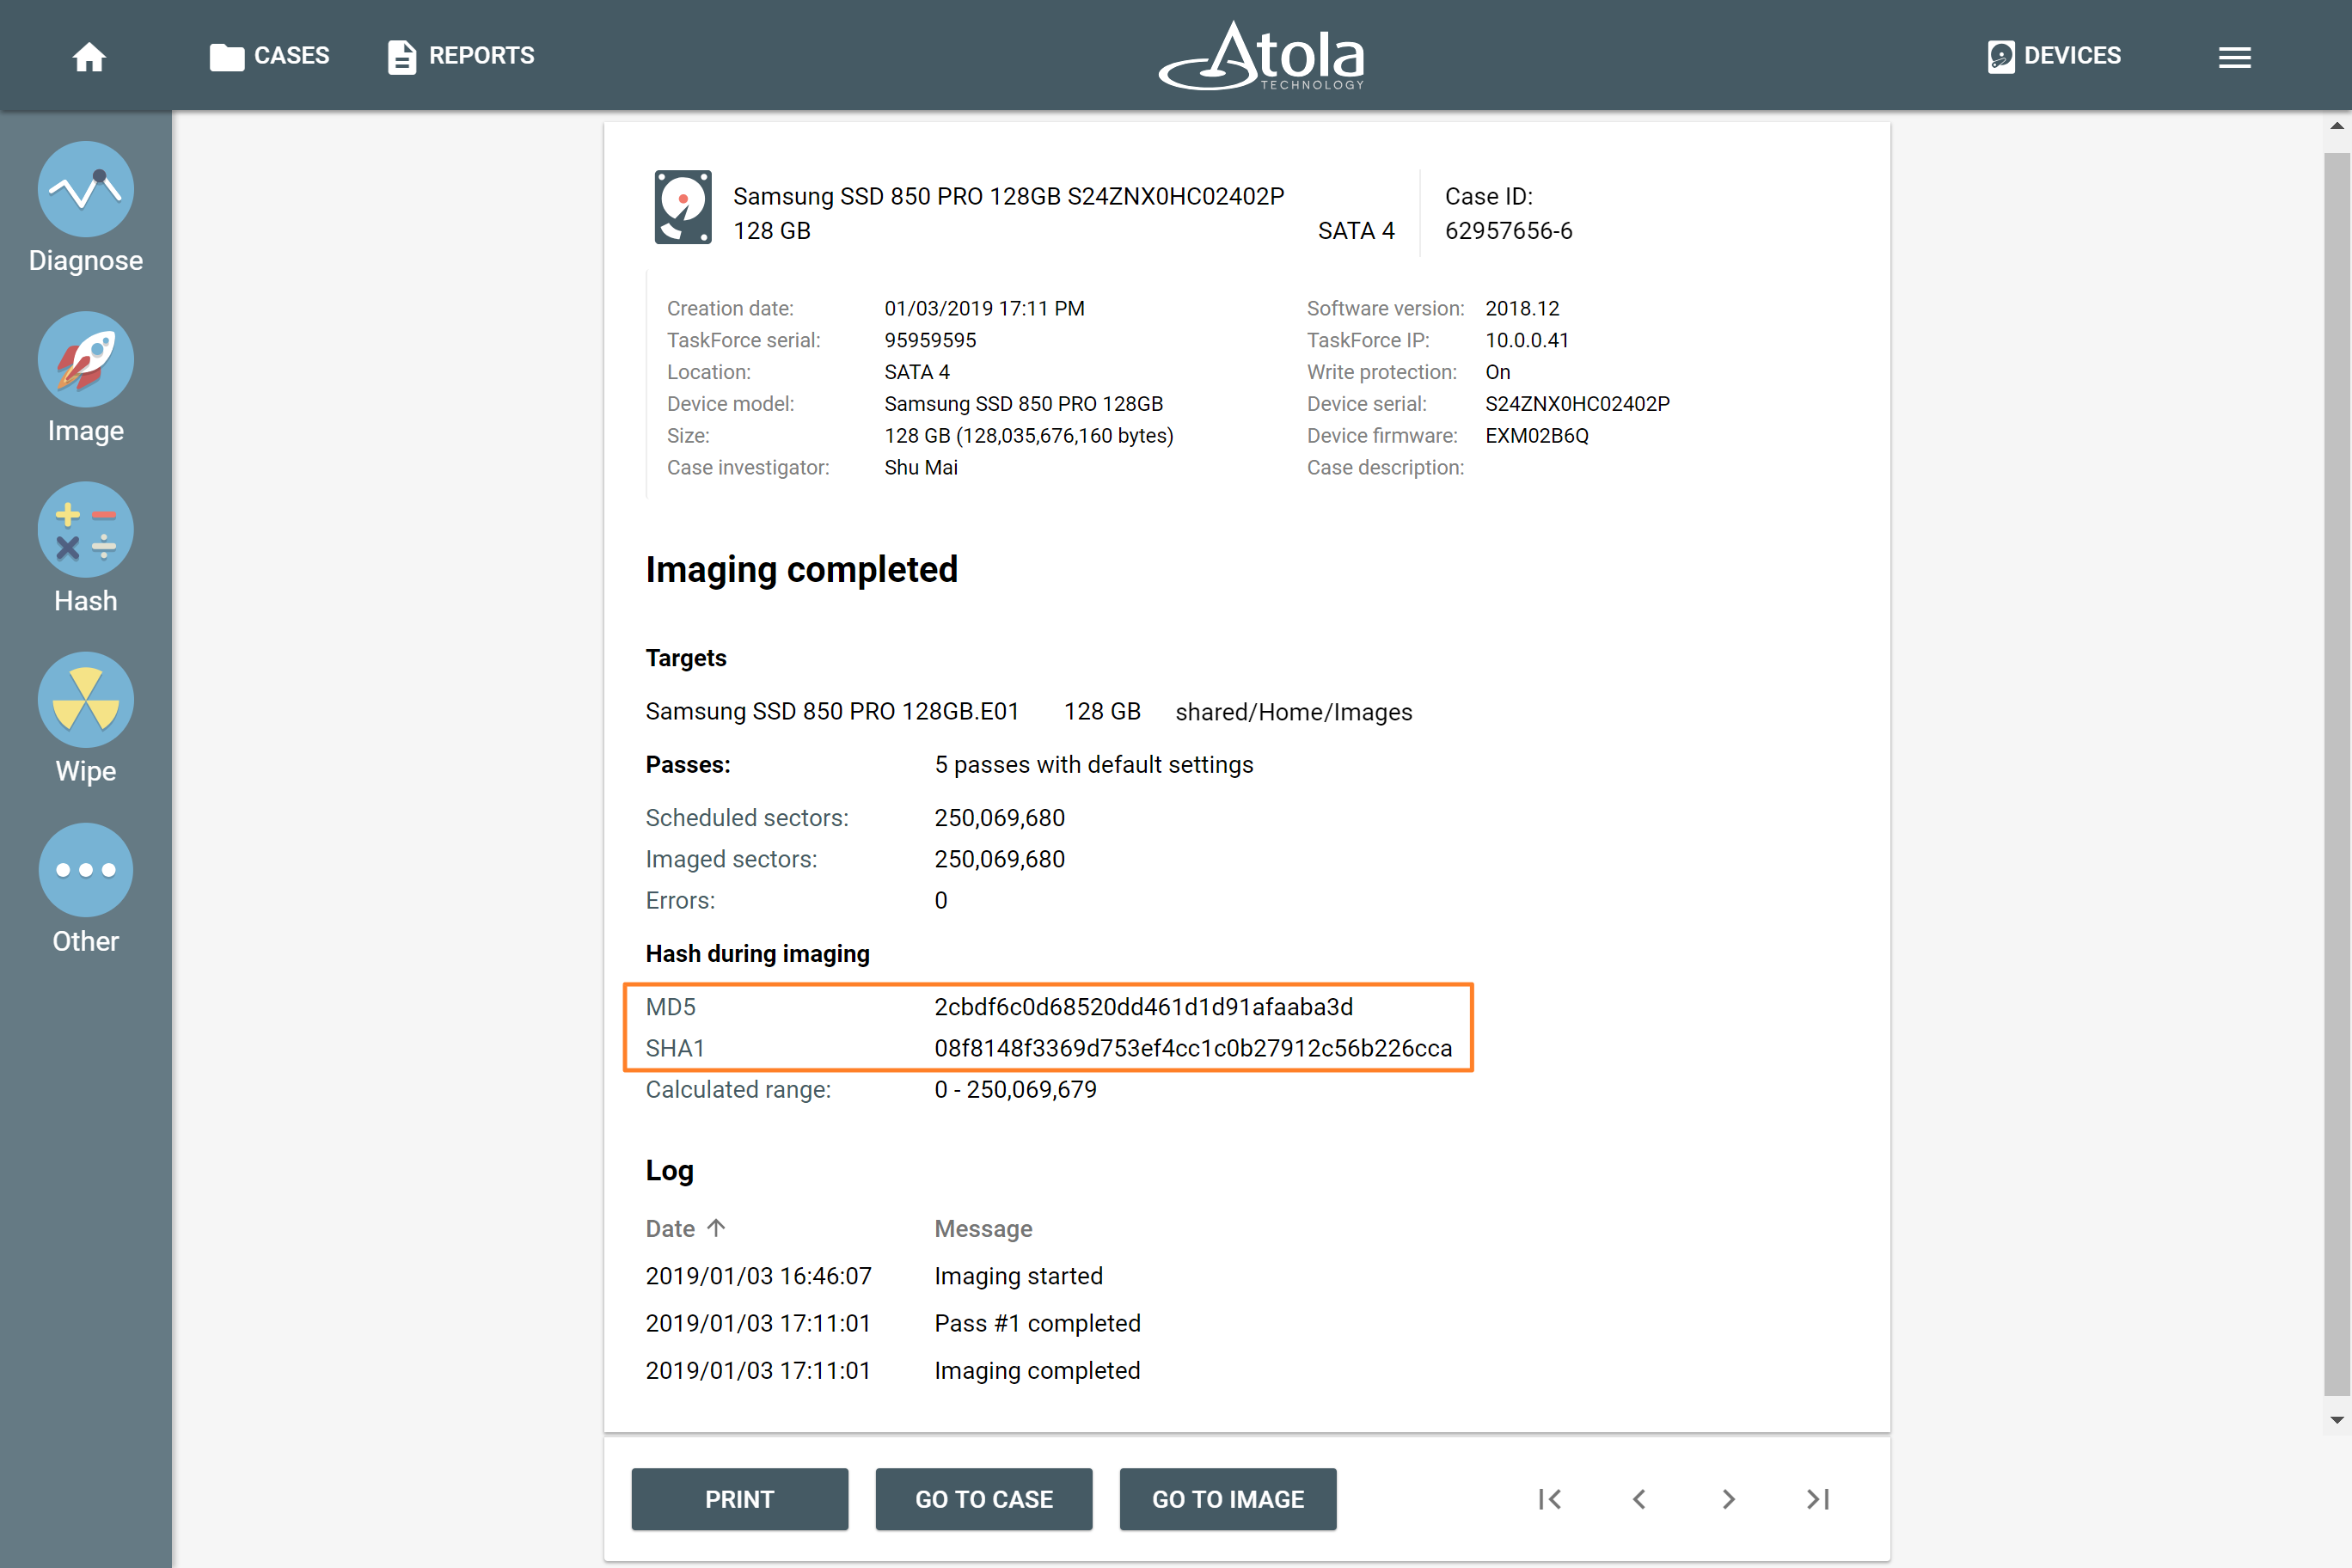
Upon completion of imaging, you can see both MD5 and SHA1 hash values indicated in the Imaging completed report.
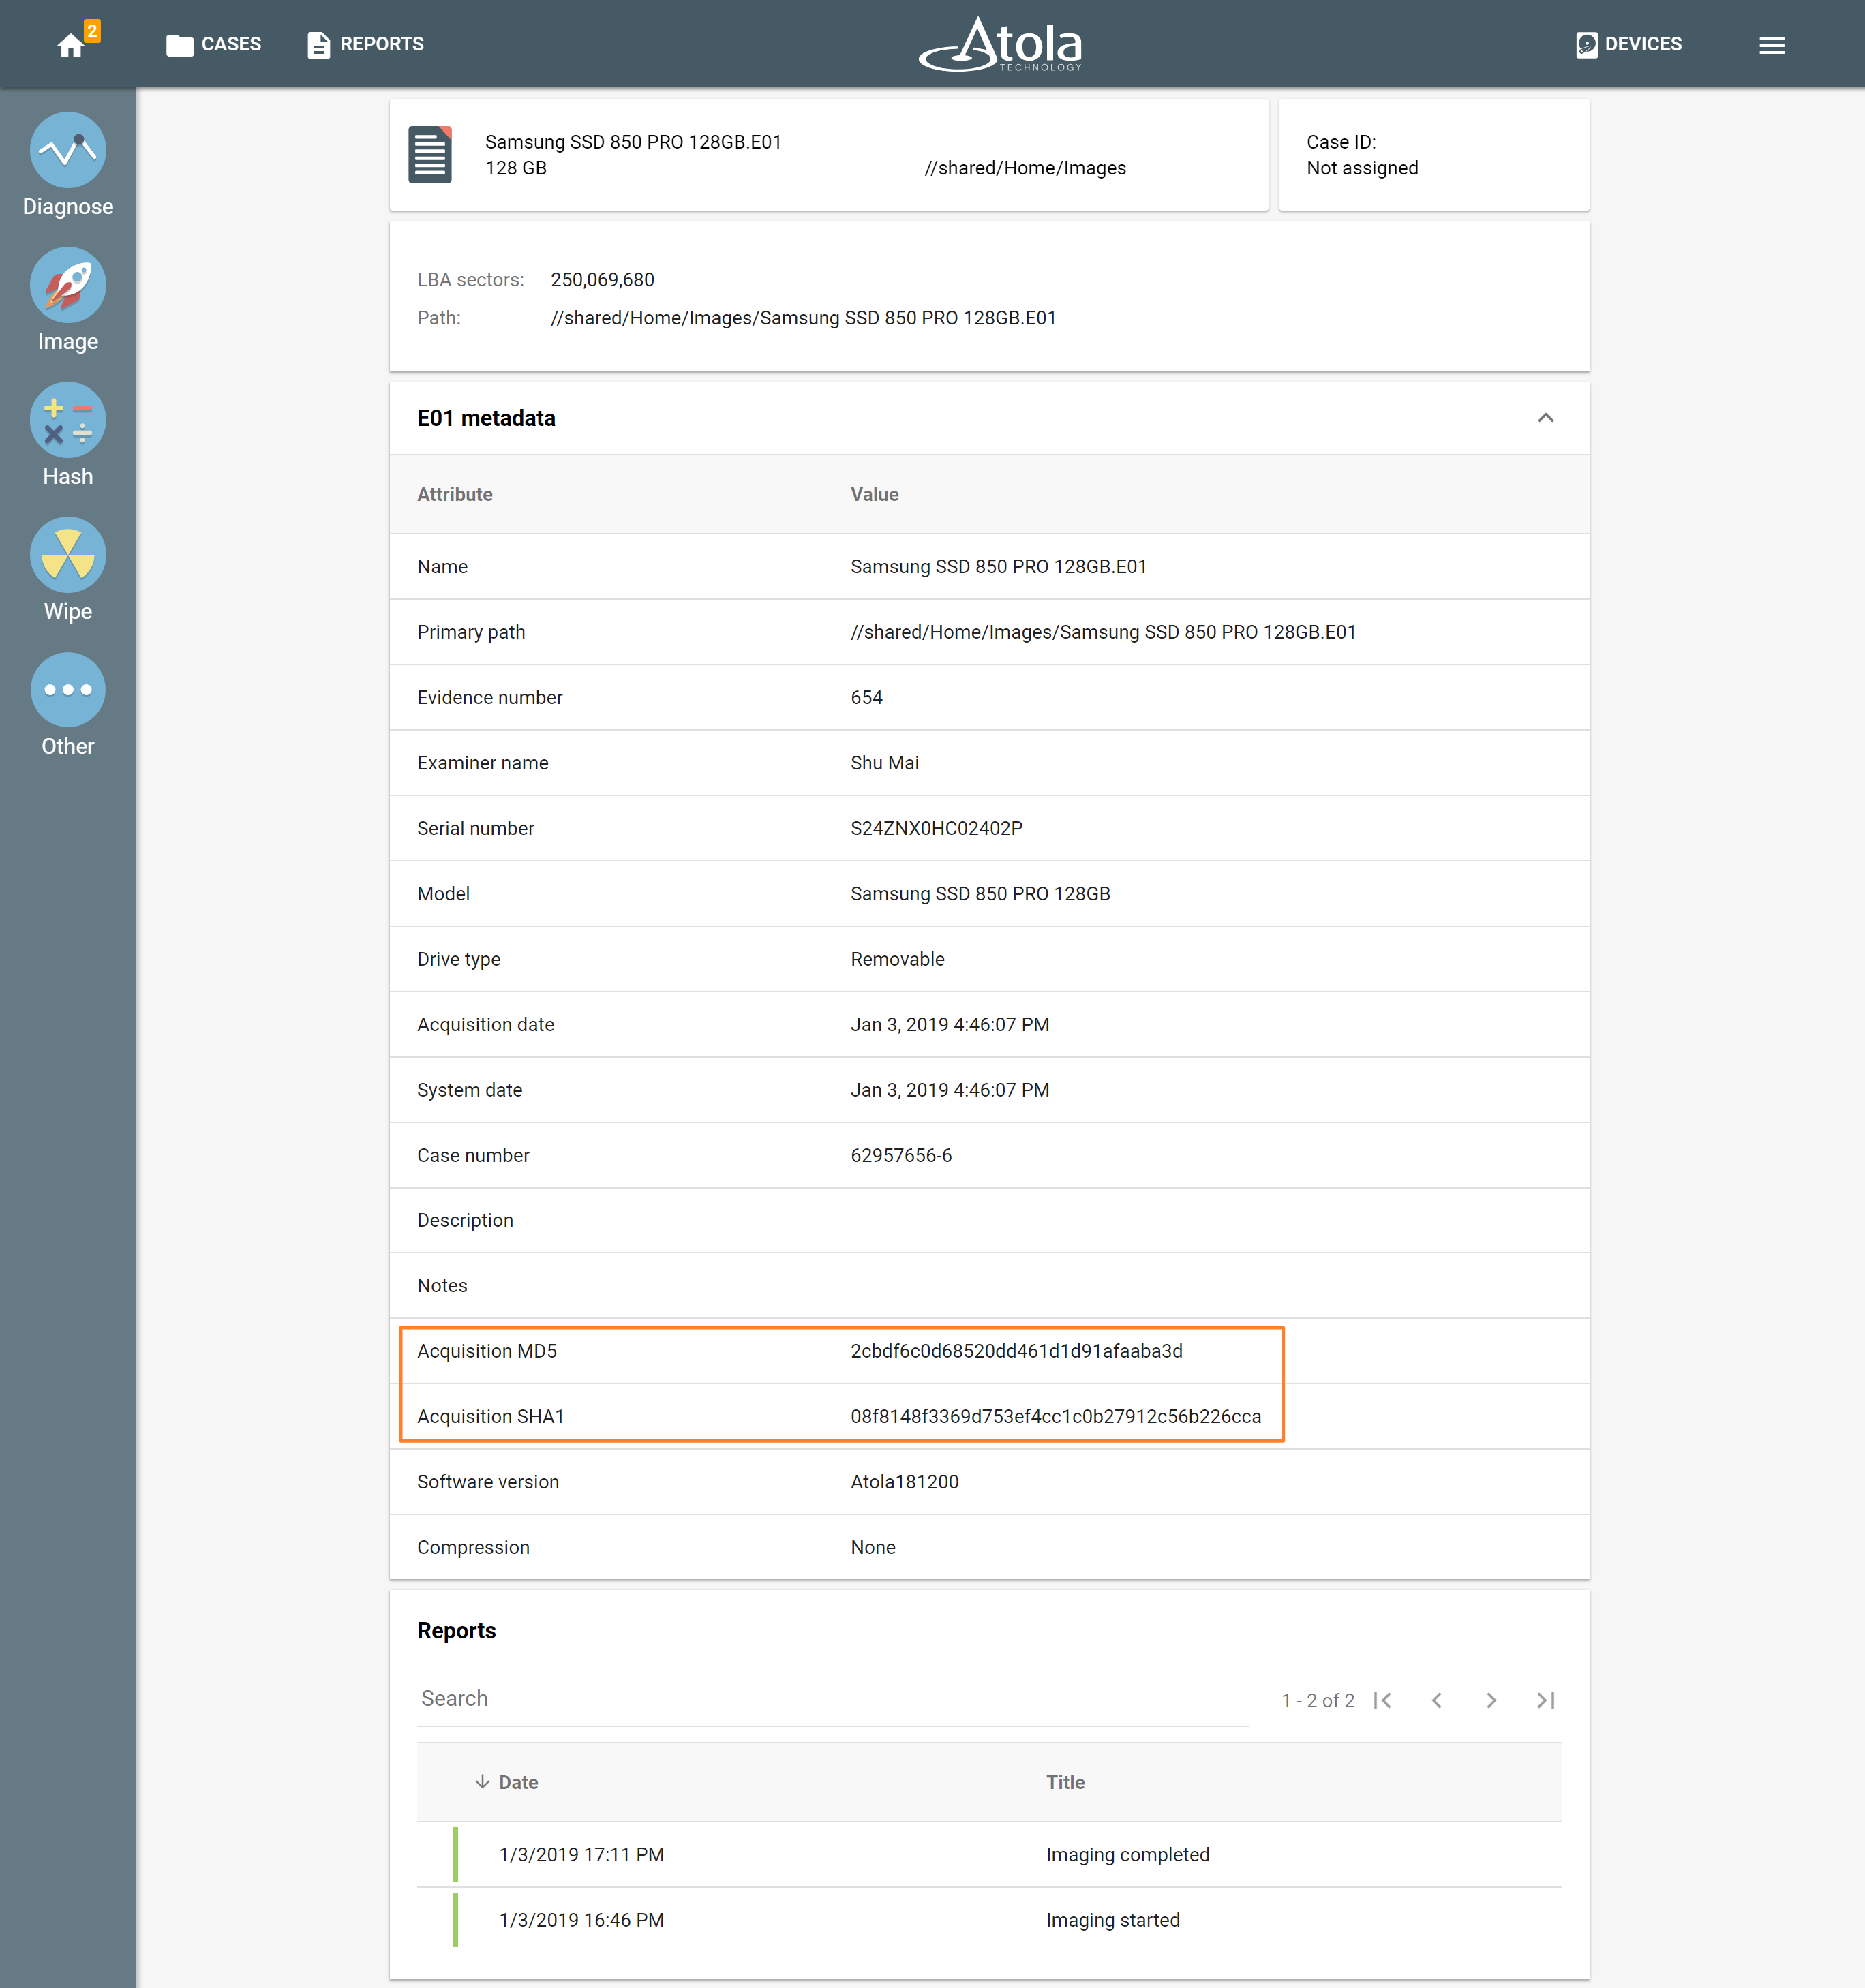
It is also possible to look up the information of the created E01 file. To do that, perform the following actions:
- Open the Devices menu by clicking the Devices button in the upper right corner.
- In the File section, you can see the recently created files.
- Click the corresponding E01 file to view its metadata.
The MD5 and SHA hash values will be there.
- Top digital forensic conferences in 2025 - January 7, 2025
- 2024. Year in Review - January 1, 2025
- 2023. Year in Review - December 31, 2023
Yulia Samoteykina
Director of Marketing Yulia believes that with a product that is exceptionally good at solving tasks of forensic experts, marketing is about explaining its capabilities to the users. Yulia regularly represents Atola at DFIR events, holds free workshops and webinars about Atola imagers functionality and advocates on the users' behalf to ensure that Atola keeps on adding value and raising the bar for the industry.
