Last November Atola Technology team presented a new hashing method called Segmented hashing. Unlike the conventional linear hashing, segmented hashing produces not a single hash, but a list of hashes of corresponding LBA ranges of the image saved into a CSV file in this format:
Hash, start LBA, end LBA
By validating all hashes in the list, you can prove that the entire image has not been modified. For more information about this hashing method, please follow this link: Segmented Hashing.
While this method of hashing has a number of benefits for forensic specialists, among its strongest advantages is its applicability to damaged drives.
For one, this non-linear hashing method allows calculating hashes of the good areas of evidence media, while bad areas that are impossible to read and image, are left out of the calculation.
Secondly, if your acquired evidence image is damaged at some point in the future, with the regular linear hashes you will get a hash mismatch upon verification, and the entire image becomes useless, whereas with segmented hashes only the hash of the damaged segment will become invalid. For example, in the case of a 4TB hard drive, if the default 4GB segment size is applied, one invalid hash will account for only 0.1% of the drive, while the remaining 99.9% of hashes can still be verified.
Verifying segmented hashes
For instance, you have imaged a source drive and calculated its segmented hashes, the CSV file is stored on your computer. Now let’s simulate a change of the evidence image to see how Segmented hashing helps us identify the areas, whose integrity has not been compromised.
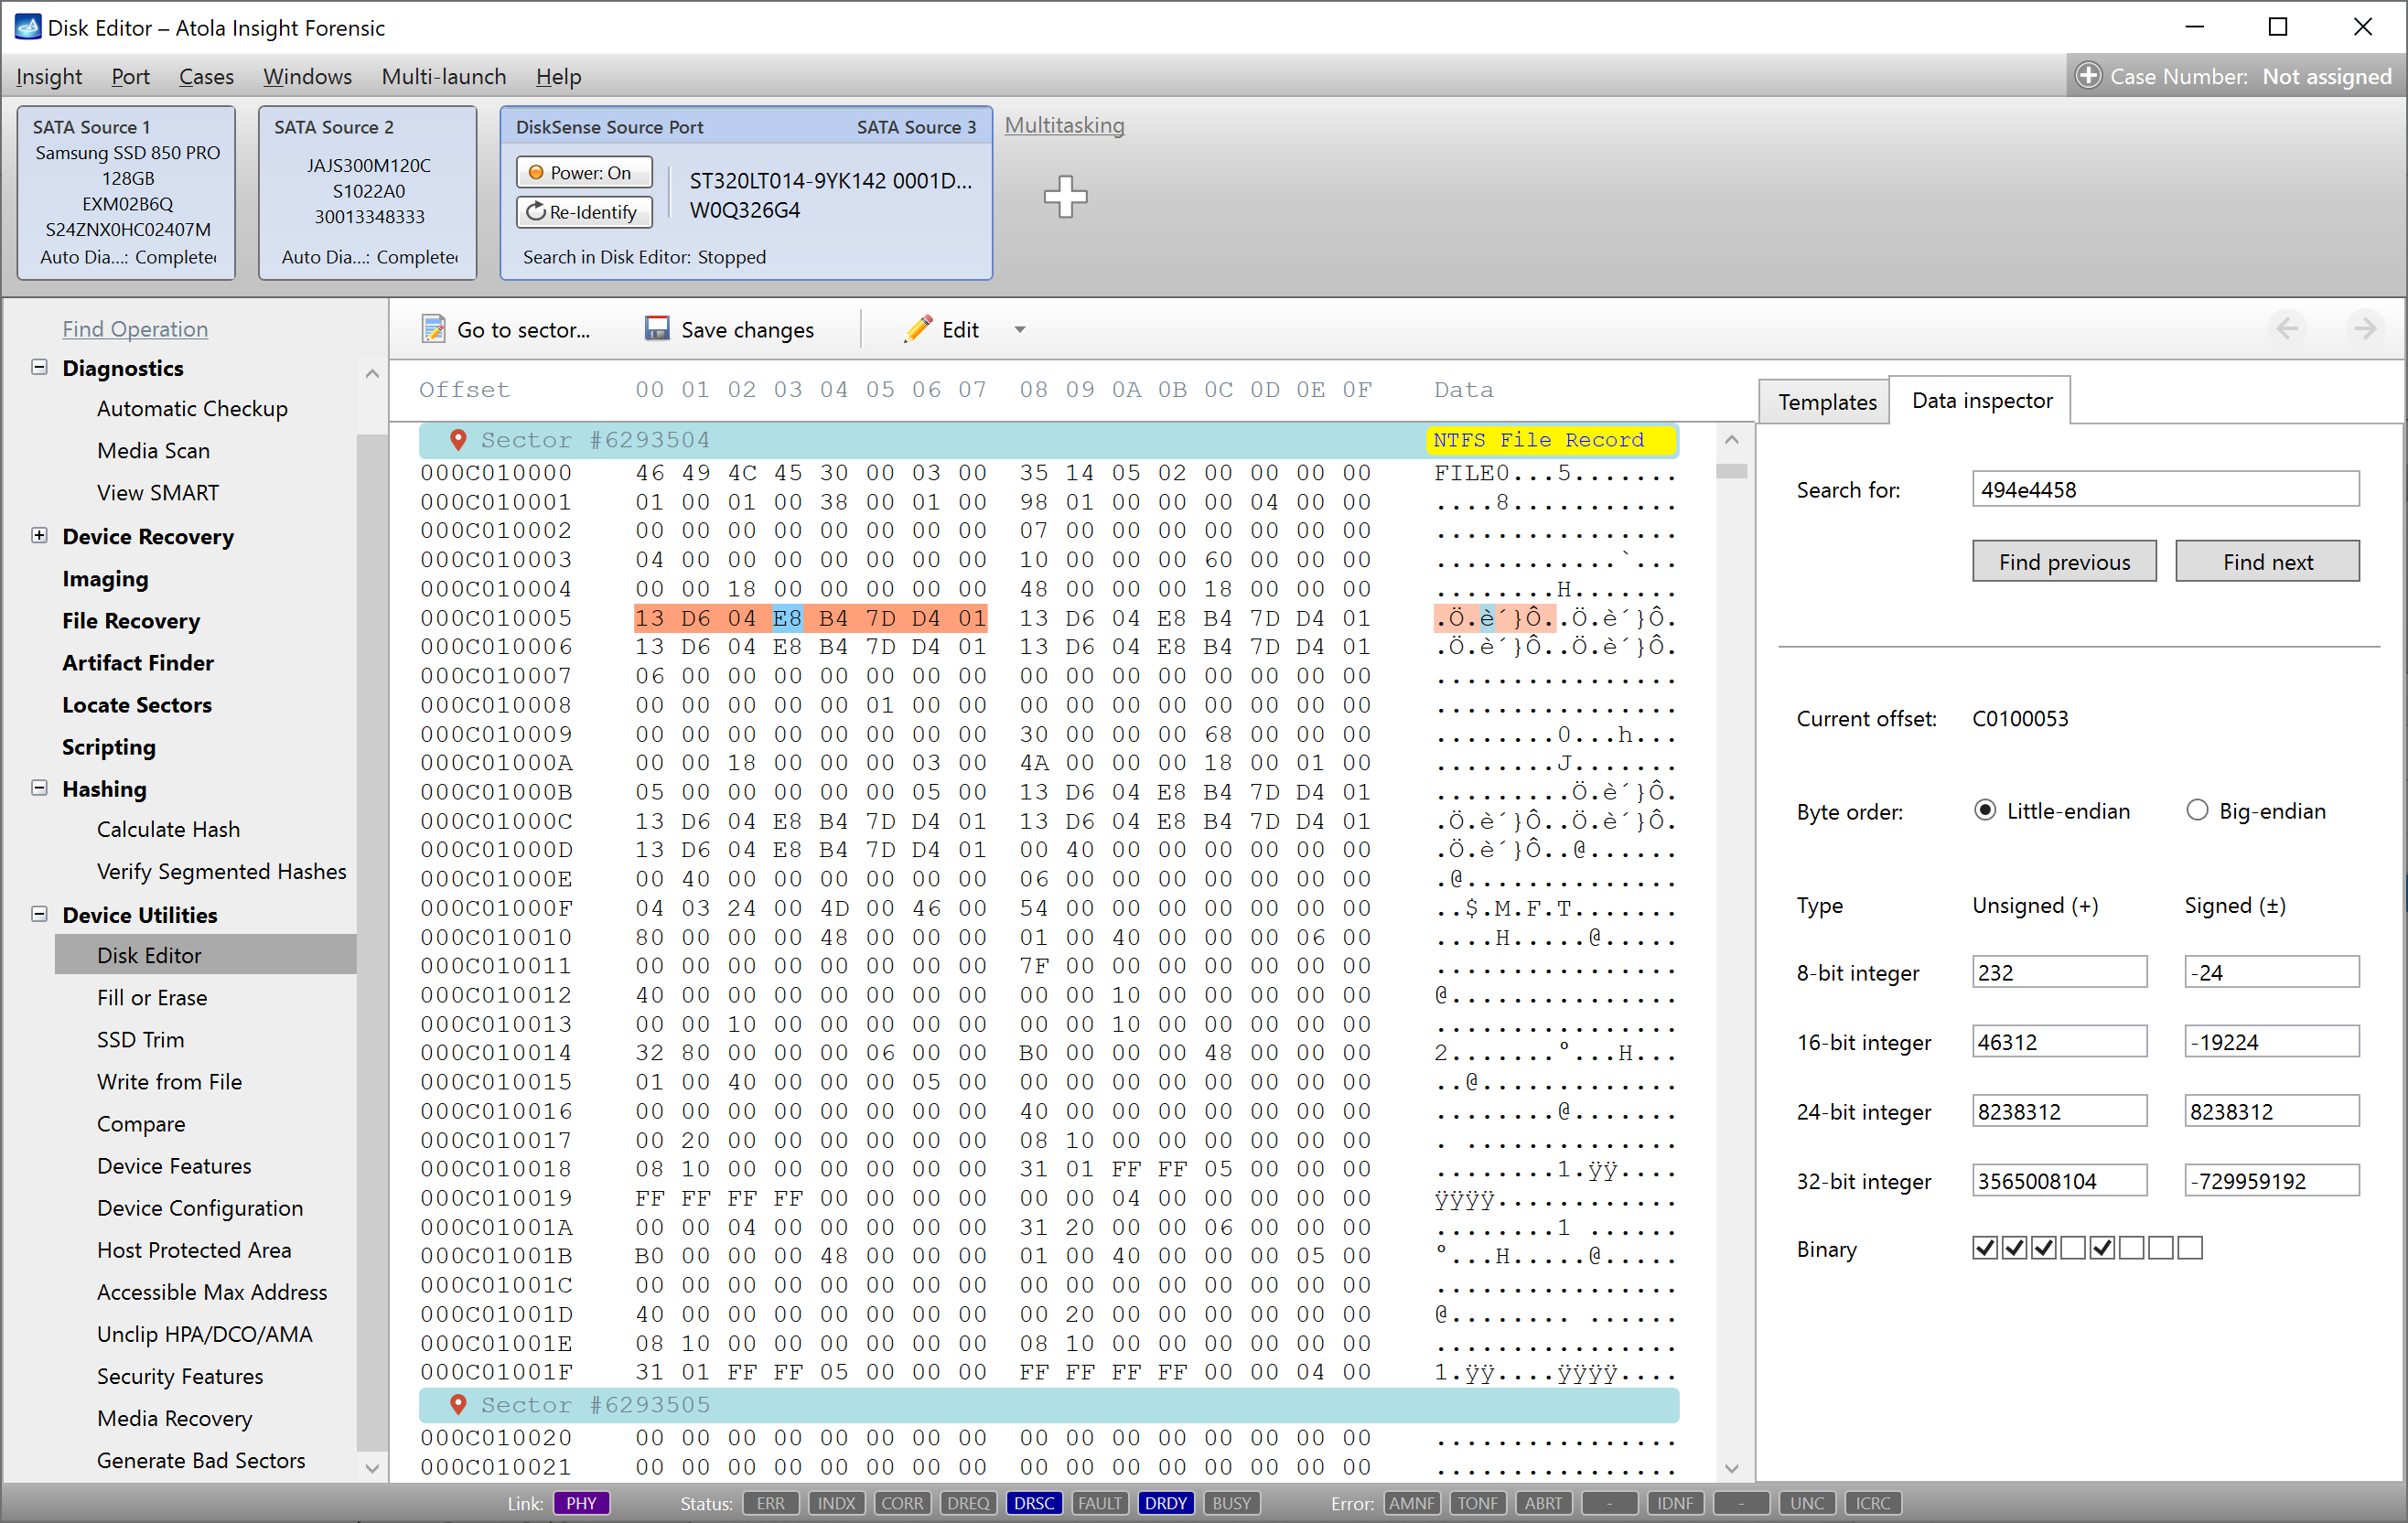
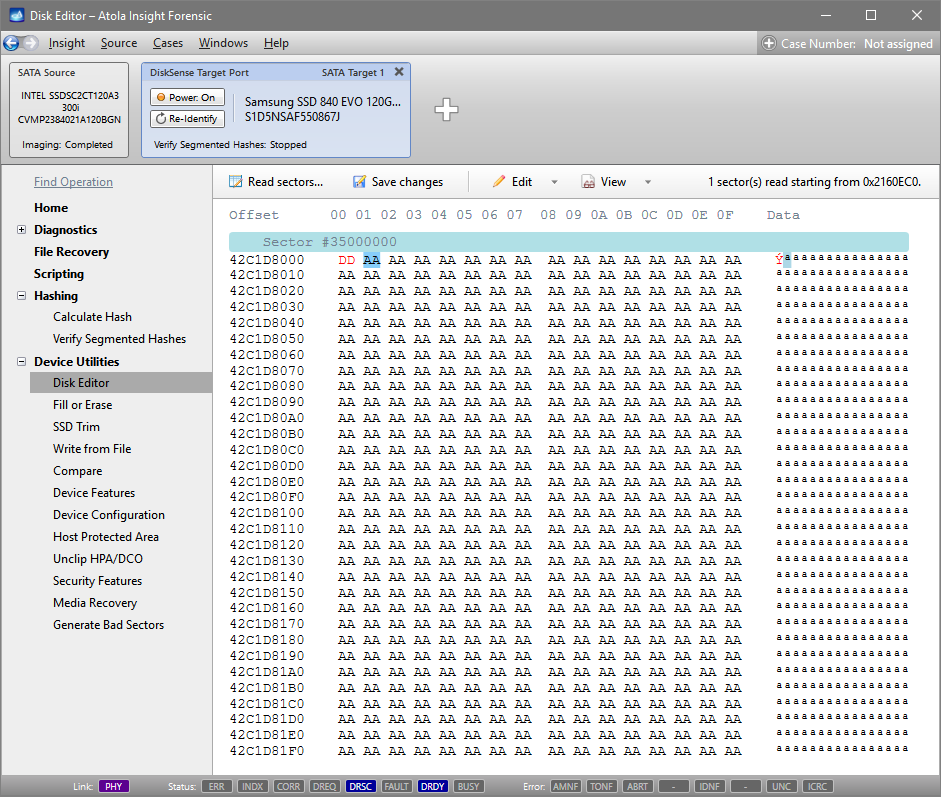
Step 1. Select the target image in the top Port bar. In the Disk Editor subcategory of Device Utilities category of the left-side menu, we can open any sector of the drive. There we can change one byte in sector #35,000,000.
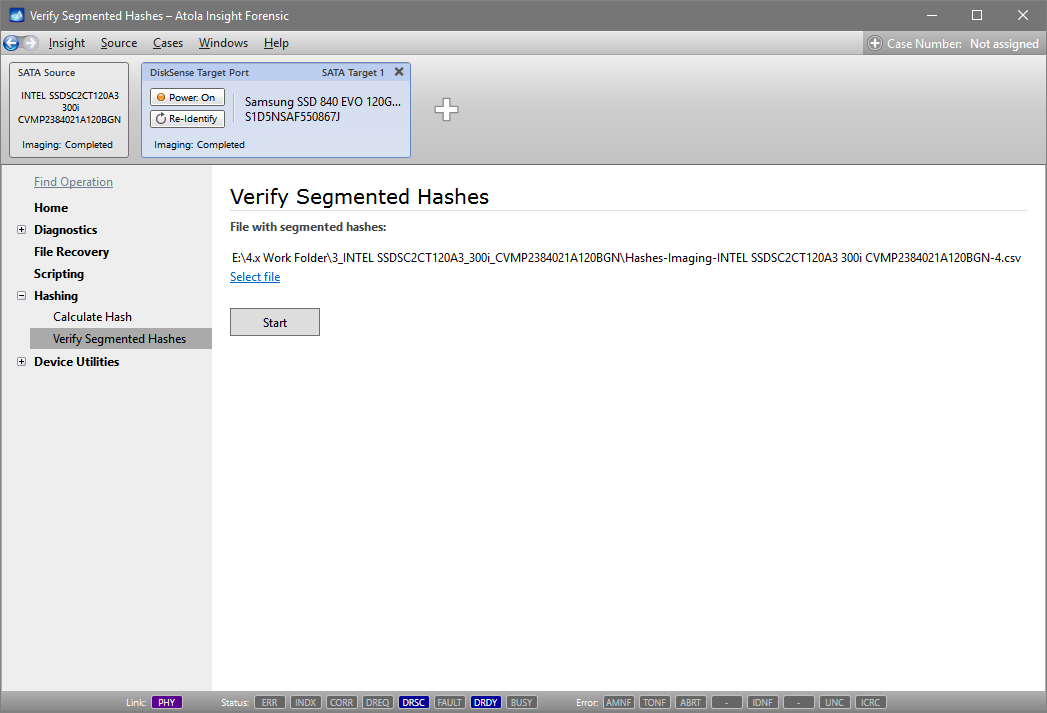
Step 2. In the Hashing category of the left-side menu there is Verifying Segmented Hashes subcategory. This is an automated way to verify the segmented hashes in an existing CSV file against the target image. Select the file with segmented hashes calculated during imaging and click Start.
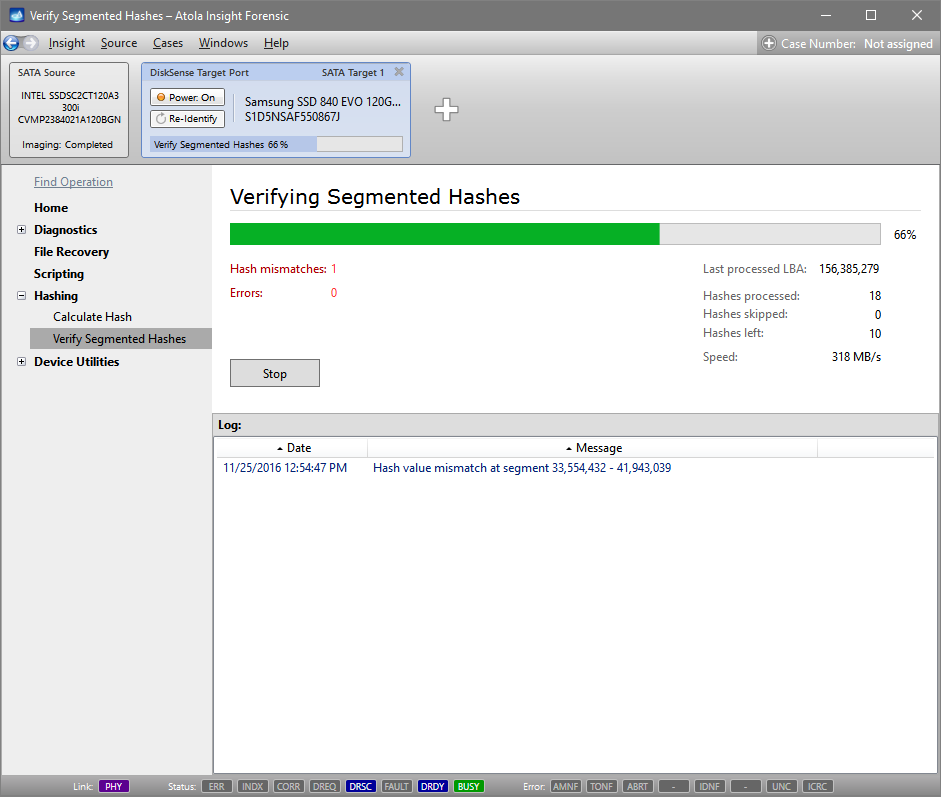
Step 3. Hash verification is in progress. Here we see 18 segmented hashes checked. Hash for the interval that includes sector 35,000,000 is invalid.
Step 4. Hash verification finishes with the proper case report automatically created, also in CSV format.

This is how segmented hashing helps you avoid the whole image being compromised when a small area of the evidence target is damaged.

Yulia believes that with a product that is exceptionally good at solving tasks of forensic experts, marketing is about explaining its capabilities to the users. Yulia regularly represents Atola at DFIR events, holds free workshops and webinars about Atola imagers functionality and advocates on the users' behalf to ensure that Atola keeps on adding value and raising the bar for the industry.
- Top digital forensic conferences in 2024 - January 1, 2024
- 2023. Year in Review - December 31, 2023
- Top digital forensics conferences in 2023 - January 1, 2023
Yulia Samoteykina
Director of Marketing Yulia believes that with a product that is exceptionally good at solving tasks of forensic experts, marketing is about explaining its capabilities to the users. Yulia regularly represents Atola at DFIR events, holds free workshops and webinars about Atola imagers functionality and advocates on the users' behalf to ensure that Atola keeps on adding value and raising the bar for the industry.