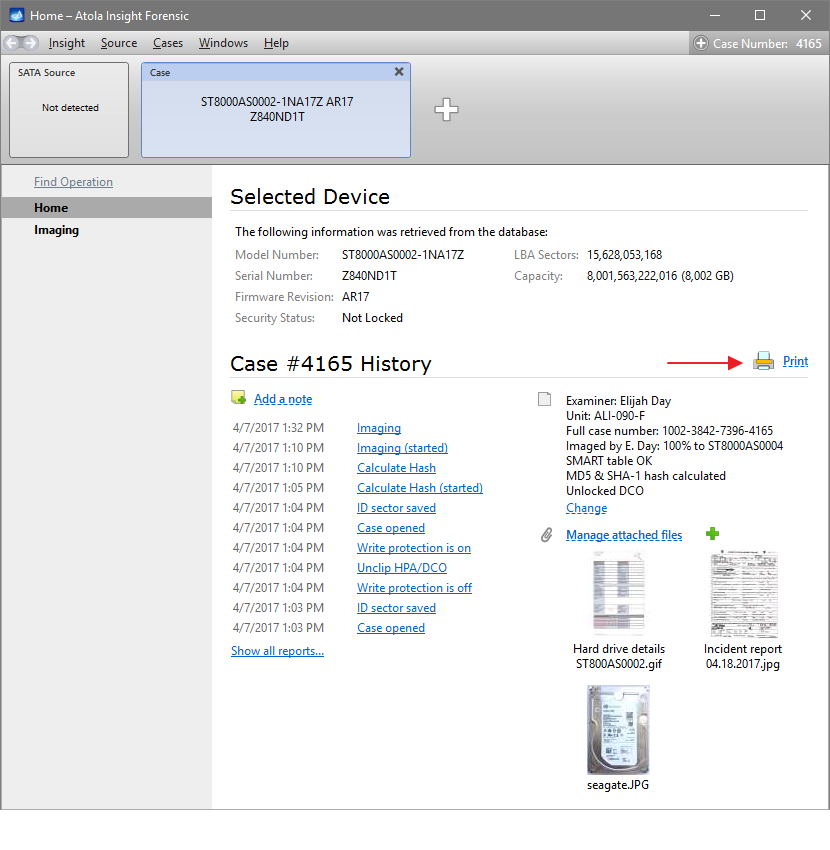
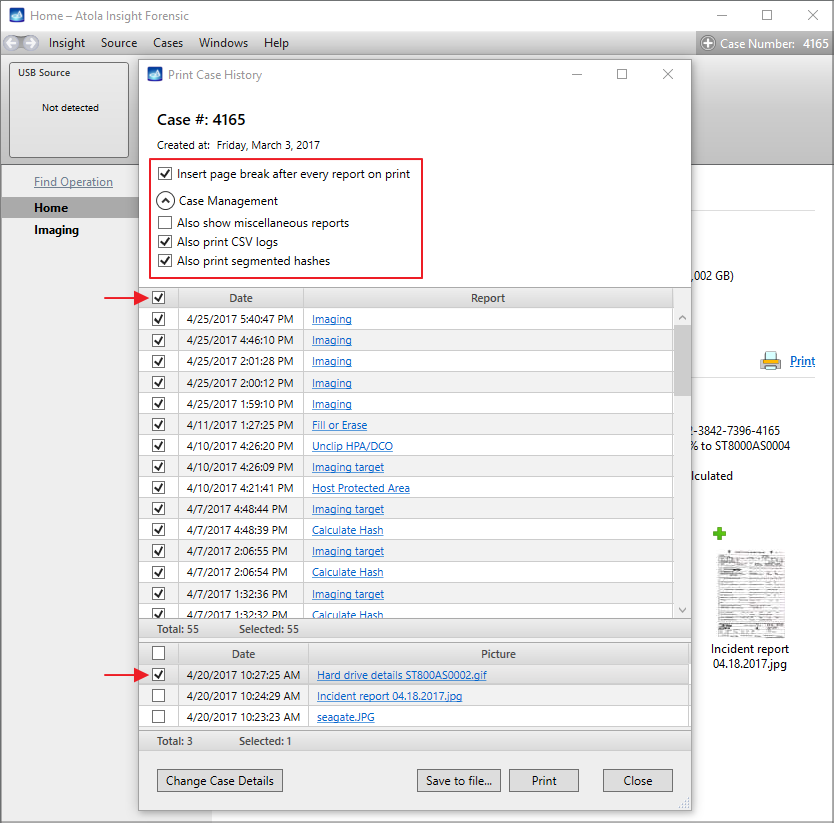
Insight’s Case Management system includes flexible printing functionality. To print a report click the Print link in the case’s Home page.
In the Print Case History window you get all the reports listed, sortable by date or by reported operation. It is possible to tick just some of the reports or select all reports in the case by ticking the check box in the header of the list. Below there are all pictures attached to the case, which you can also select to be printed.
At the top of the Print Case History window there are four check boxes with report listing and printing settings (click on the Case Management arrow to view all check boxes):
- Insert page break after every report on print
- Also show miscellaneous reports hides/displays all reports of seemingly minor importance, yet essential to some forensic specialists in accordance with their internal procedures
- Also print CSV logs allows the printed version of the reports to include operation logs saved in CSV format
- Also print segmented hashes also enables segmented hash saved in CSV files to be included in the printed version of the reports
It is possible to print or save the selected reports and pictures in a PDF, HTML or RTF file by clicking Save to file… or Print buttons.
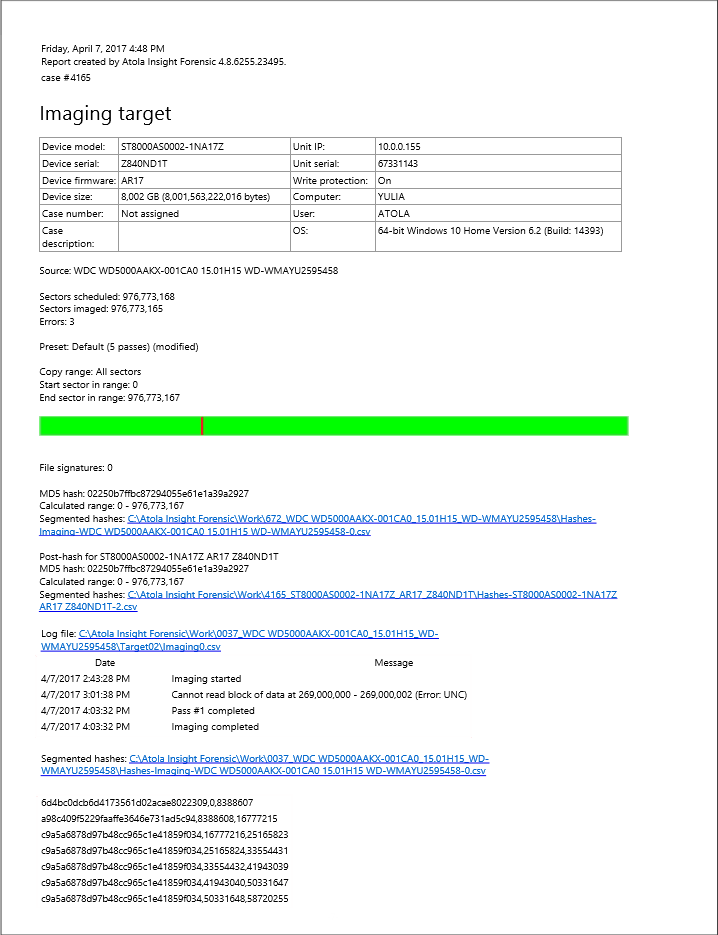
If you have ticked the two later options, this is how the log and the segmented hashes will be displayed in the report:

Yulia believes that with a product that is exceptionally good at solving tasks of forensic experts, marketing is about explaining its capabilities to the users. Yulia regularly represents Atola at DFIR events, holds free workshops and webinars about Atola imagers functionality and advocates on the users' behalf to ensure that Atola keeps on adding value and raising the bar for the industry.
- Top digital forensic conferences in 2024 - January 1, 2024
- 2023. Year in Review - December 31, 2023
- Top digital forensics conferences in 2023 - January 1, 2023
Yulia Samoteykina
Director of Marketing Yulia believes that with a product that is exceptionally good at solving tasks of forensic experts, marketing is about explaining its capabilities to the users. Yulia regularly represents Atola at DFIR events, holds free workshops and webinars about Atola imagers functionality and advocates on the users' behalf to ensure that Atola keeps on adding value and raising the bar for the industry.