[Update 2022]
Atola Technology keeps developing Atola Insight Forensic, forensic data recovery tool capable of Seagate password removal via COM port.
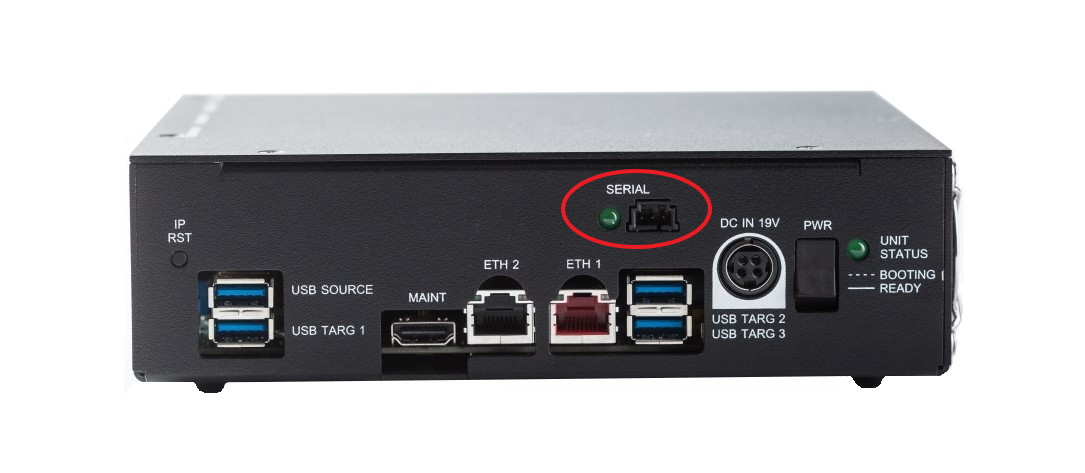
If you need to extract or reset an unknown password or perform drive recovery on a Seagate hard drive, use a Serial cable to connect the drive to the DiskSense unit.
Take a minute to familiarize yourself with the Serial cable’s three connectors. On one side of the cable, there are two connectors. Both are 2-pin RX-TX (receive-transmit) connectors. The slightly larger one has 2.5-mm pin pitch and is used for IDE drives. The smaller one has 2-mm pin pitch and is used for SATA drives.
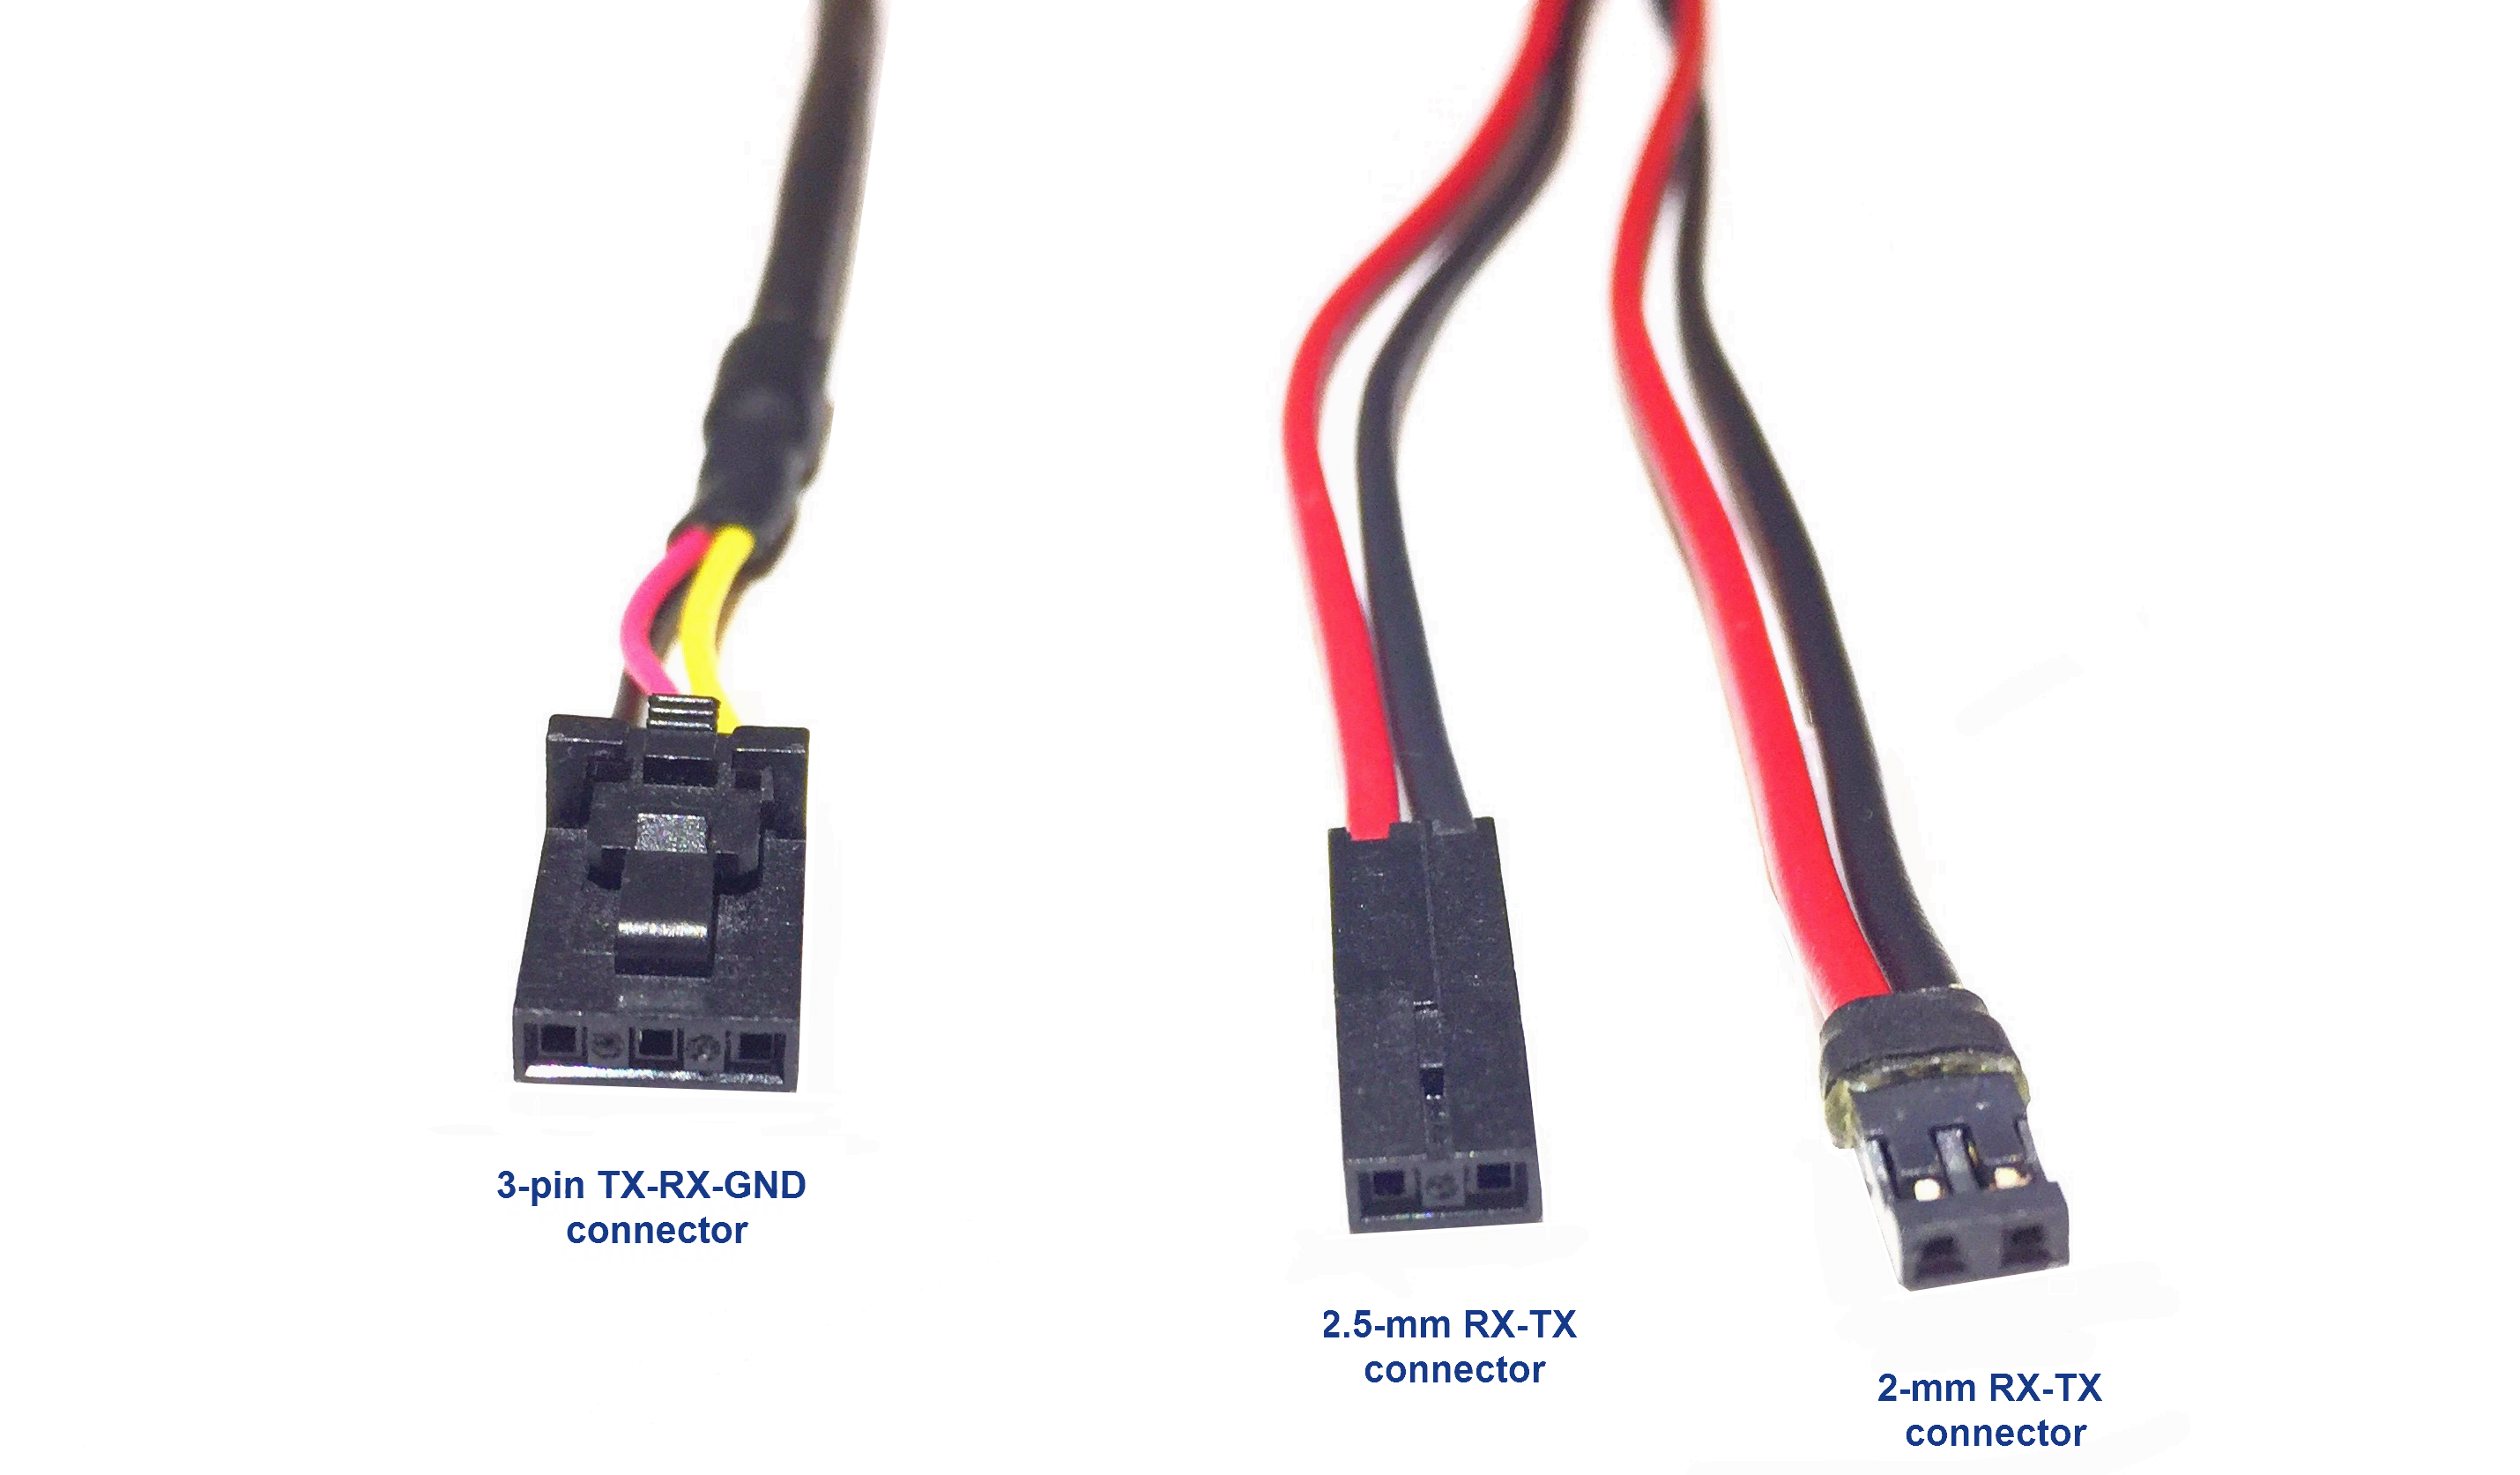
On the opposite side of the Serial cable, there is a 3-pin TX-RX-GND (transmit-receive-grounding) connector. This connector is inserted in the Serial port on the back side of the DiskSense unit.
Connecting 3.5-inch and 2.5-inch Seagate SATA drives
When you look at a Seagate SATA drive (either 3.5-inch or 2.5-inch), there is a 4-pin jumper block right next to the SATA port.
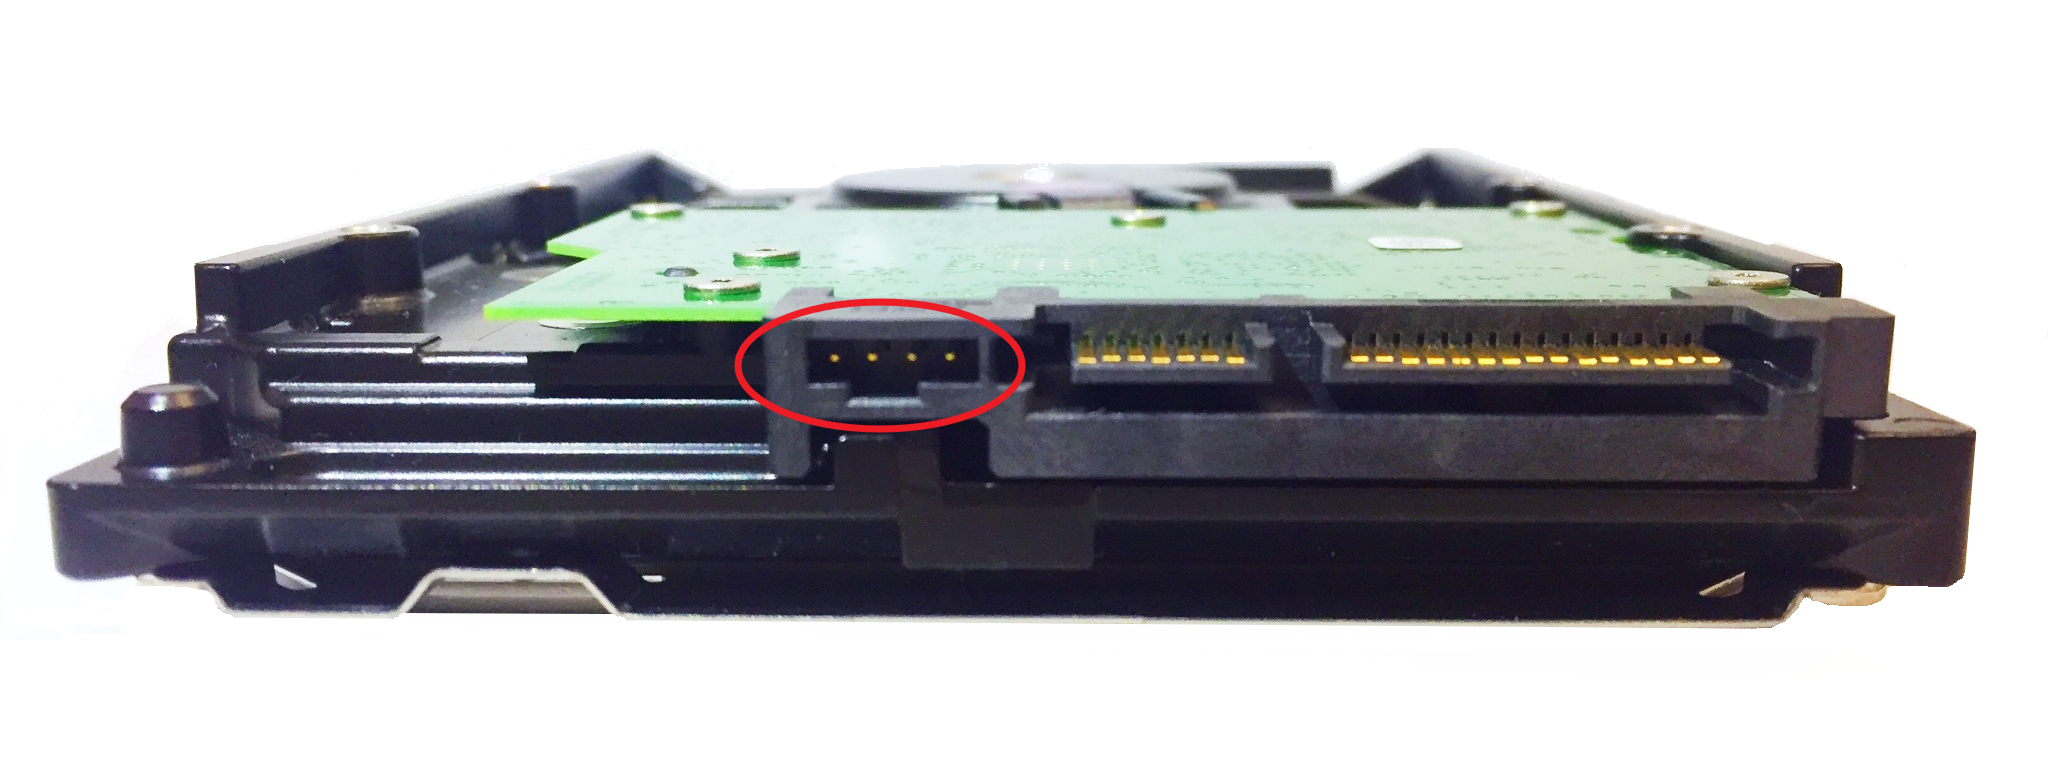
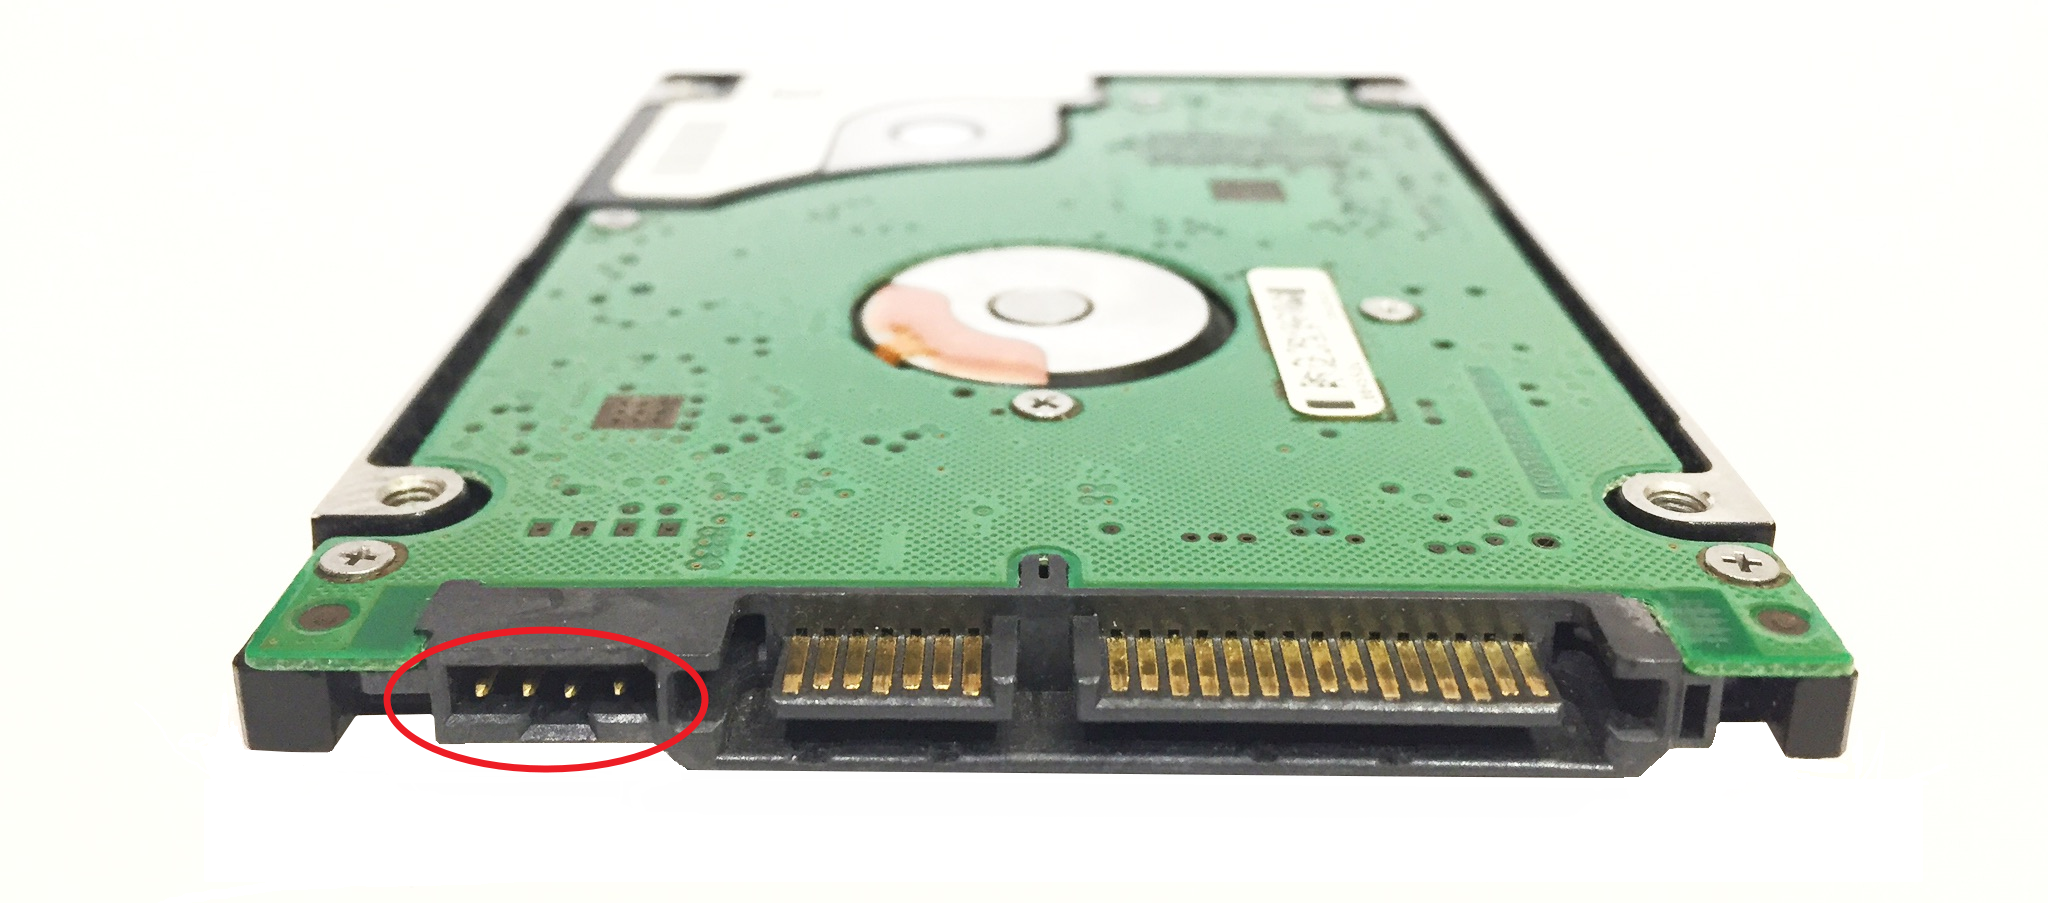
Connect the 2-mm RX-TX end of the serial cable to the two jumper pins located closest to the SATA port so that the red RX (receive) wire is connected to the pin closer to the SATA port.
![]()
![]()
Connecting 3.5-inch Seagate IDE drives
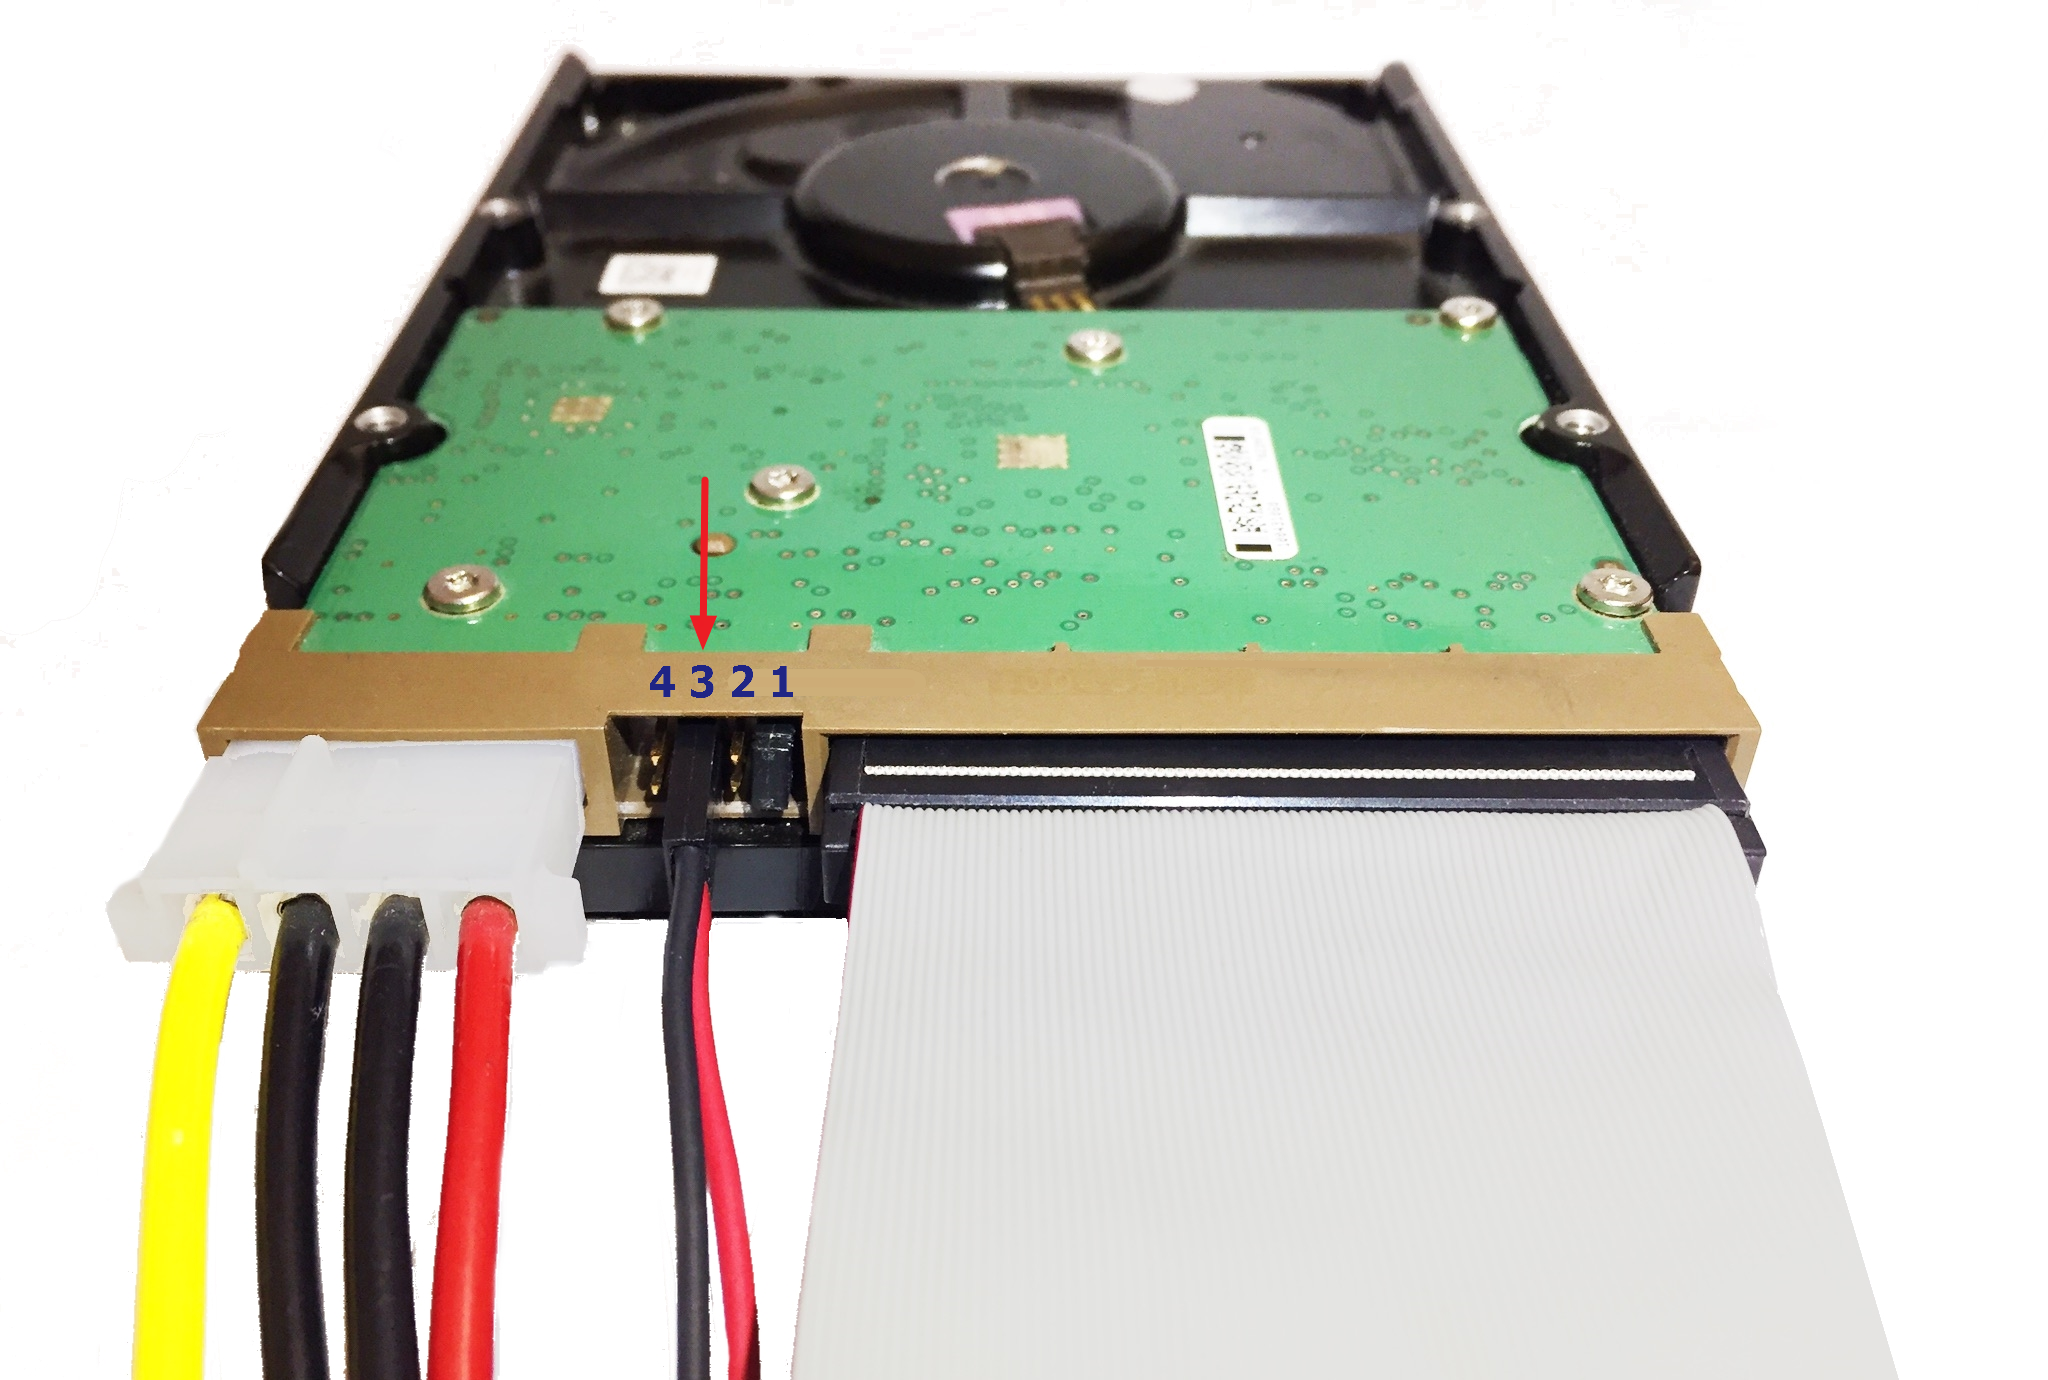
Desktop IDE drives have an 8-pin jumper block between IDE port and Power port. For the purpose of this manual, we shall call the pair of pins located closest to the IDE port and used for Master/Slave settings the first pair of pins. The next, second pair of pins is usually used for Cable Select settings. The third pair of pins is the one we will connect the Serial cable to.
Please note that IDE hard drives must be set to Master mode for password extraction and reset or drive recovery. To use the drive in Master mode, place a jumper on the first pair of pins (closest to the IDE port), as shown in the picture below.
![]()
Attach the 2.5-mm RX-TX connector to the third pair of jumper pins, as shown in the picture below. Make sure that red RX (receive) wire is facing down and the black TX (transmit) wire is facing up. The second pair and the fourth pair of pins must be left open.
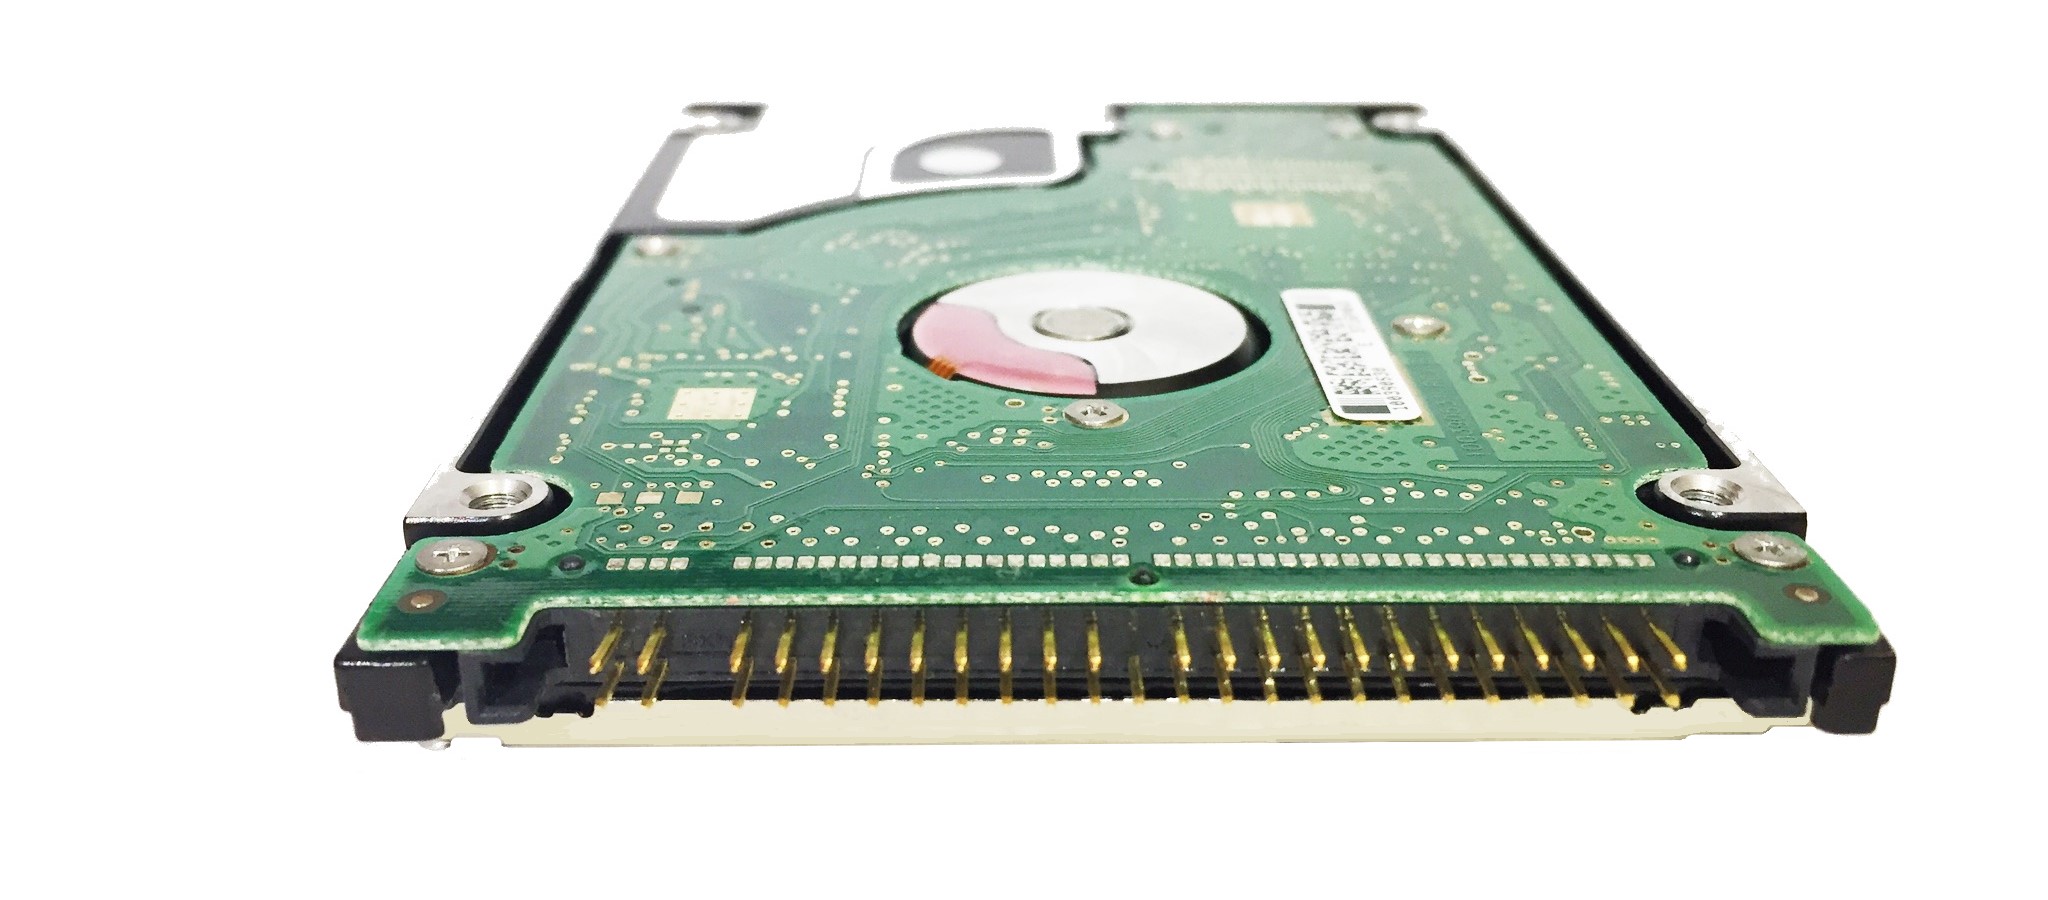
Connecting 2.5-inch Seagate IDE drives
Similar to desktop hard drives, laptop Seagate hard drives also must be set to Master mode to perform password extraction and reset or drive recovery. Master mode on a 2.5-inch device is set by removing all jumpers.
There is a 3.5″-to-2.5″ IDE adapter included in the package with the DiskSense unit. It consists of the following components:
- IDE port J1 for IDE interface cable
- 2.5-inch IDE port J2 to connect the drive to
- Power port J3 for IDE power cable
- 4-pin block J4, where each pin is marked with letter A, B, C, and D.
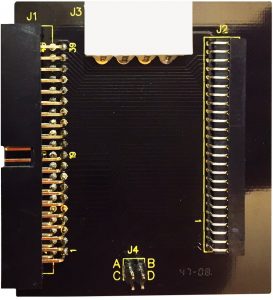
Use the adapter to connect the drive to IDE interface cable and IDE power cable. Then attach the 2.5-mm RX-TX connector to pins marked A and C, as shown in the picture below. Make sure that the black TX (transmit) wire is connected to the pin A, and red RX (receive) wire is connected to the pin C.
![]()
Please note that to use the 2.5-inch Seagate IDE drive in Slave mode, the 2.5-mm RX-TX connector must be detached from the adapter and instead a jumper must be placed on pins A and B.
Configuring the Baud rate
Once the Seagate hard drive is connected to the unit, follow these instructions to configure the Baud rate of Seagate Terminal, which allows you to use an extensive set of commands on a Seagate drive:
- If there is only one source drive connected to the DiskSense unit, it will automatically be identified and displayed in the Source disk port. However, if there are multiple hard drives connected to the DiskSense unit as Source drives, go to Source category of the top level menu, click on Select Source and choose the Seagate drive.
- Power down the selected drive.
- In the Windows category of the top level menu click on Terminal and in the COM Port Settings window select the Baud rate compatible with the drive. Please note that for Seagate 7200.10 and older Baud rate will be 9600; for 7200.11 and newer Baud rate will be 38400 (Atola Insight Forensic will suggest the baud rate by setting a default value in the Terminal window for the drive connected to it).
- Then click OK. But do not close the Terminal window just yet.
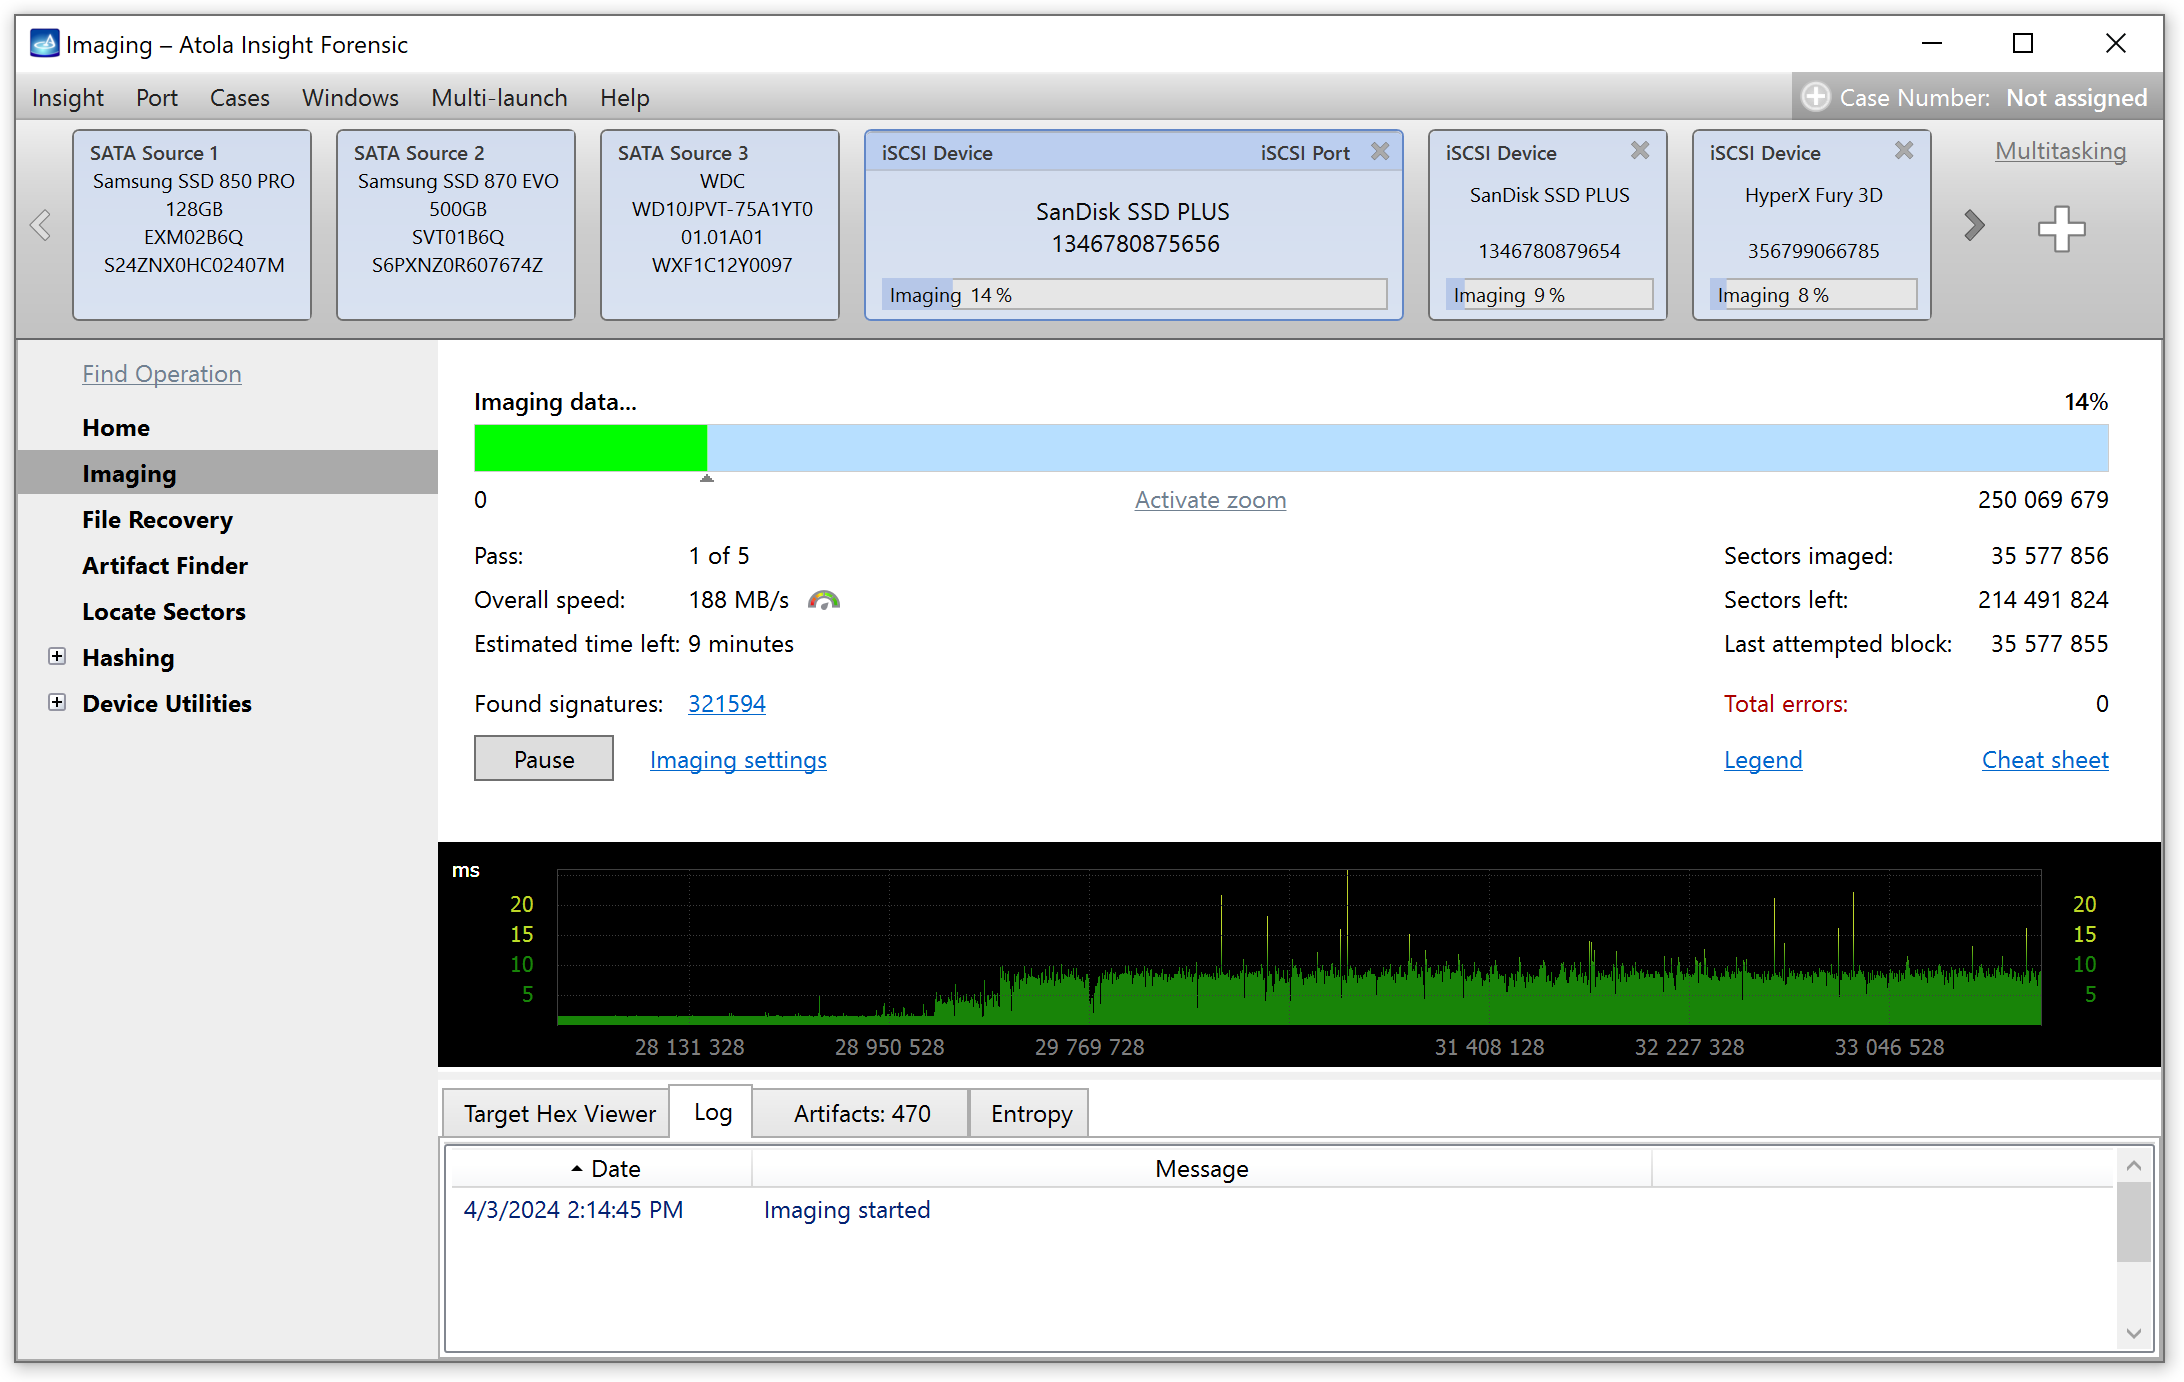
- Power on the drive again. There must be a valid output in the Terminal window (see the picture below).
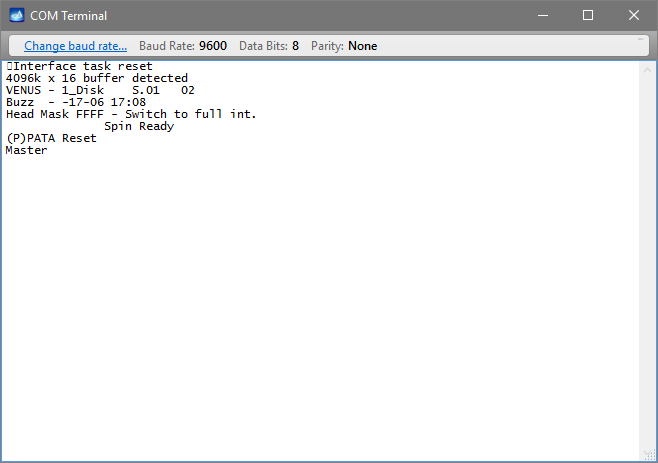
Should there be no output in the Terminal window or should it consist of random symbols, try to change the Baud rate until you get a good response.
Now proceed with password extraction or send Seagate Terminal commands to the drive.

Yulia believes that with a product that is exceptionally good at solving tasks of forensic experts, marketing is about explaining its capabilities to the users. Yulia regularly represents Atola at DFIR events, holds free workshops and webinars about Atola imagers functionality and advocates on the users' behalf to ensure that Atola keeps on adding value and raising the bar for the industry.
- Top digital forensic conferences in 2024 - January 1, 2024
- 2023. Year in Review - December 31, 2023
- Top digital forensics conferences in 2023 - January 1, 2023
Yulia Samoteykina
Director of Marketing Yulia believes that with a product that is exceptionally good at solving tasks of forensic experts, marketing is about explaining its capabilities to the users. Yulia regularly represents Atola at DFIR events, holds free workshops and webinars about Atola imagers functionality and advocates on the users' behalf to ensure that Atola keeps on adding value and raising the bar for the industry.