With 2020.7, Atola TaskForce supports RAID imaging and provides a breakthrough configuration autodetection module. Currently, we have supported RAID 0, 1 and 5 with NTFS and ext4/3/2 file systems. Our dev team works to support more RAID types and file systems in the upcoming releases. In this blog, we show how imaging RAID 5 array with an unknown configuration is effortless in TaskForce.
Selecting RAID members for RAID reassembly
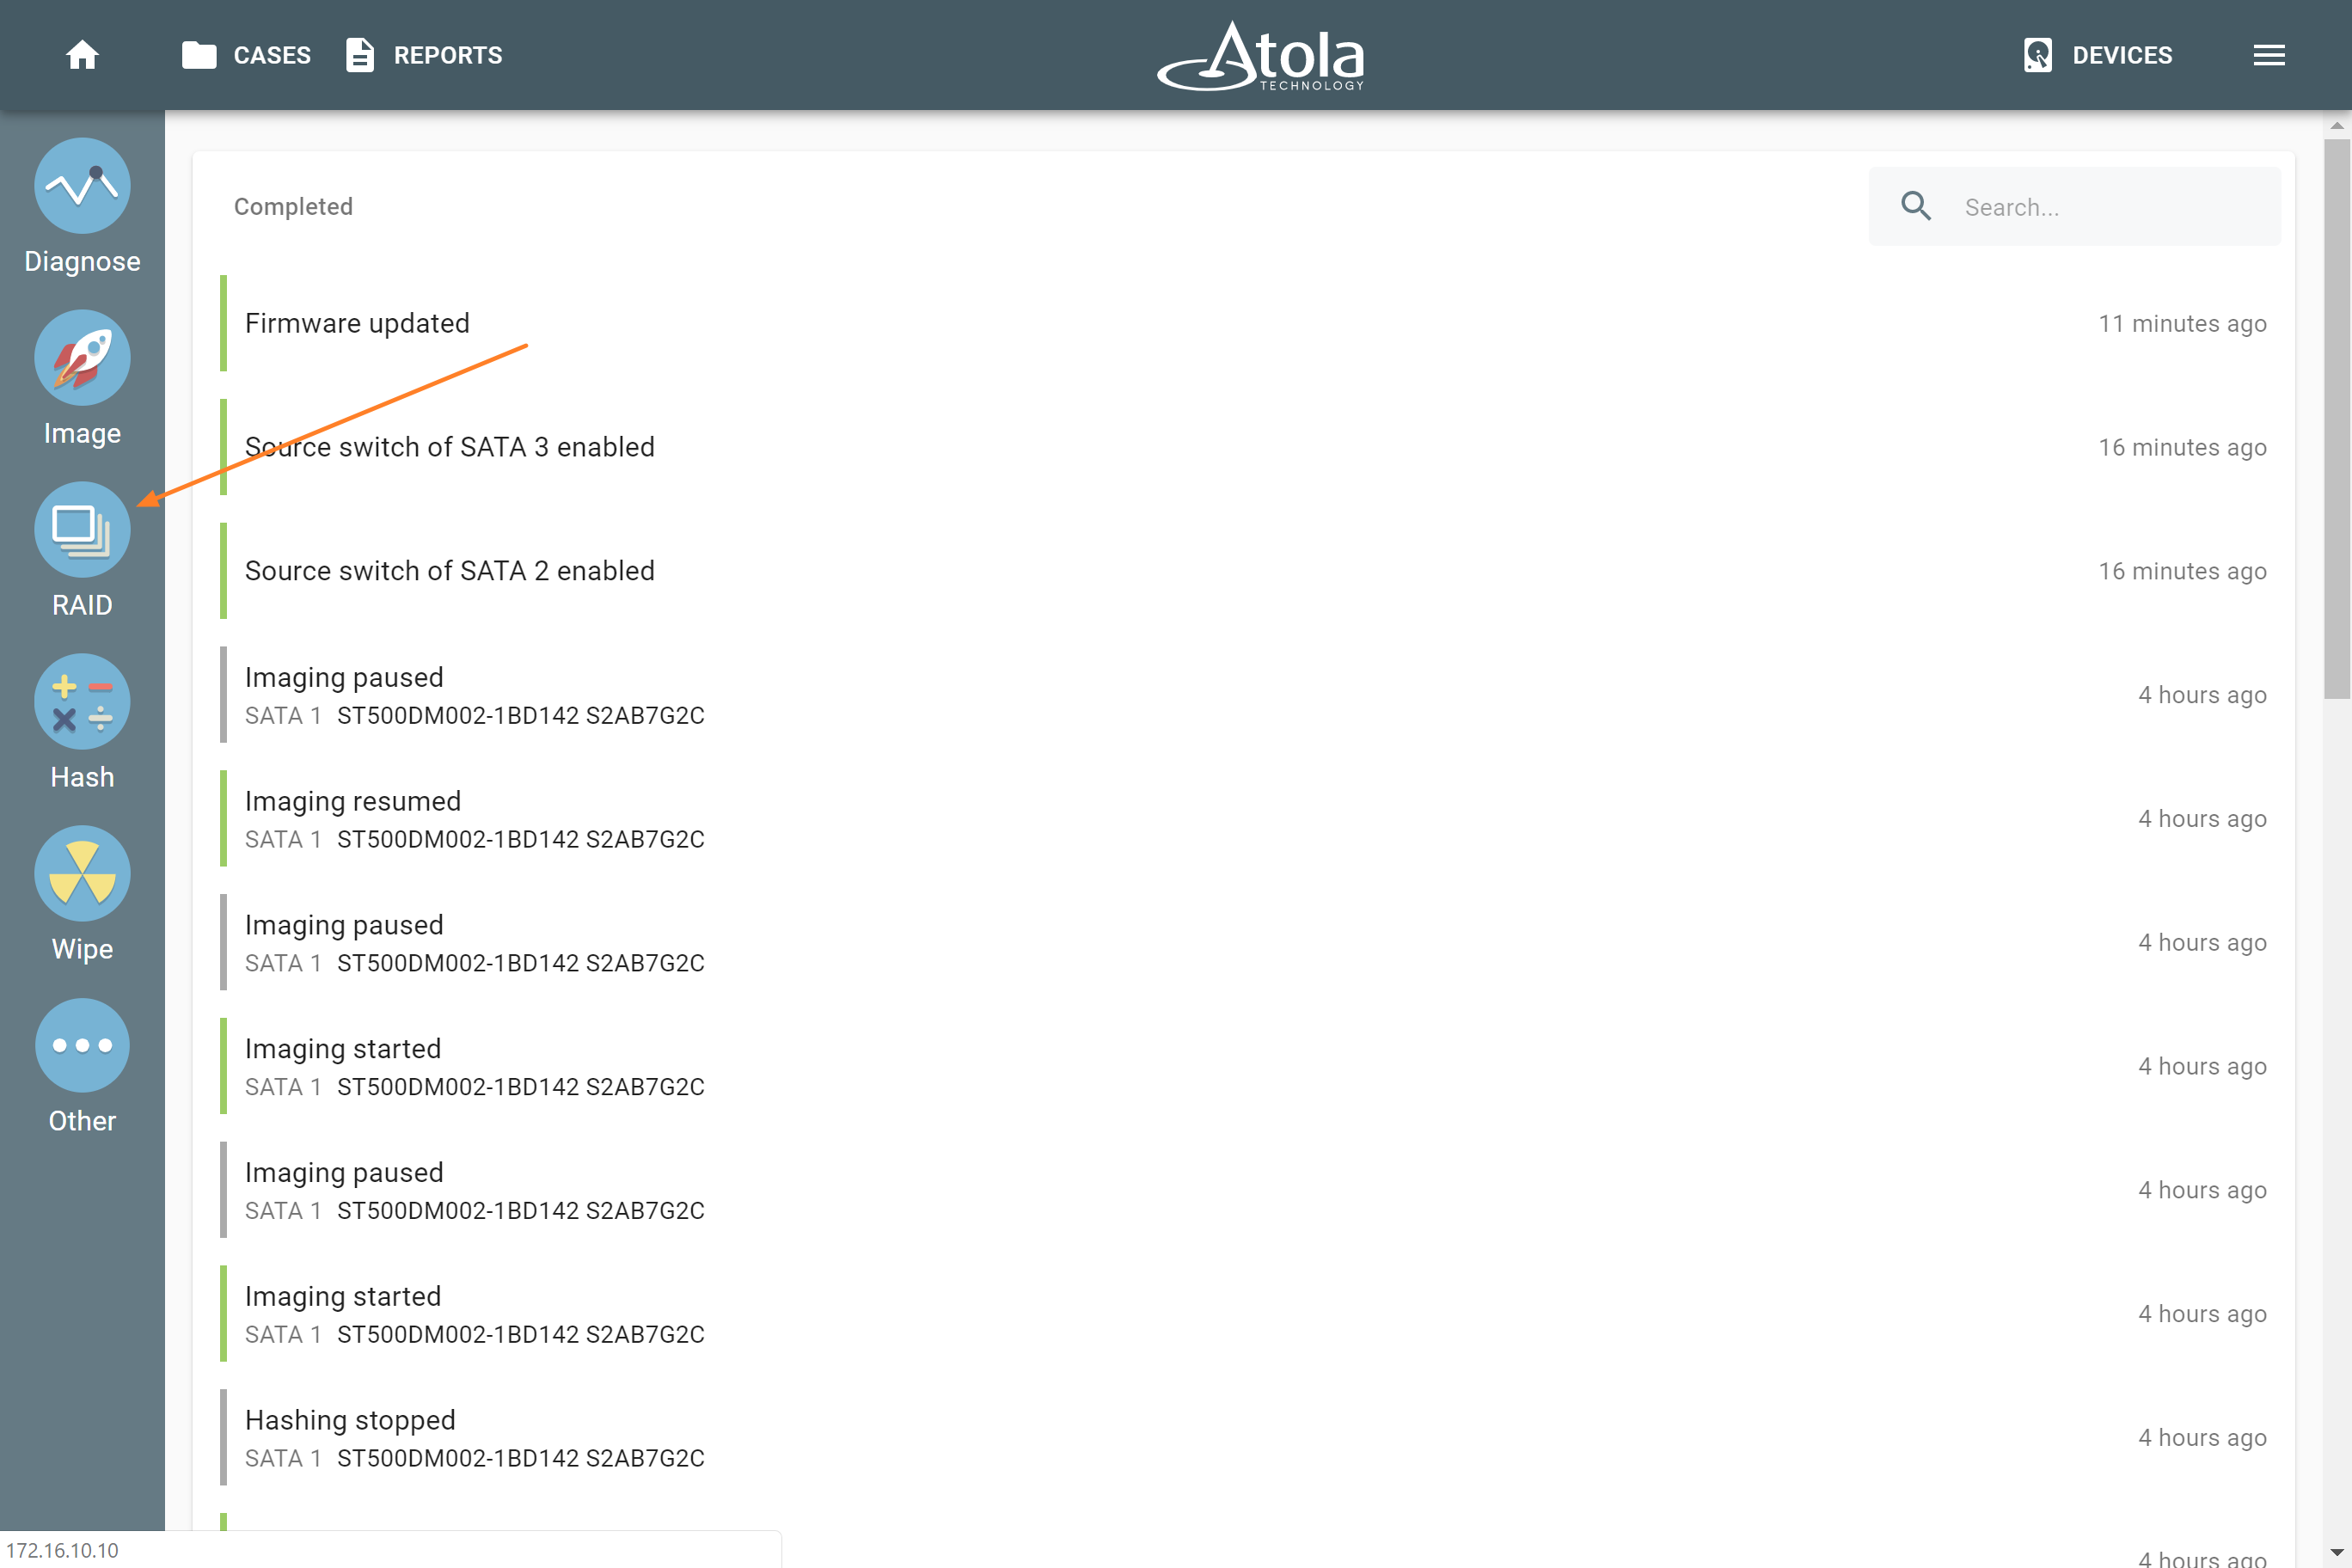
1. Start by clicking on the new RAID icon in the left-side Task Menu.
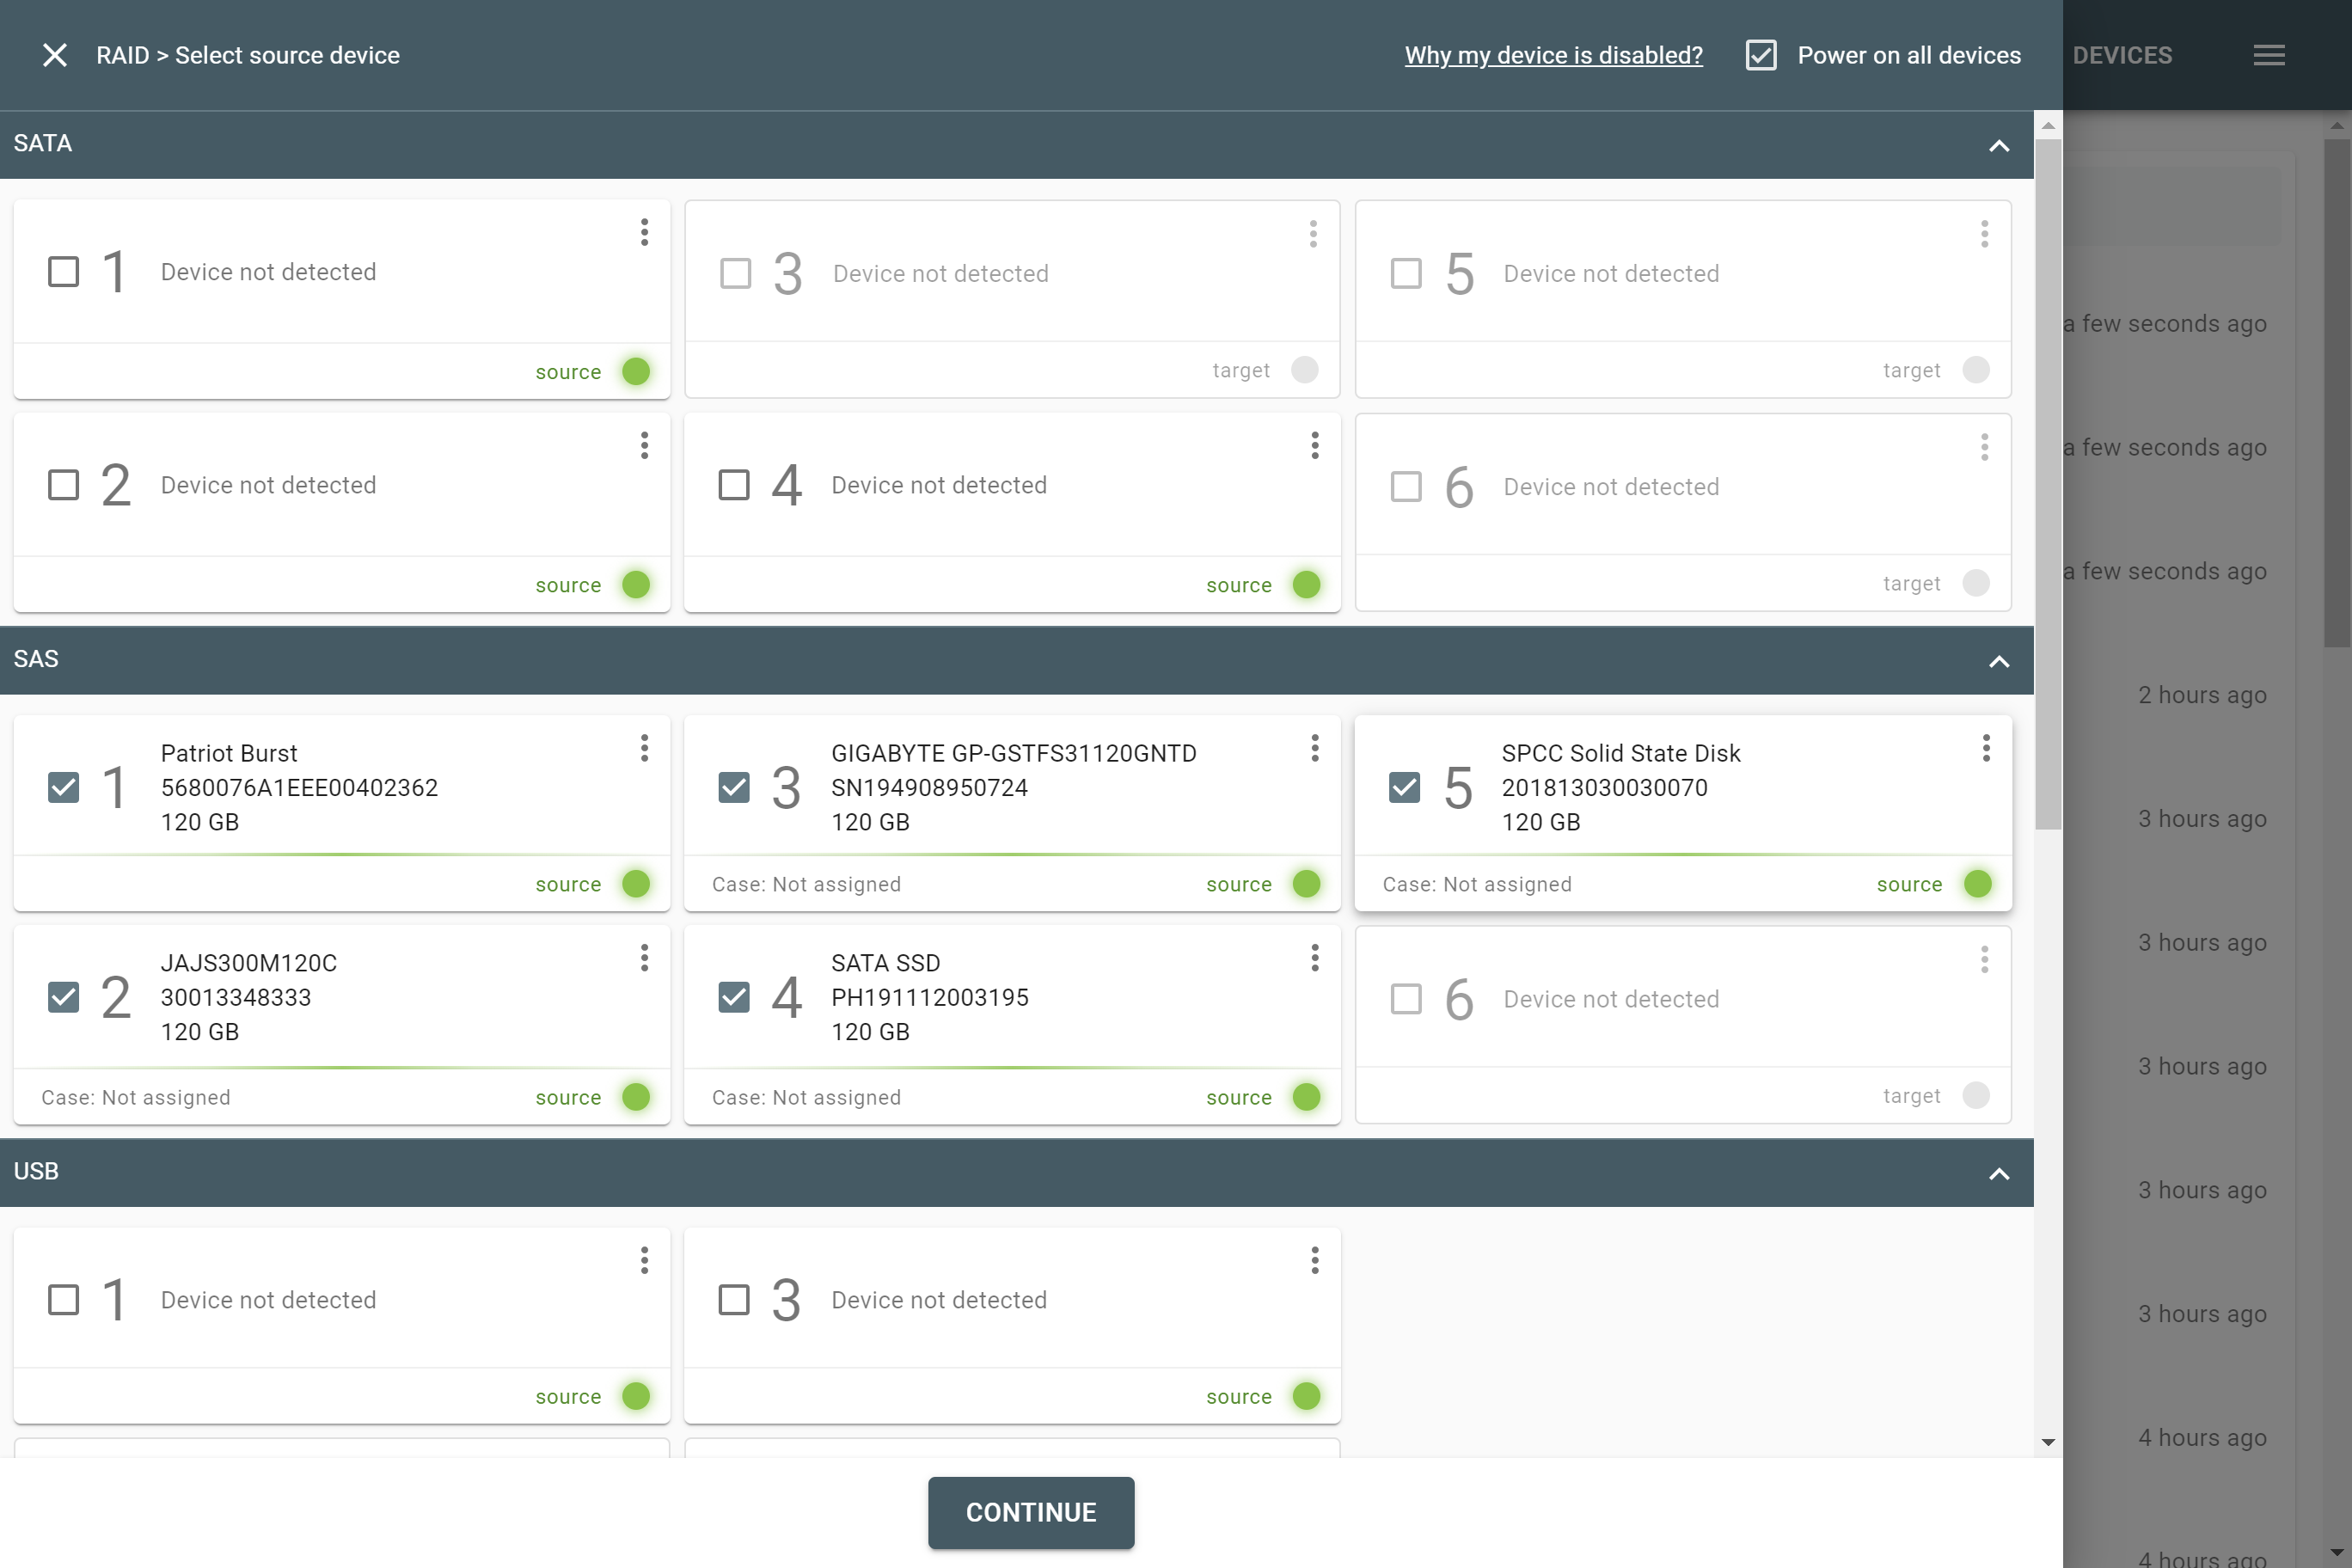
2. Next, select the devices that make up the RAID array and click Continue.
NB You can also use images of the individual drives from the RAID array by browsing and selecting images in the FILE subsection of the Select source device menu.
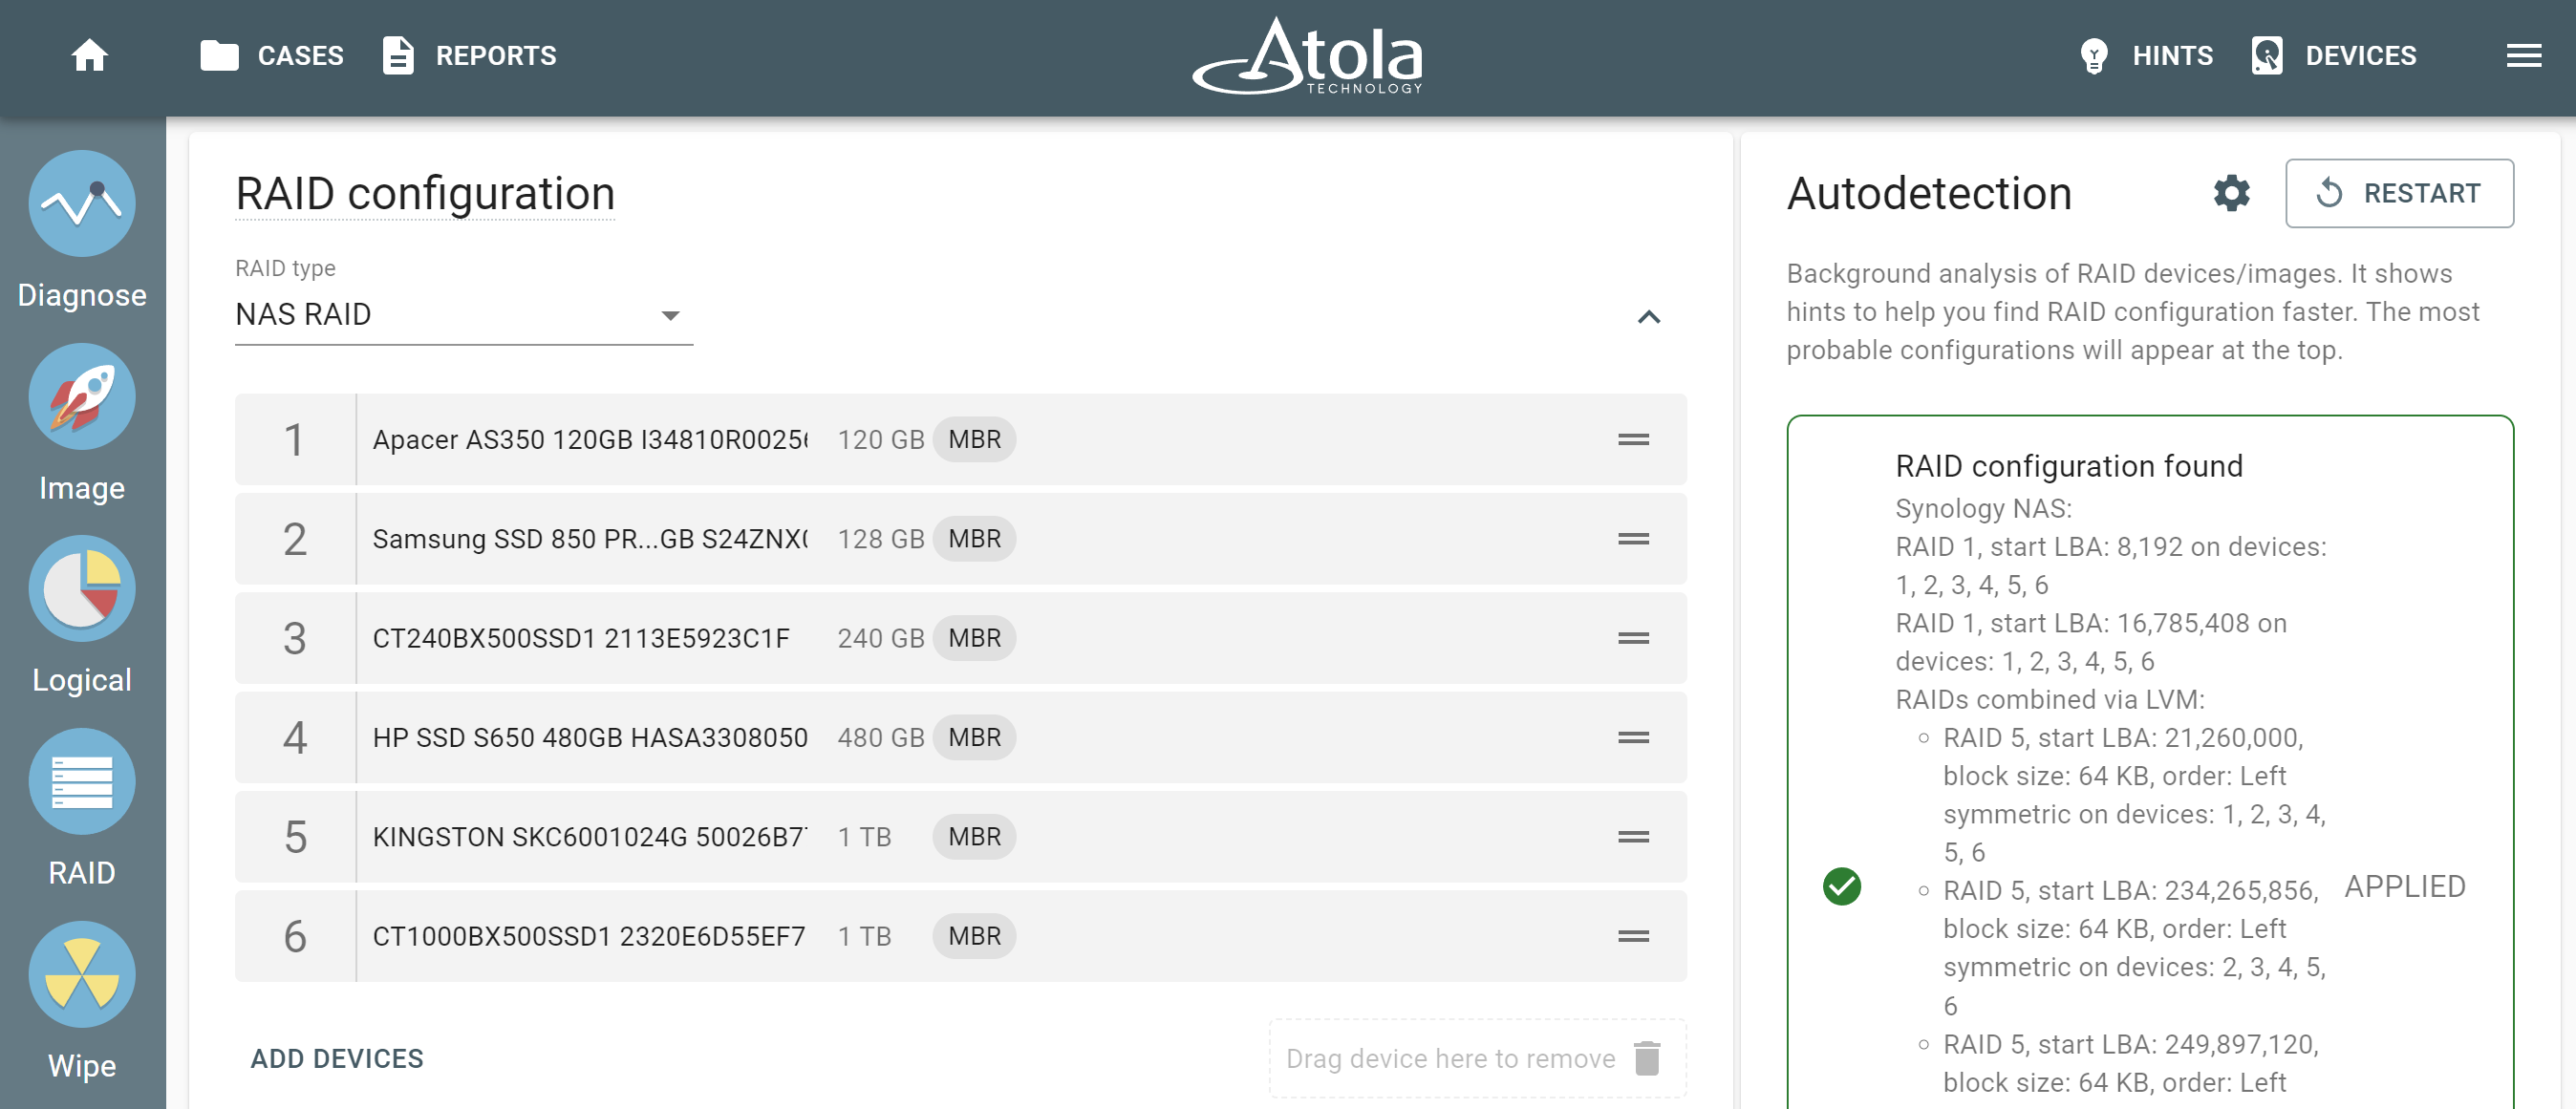
Autodetection of RAID configuration
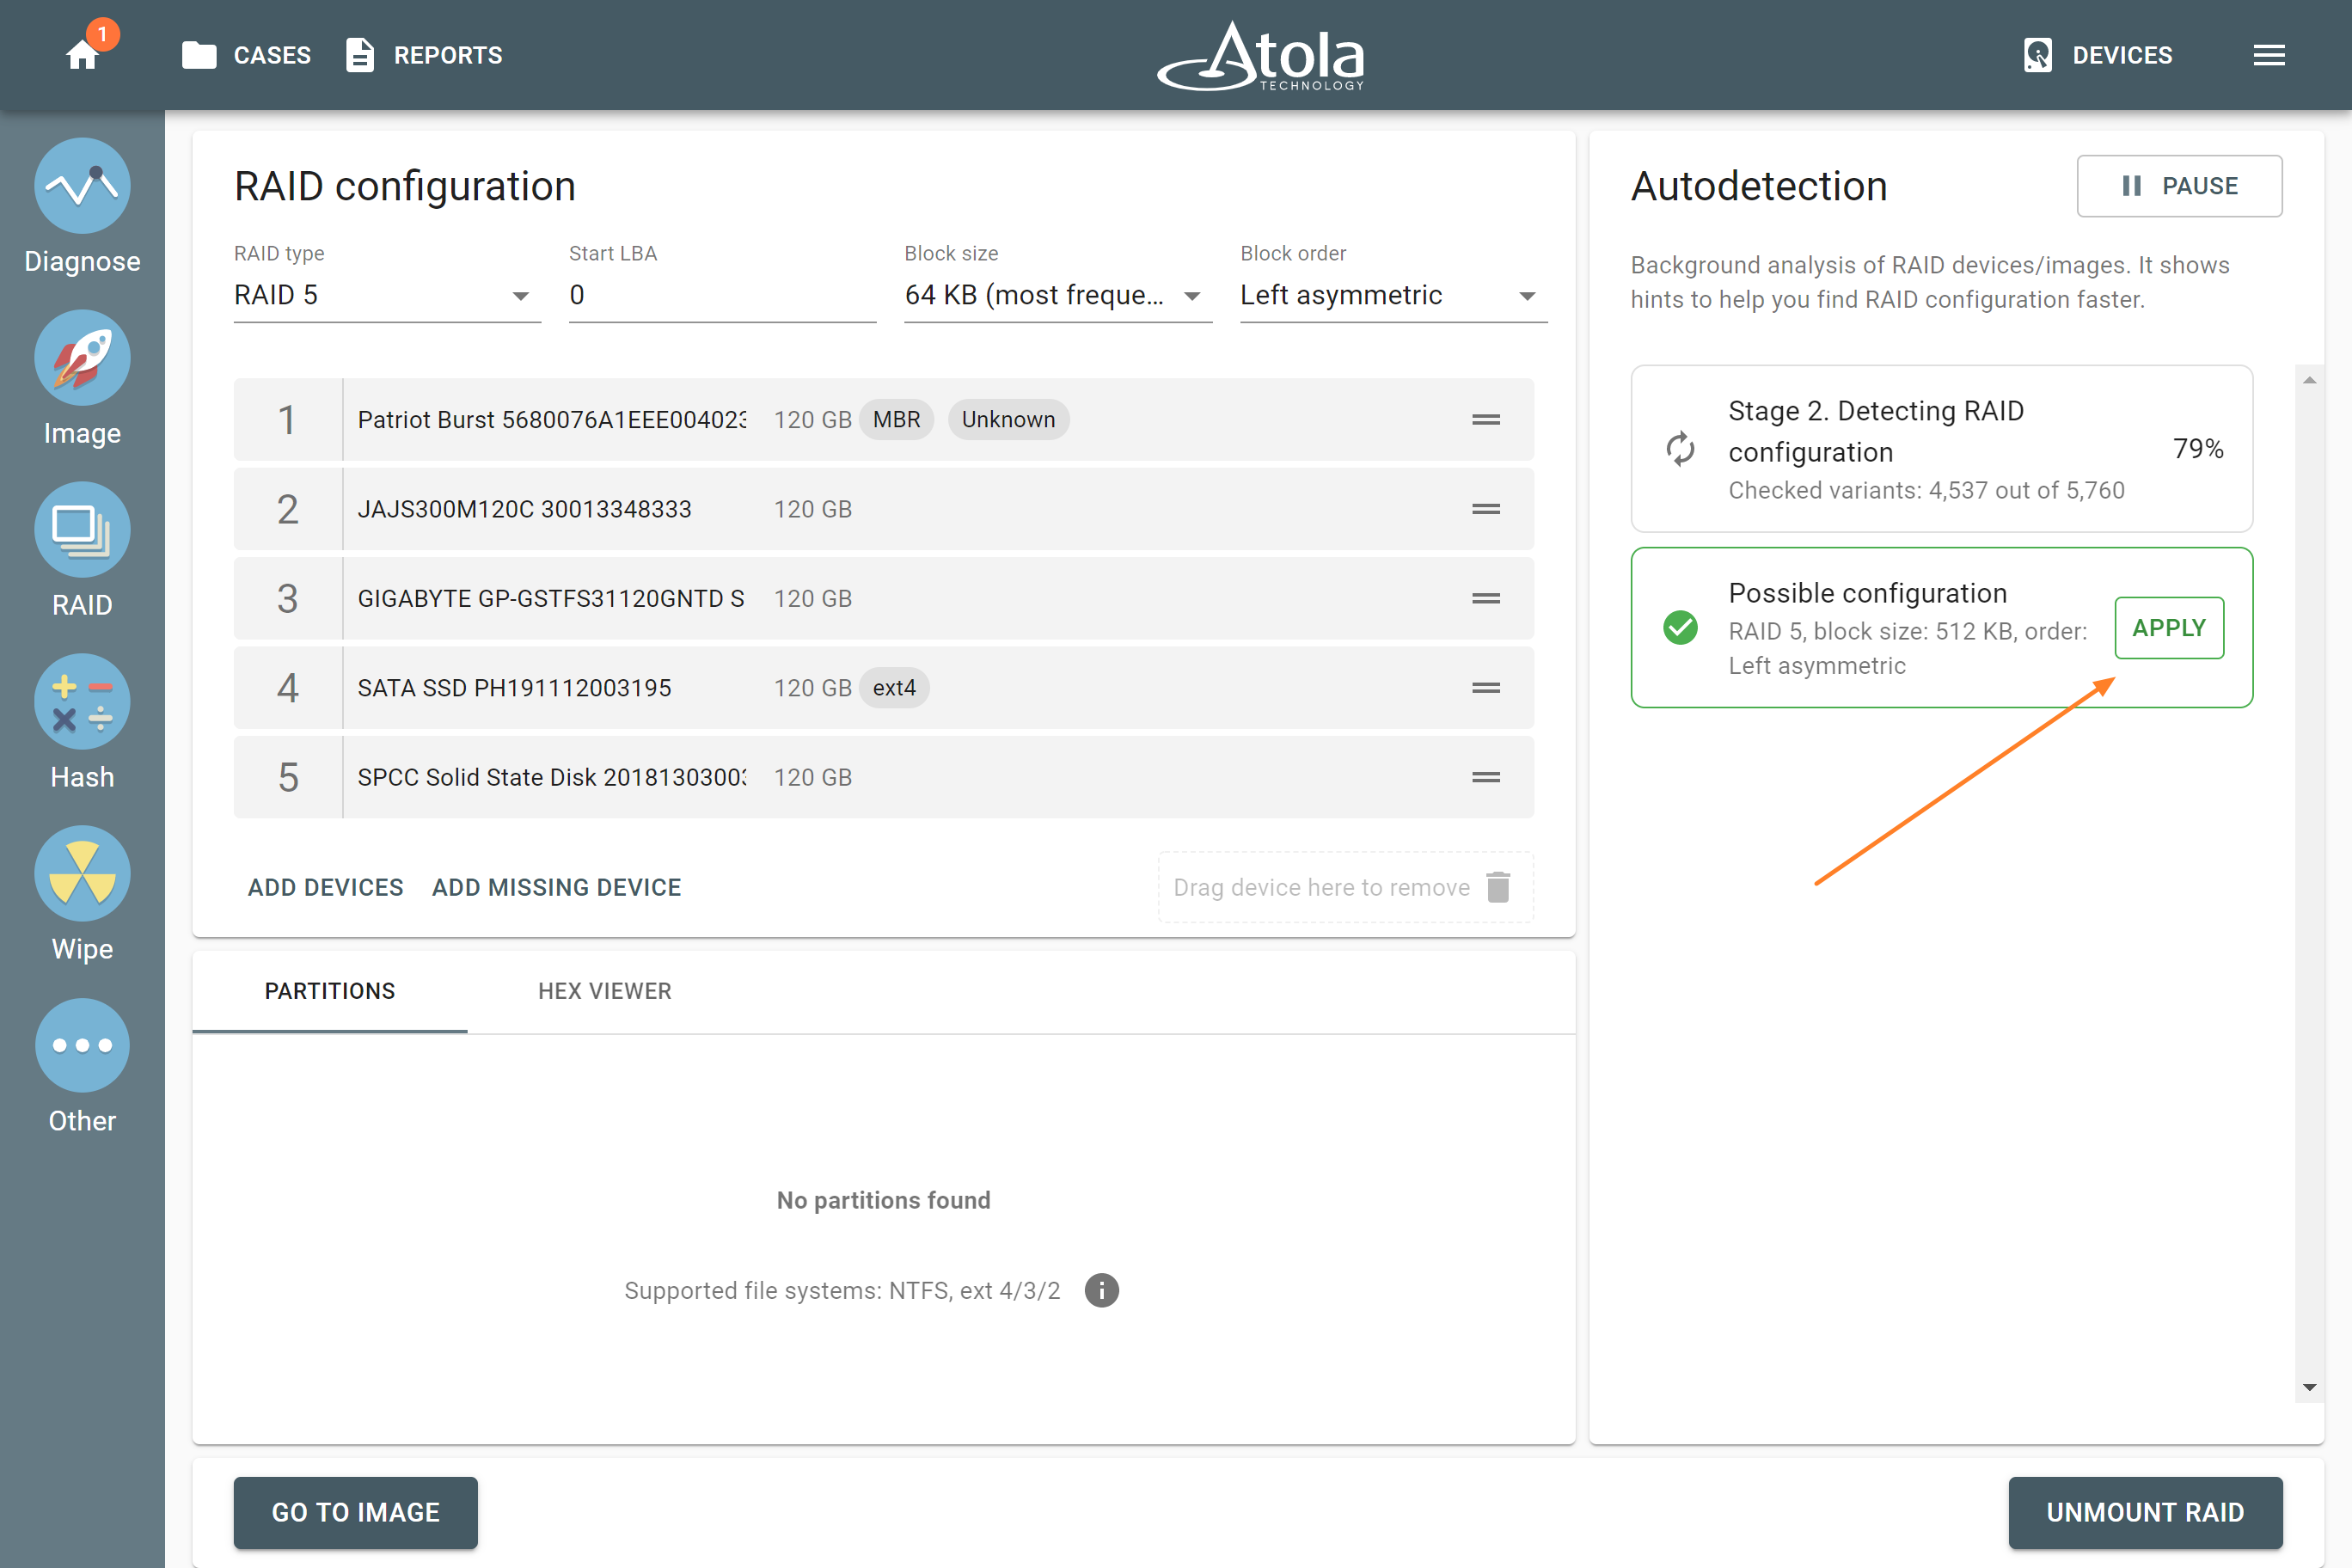
Next, you see the RAID configuration screen. It consists of three parts: the RAID configuration part at the top is where you see the selected devices or files. Underneath it, there is the RAID Partitions viewer, which allows a preview of partitions and files within them upon a successful RAID assembly. In the right-hand part of the screen, the Autodetection module starts running as soon as the screen has loaded. Subsequently, it produces an output of RAID configuration suggestions.
NB Autodetection module reads data on all devices or images that make up the RAID to identify its configuration. The parameters include: RAID type (level), start LBA, block size and block order. Importantly, if these parameters are known, the operator can set them manually. Depending on the RAID type, its volume, and how metadata is distributed on the drives in the RAID, Autodetection can produce configuration suggestions within a period of 30 seconds to a few hours. The latter happens when dealing with a large RAID of 9+ drives. In some cases, Autodetection can produce several configuration suggestions. You can apply these suggestions one by one to find the exact match.
3. Click the Apply button to apply the configuration suggested by the Autodetection module.
Partition preview
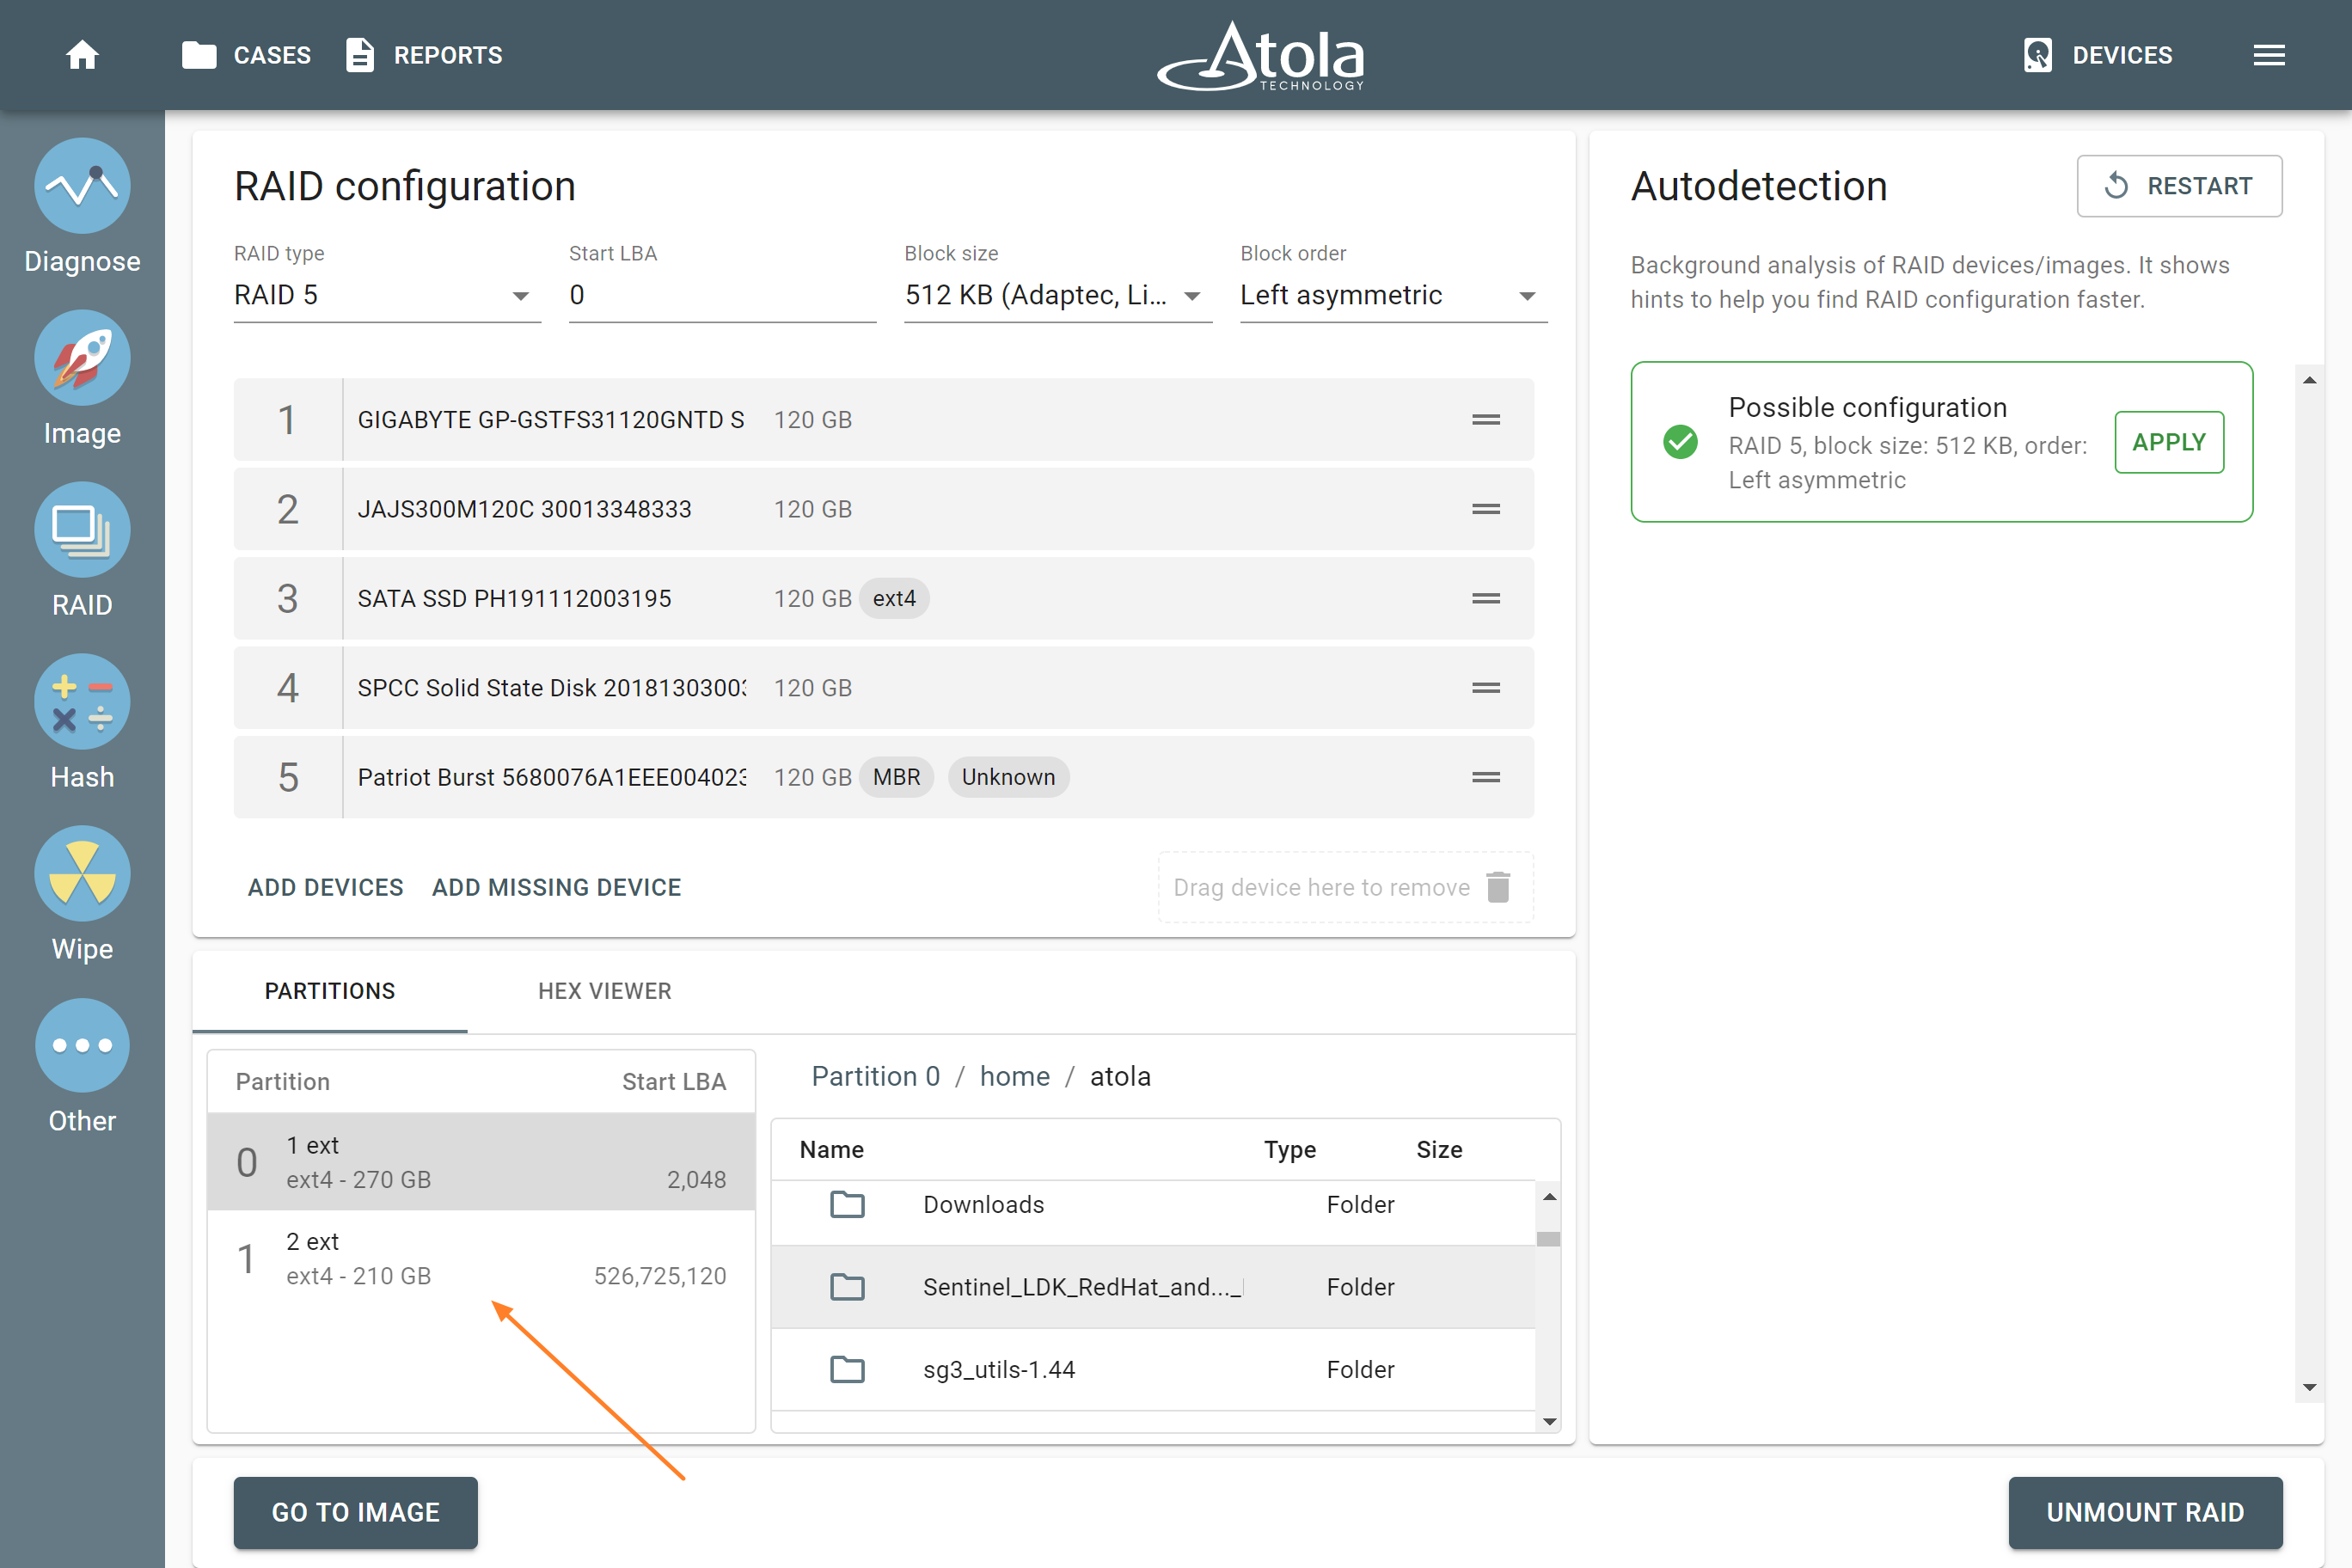
If the suggested configuration matches the RAID native configuration, partitions of the RAID will be available for a preview of data within the partition. For instance, it allows you to find potential evidence and prioritize partitions early on.
Imaging the reassembled RAID
4. Click GO TO IMAGE button in the left bottom corner of the screen. Subsequently, adjust the imaging settings and define the target for the image.
5. Select the target for the imaging session. For instance, both a local server and a target device in Storage mode are available as targets for imaging of a RAID array.
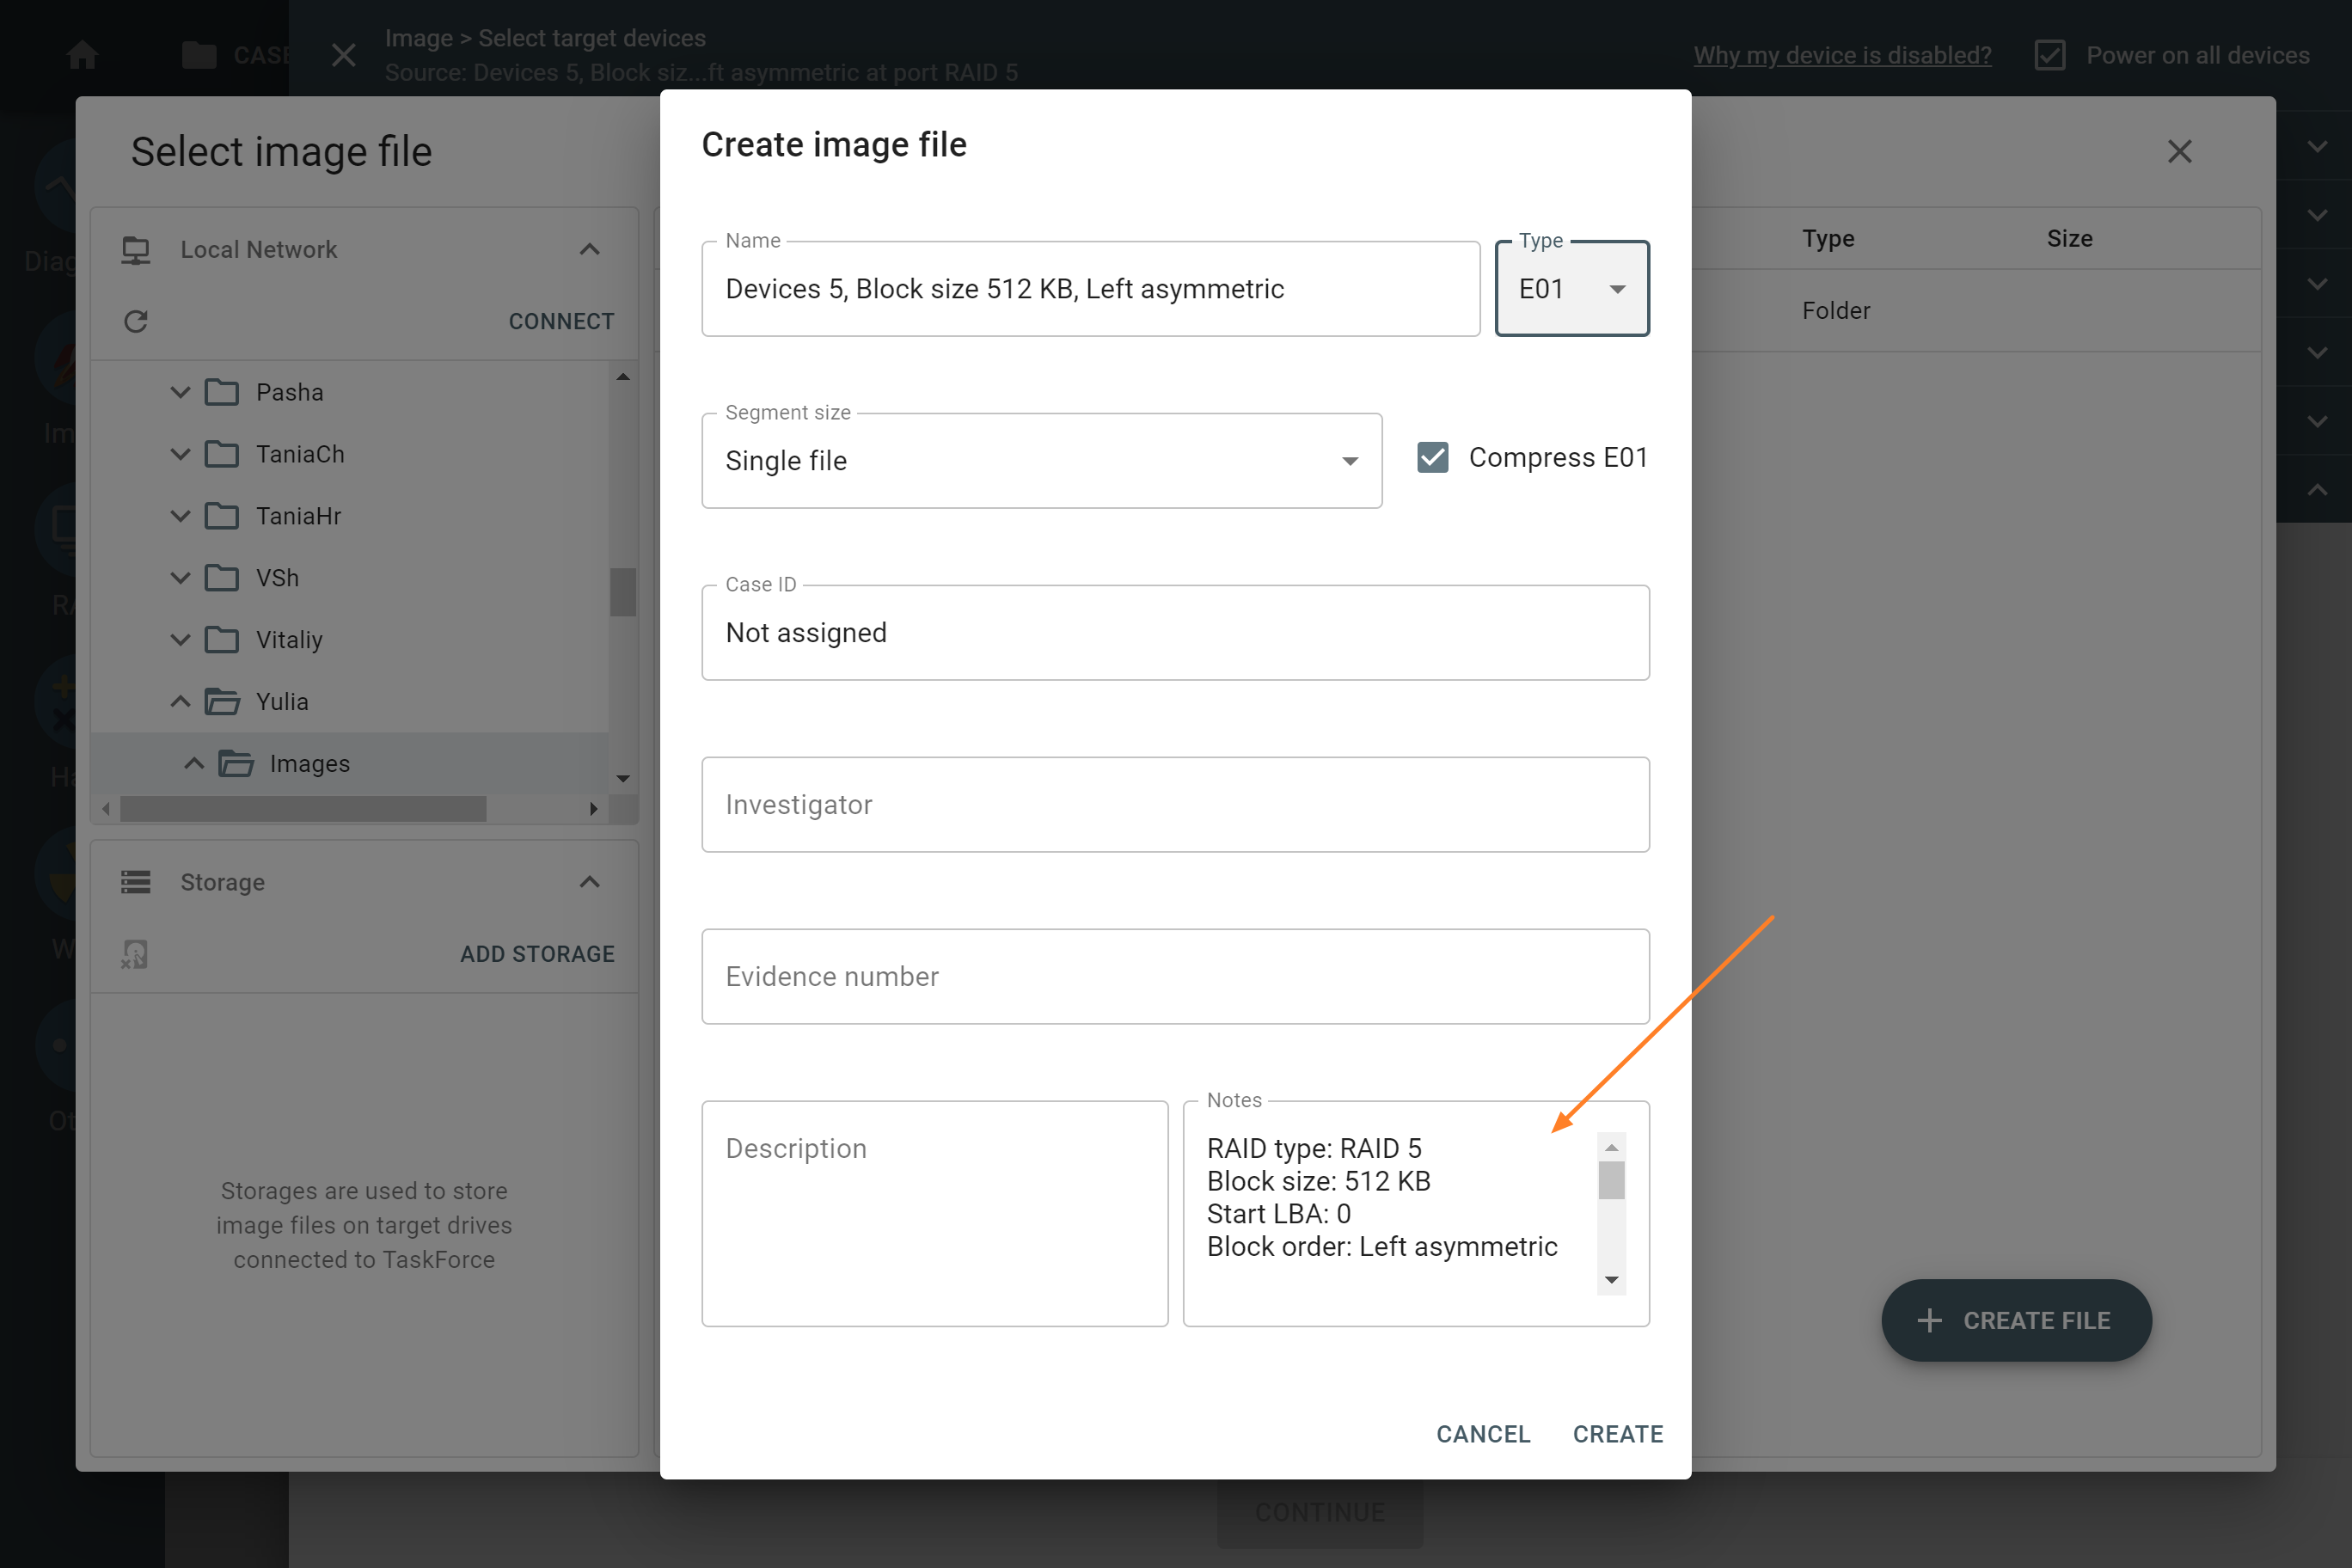
6. Click + CREATE FILE button and fill out the image details in the Create image file window and click Create.
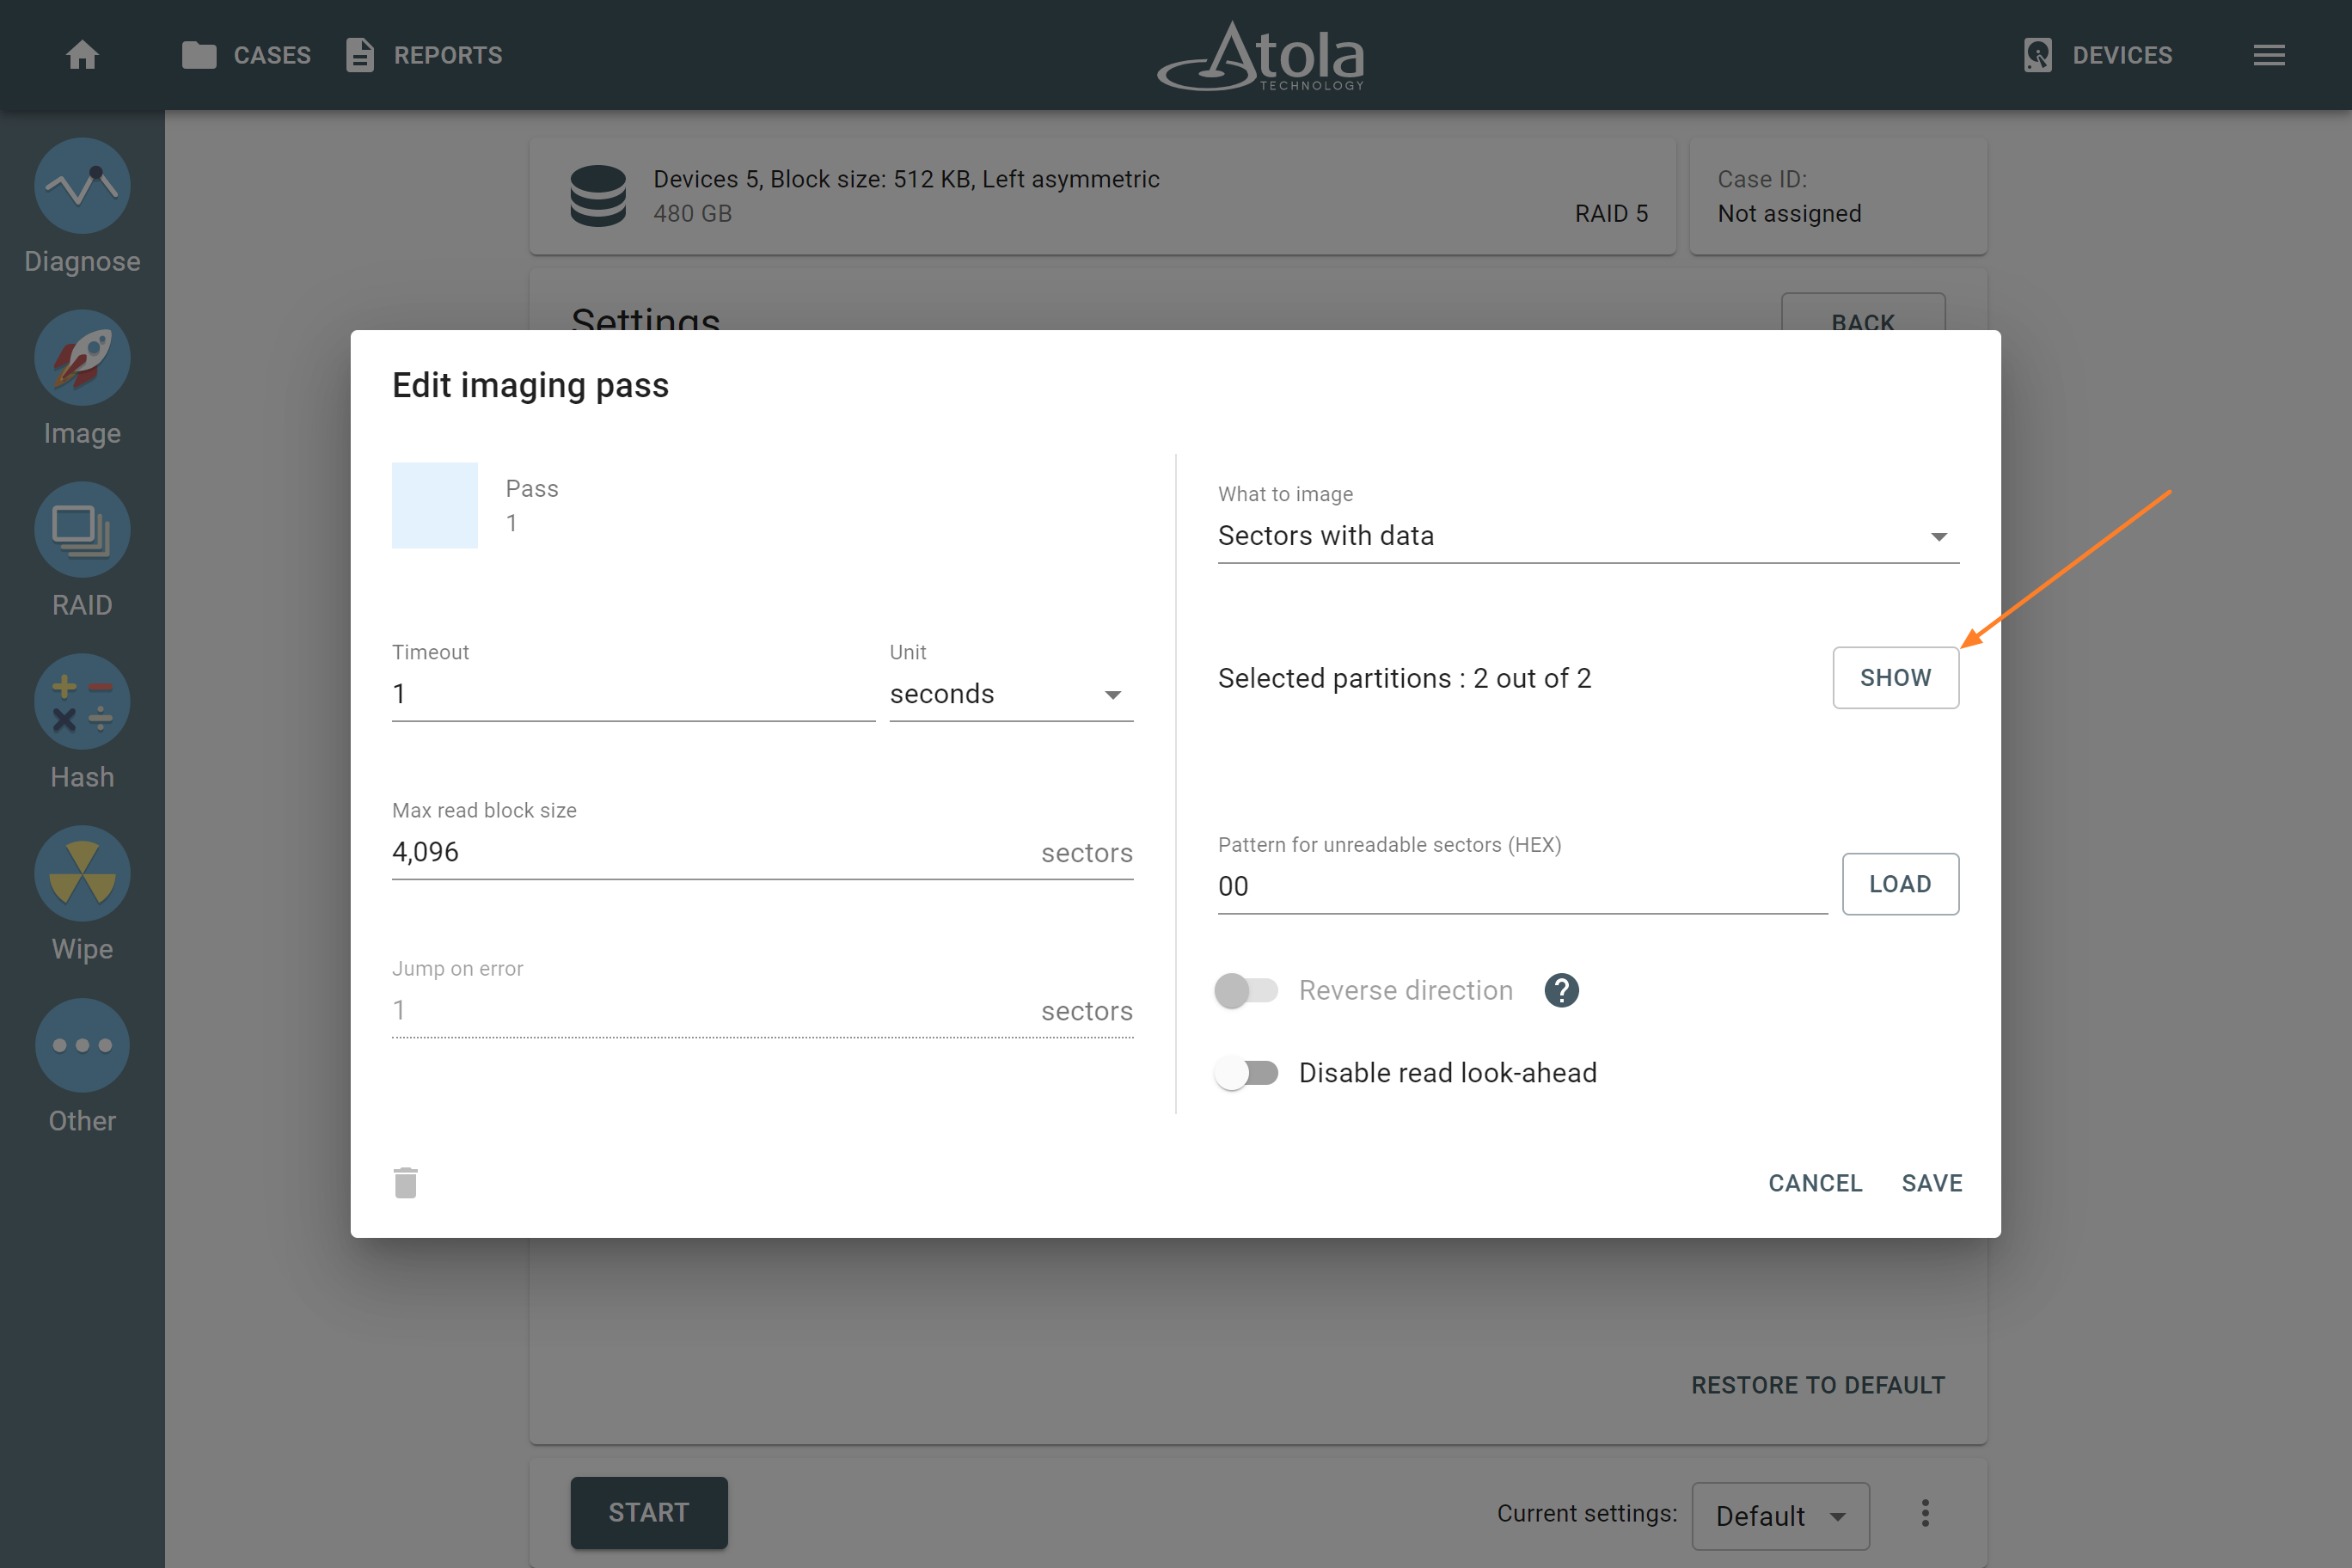
7. In the Settings page, click the Change button and then the imaging pass settings.
8. Then, in Edit imaging pass window, you can select the individual partitions you want to image and click Save.
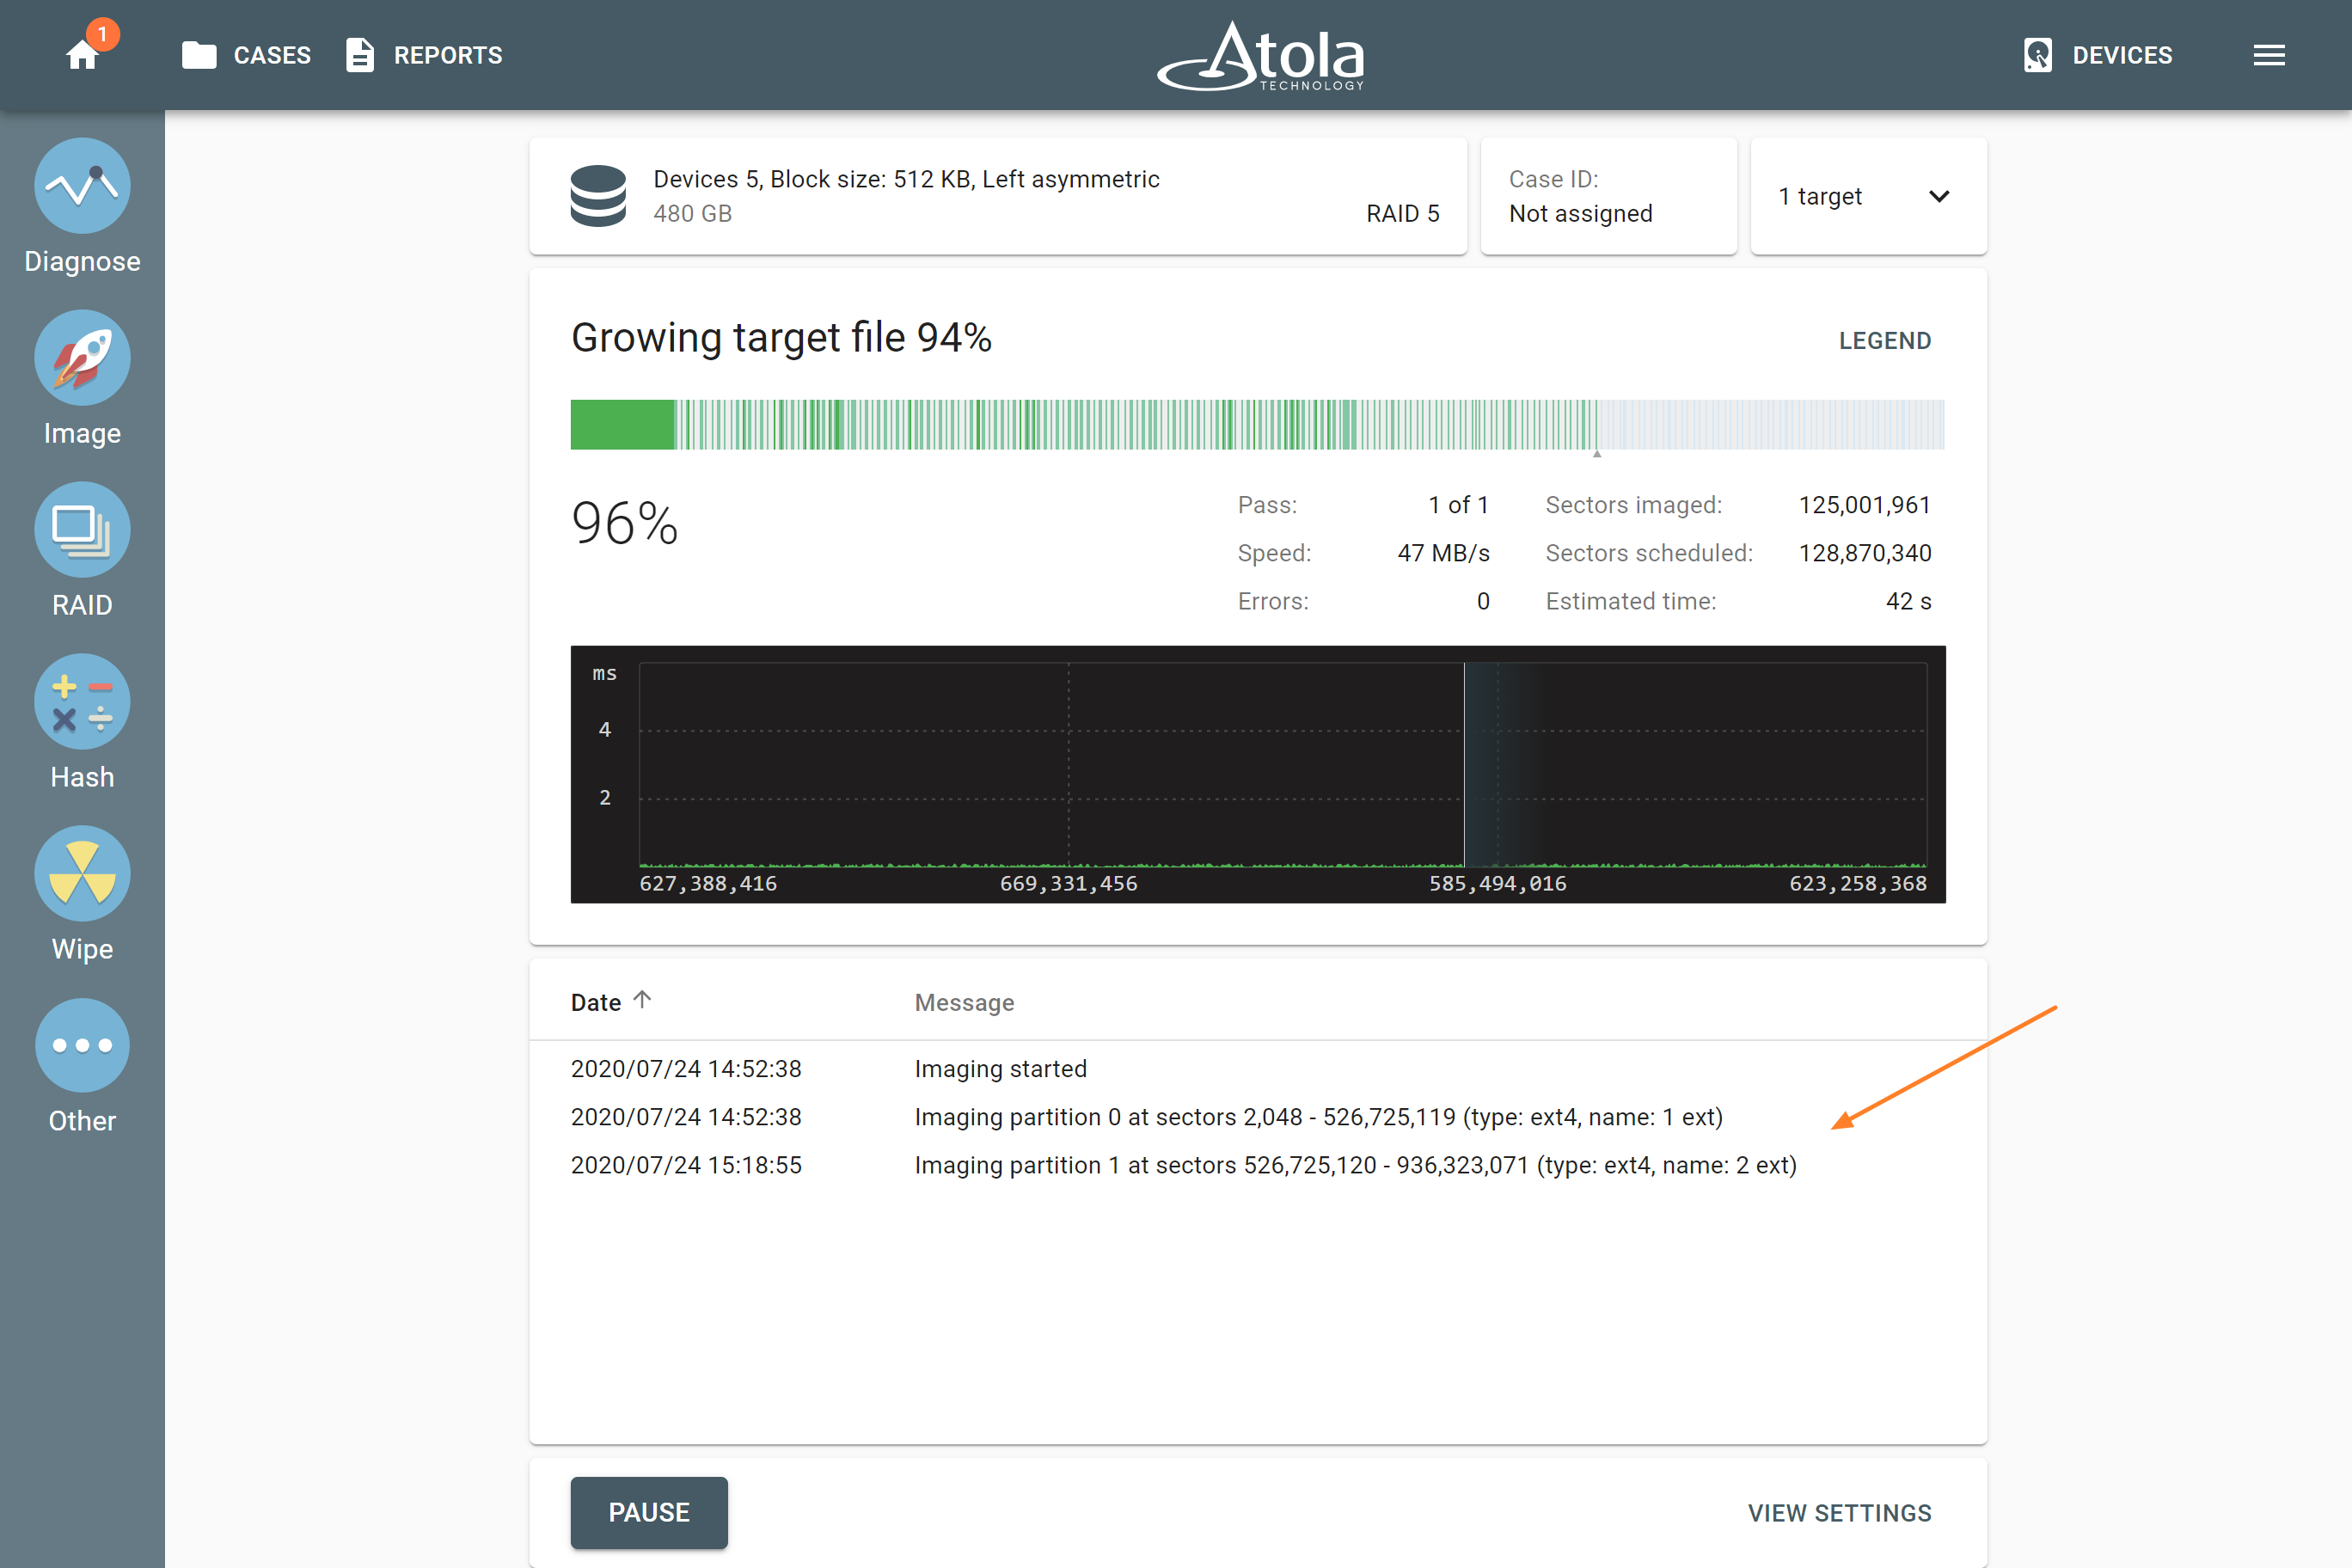
9. Click the START button to proceed with imaging.
As a result, TaskForce will be imaging RAID 5 array or its partitions as configured in the imaging settings.
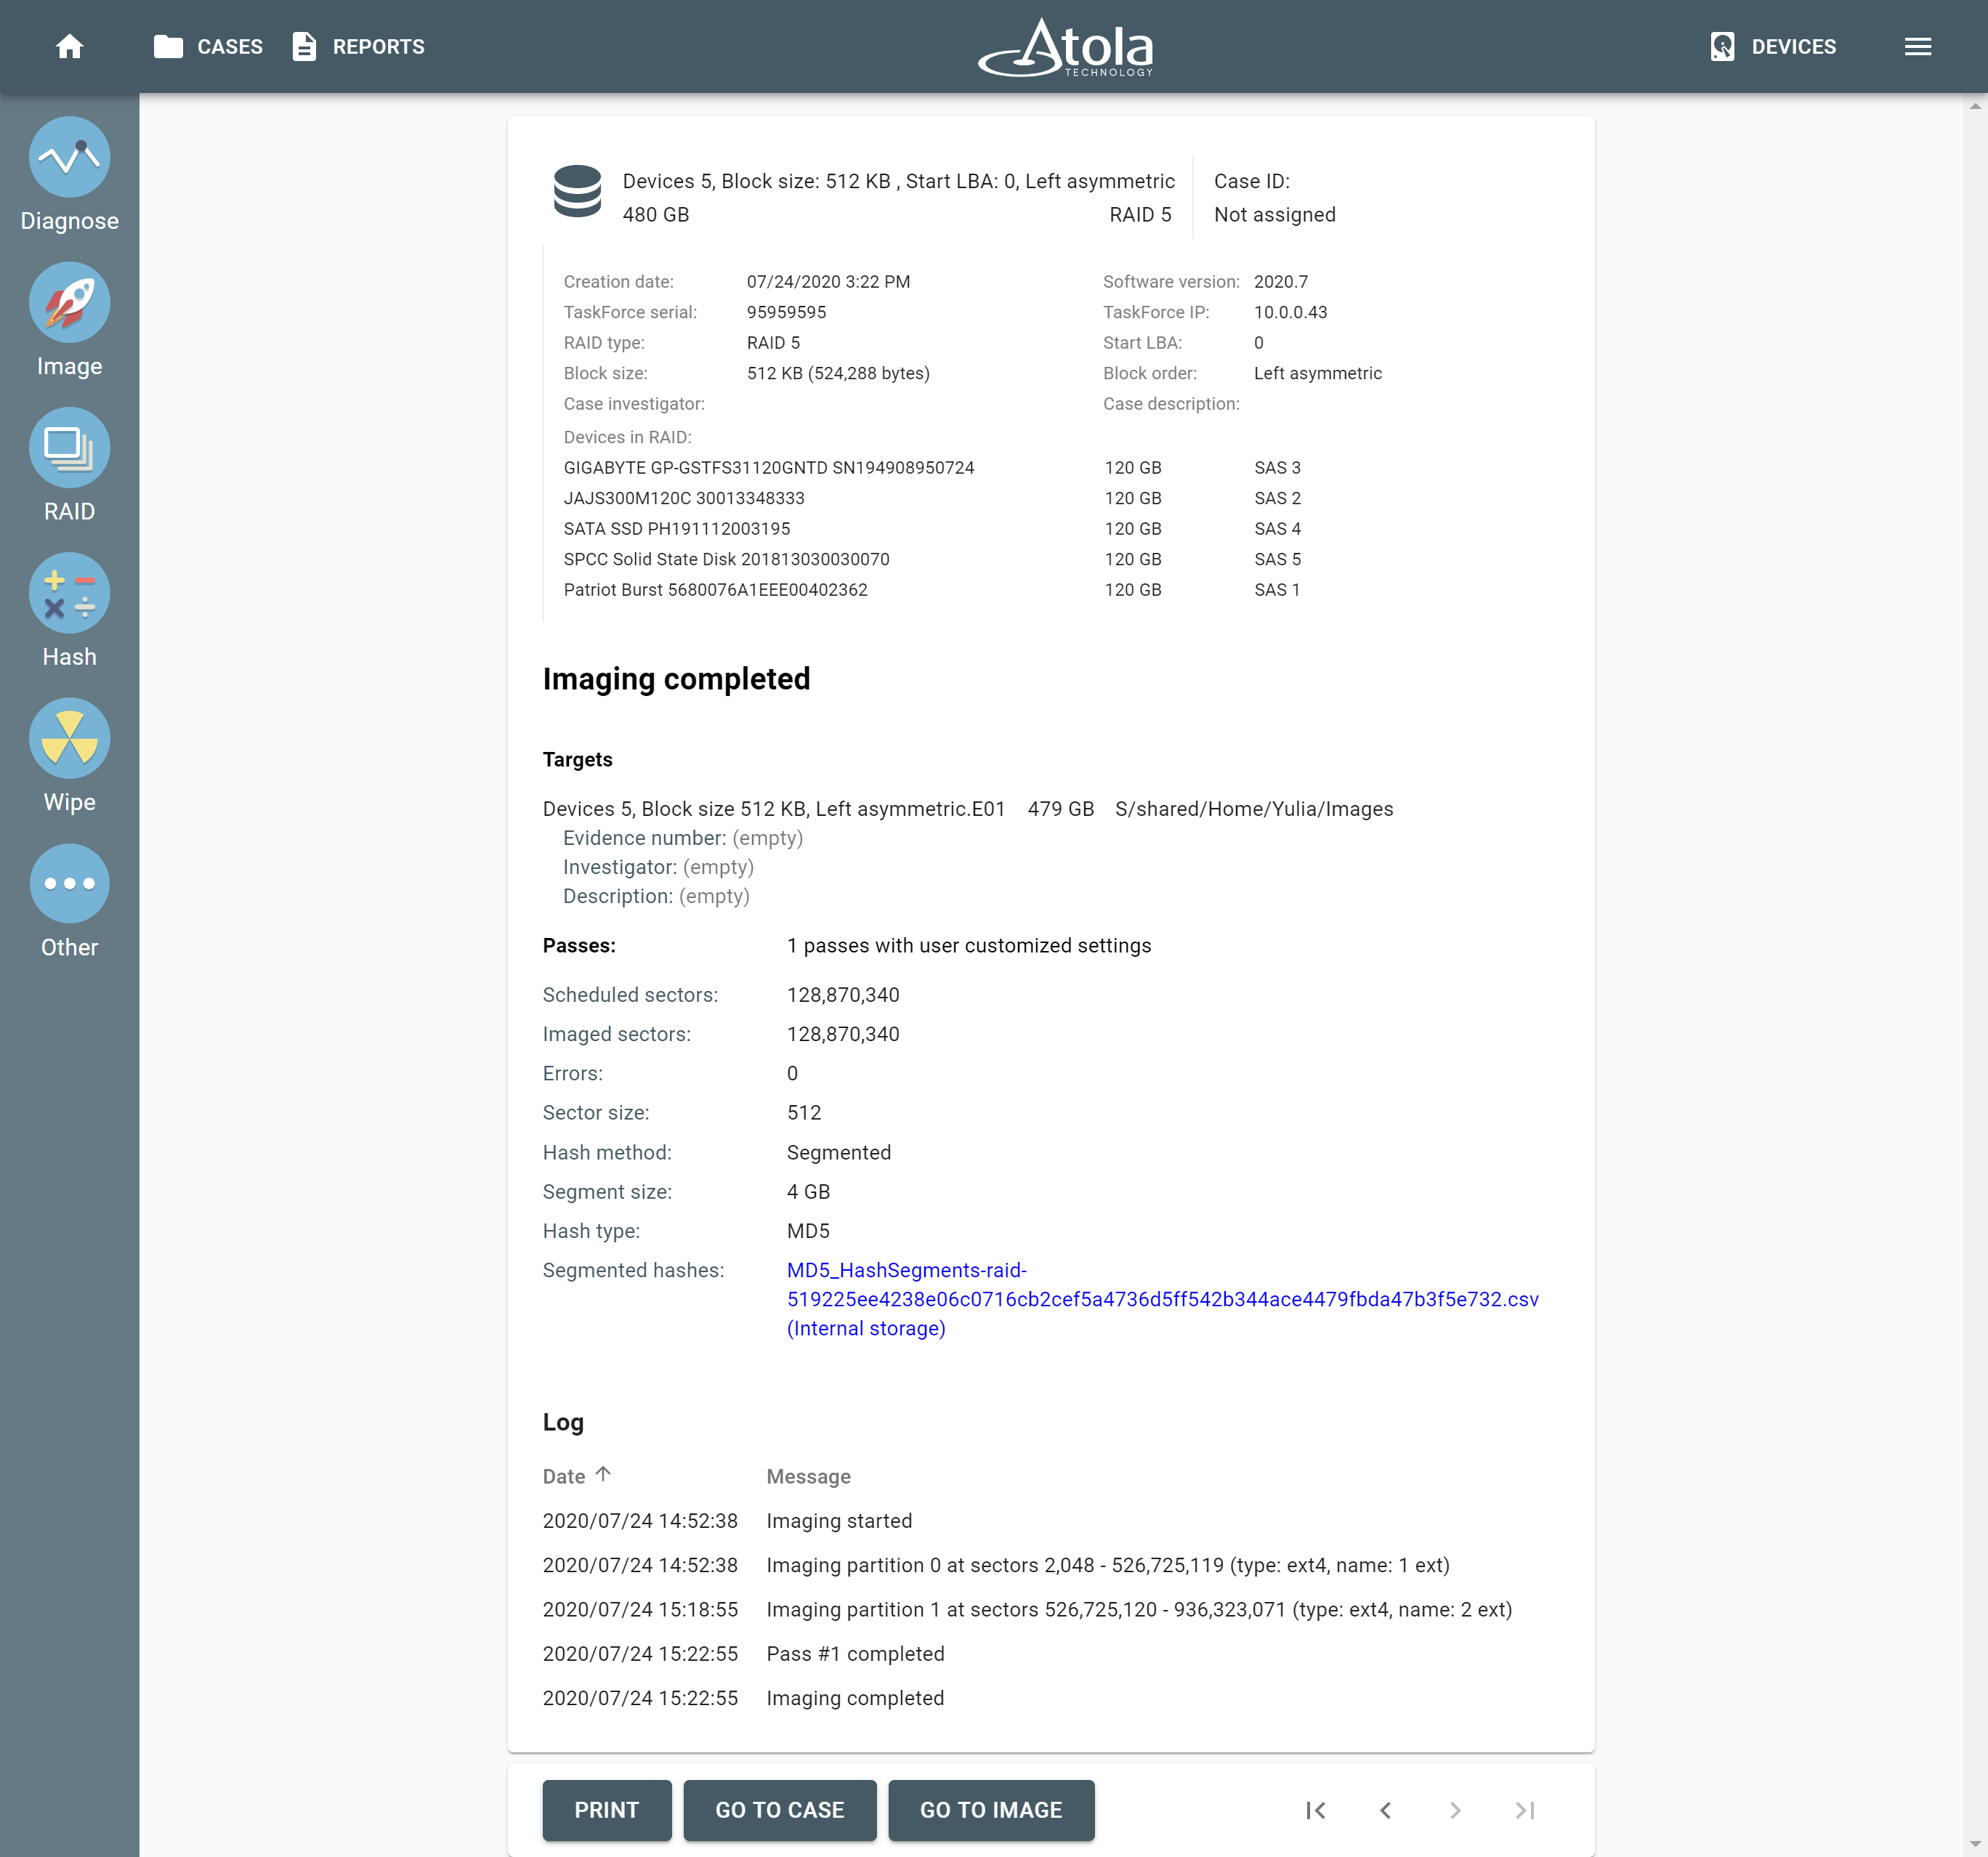
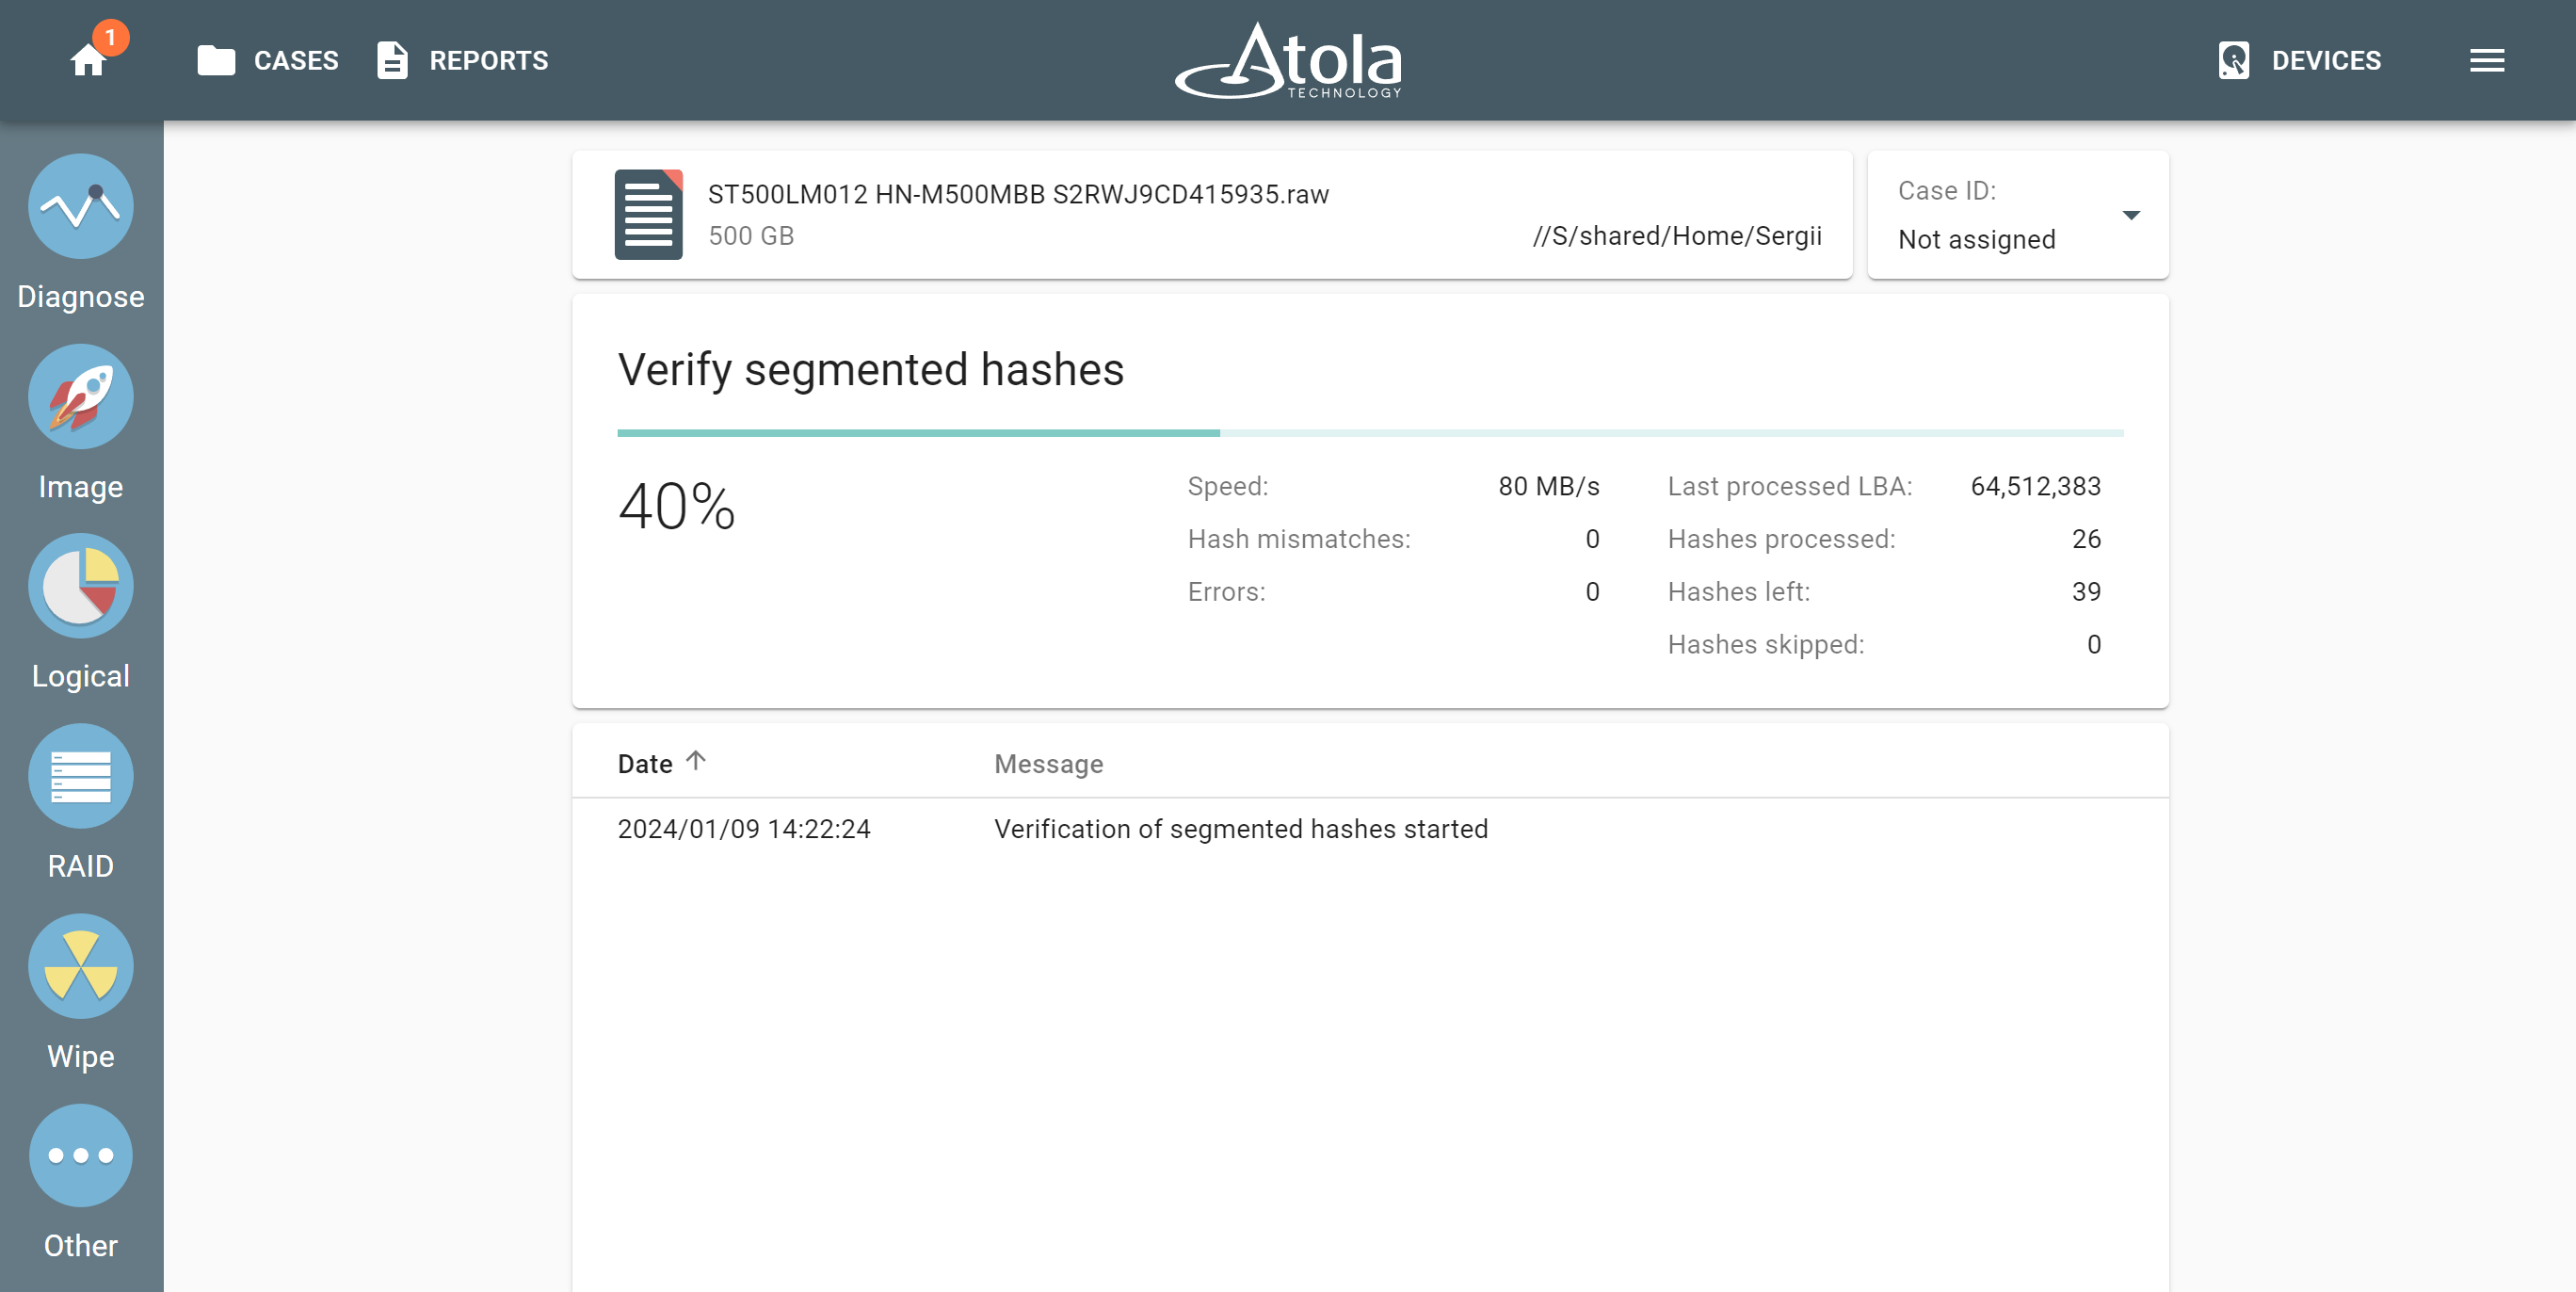
Imaging report
At the end of imaging, TaskForce will produce an Imaging completed report with all the details of the source drives, the RAID configuration, the target, the partition, the timestamps, etc.

Yulia believes that with a product that is exceptionally good at solving tasks of forensic experts, marketing is about explaining its capabilities to the users. Yulia regularly represents Atola at DFIR events, holds free workshops and webinars about Atola imagers functionality and advocates on the users' behalf to ensure that Atola keeps on adding value and raising the bar for the industry.
- Top digital forensic conferences in 2024 - January 1, 2024
- 2023. Year in Review - December 31, 2023
- Top digital forensics conferences in 2023 - January 1, 2023
Yulia Samoteykina
Director of Marketing Yulia believes that with a product that is exceptionally good at solving tasks of forensic experts, marketing is about explaining its capabilities to the users. Yulia regularly represents Atola at DFIR events, holds free workshops and webinars about Atola imagers functionality and advocates on the users' behalf to ensure that Atola keeps on adding value and raising the bar for the industry.
1 Comment
iii · August 27, 2022 at 9:22 pm
hi